
I made this shadow box for a good friend who wanted to display this gorgeous stained glass panel, but she didn’t have a window to hang it in. The box has a fluorescent light in it which illuminates the panel beautifully.


Rifle stock battle club


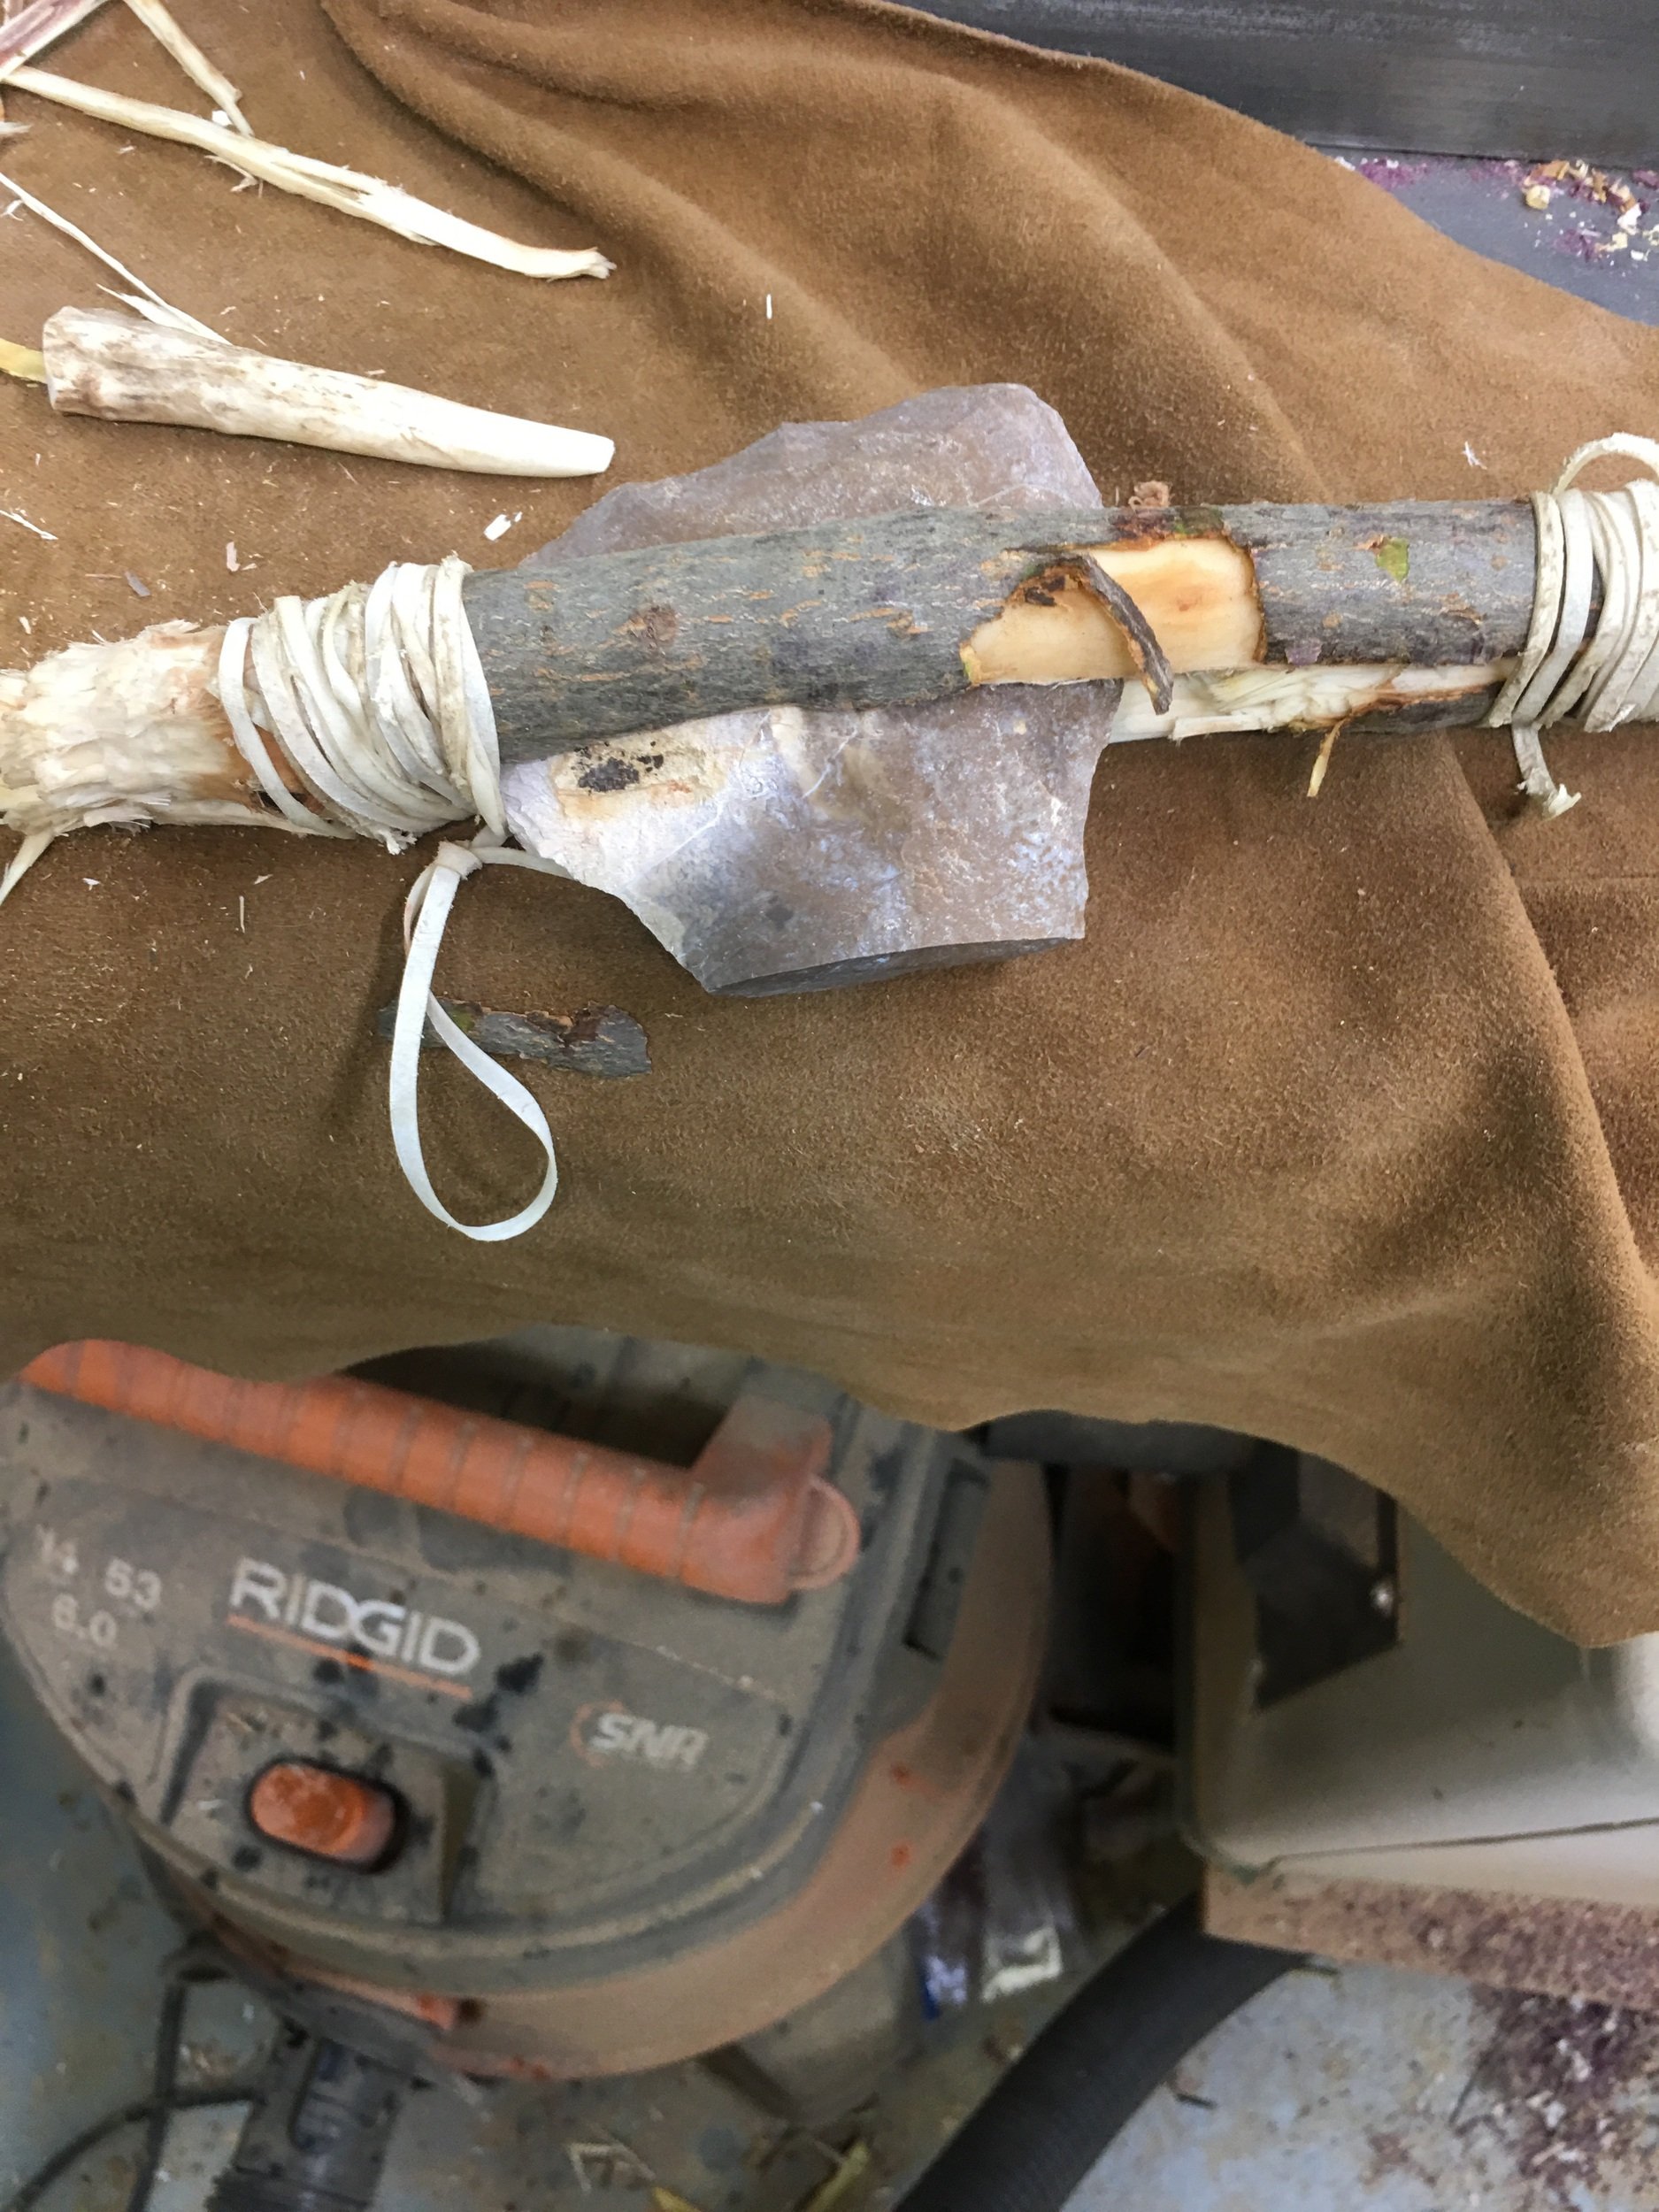
Tomahawk Construction
Some primitive techniques for Tomahawk construction
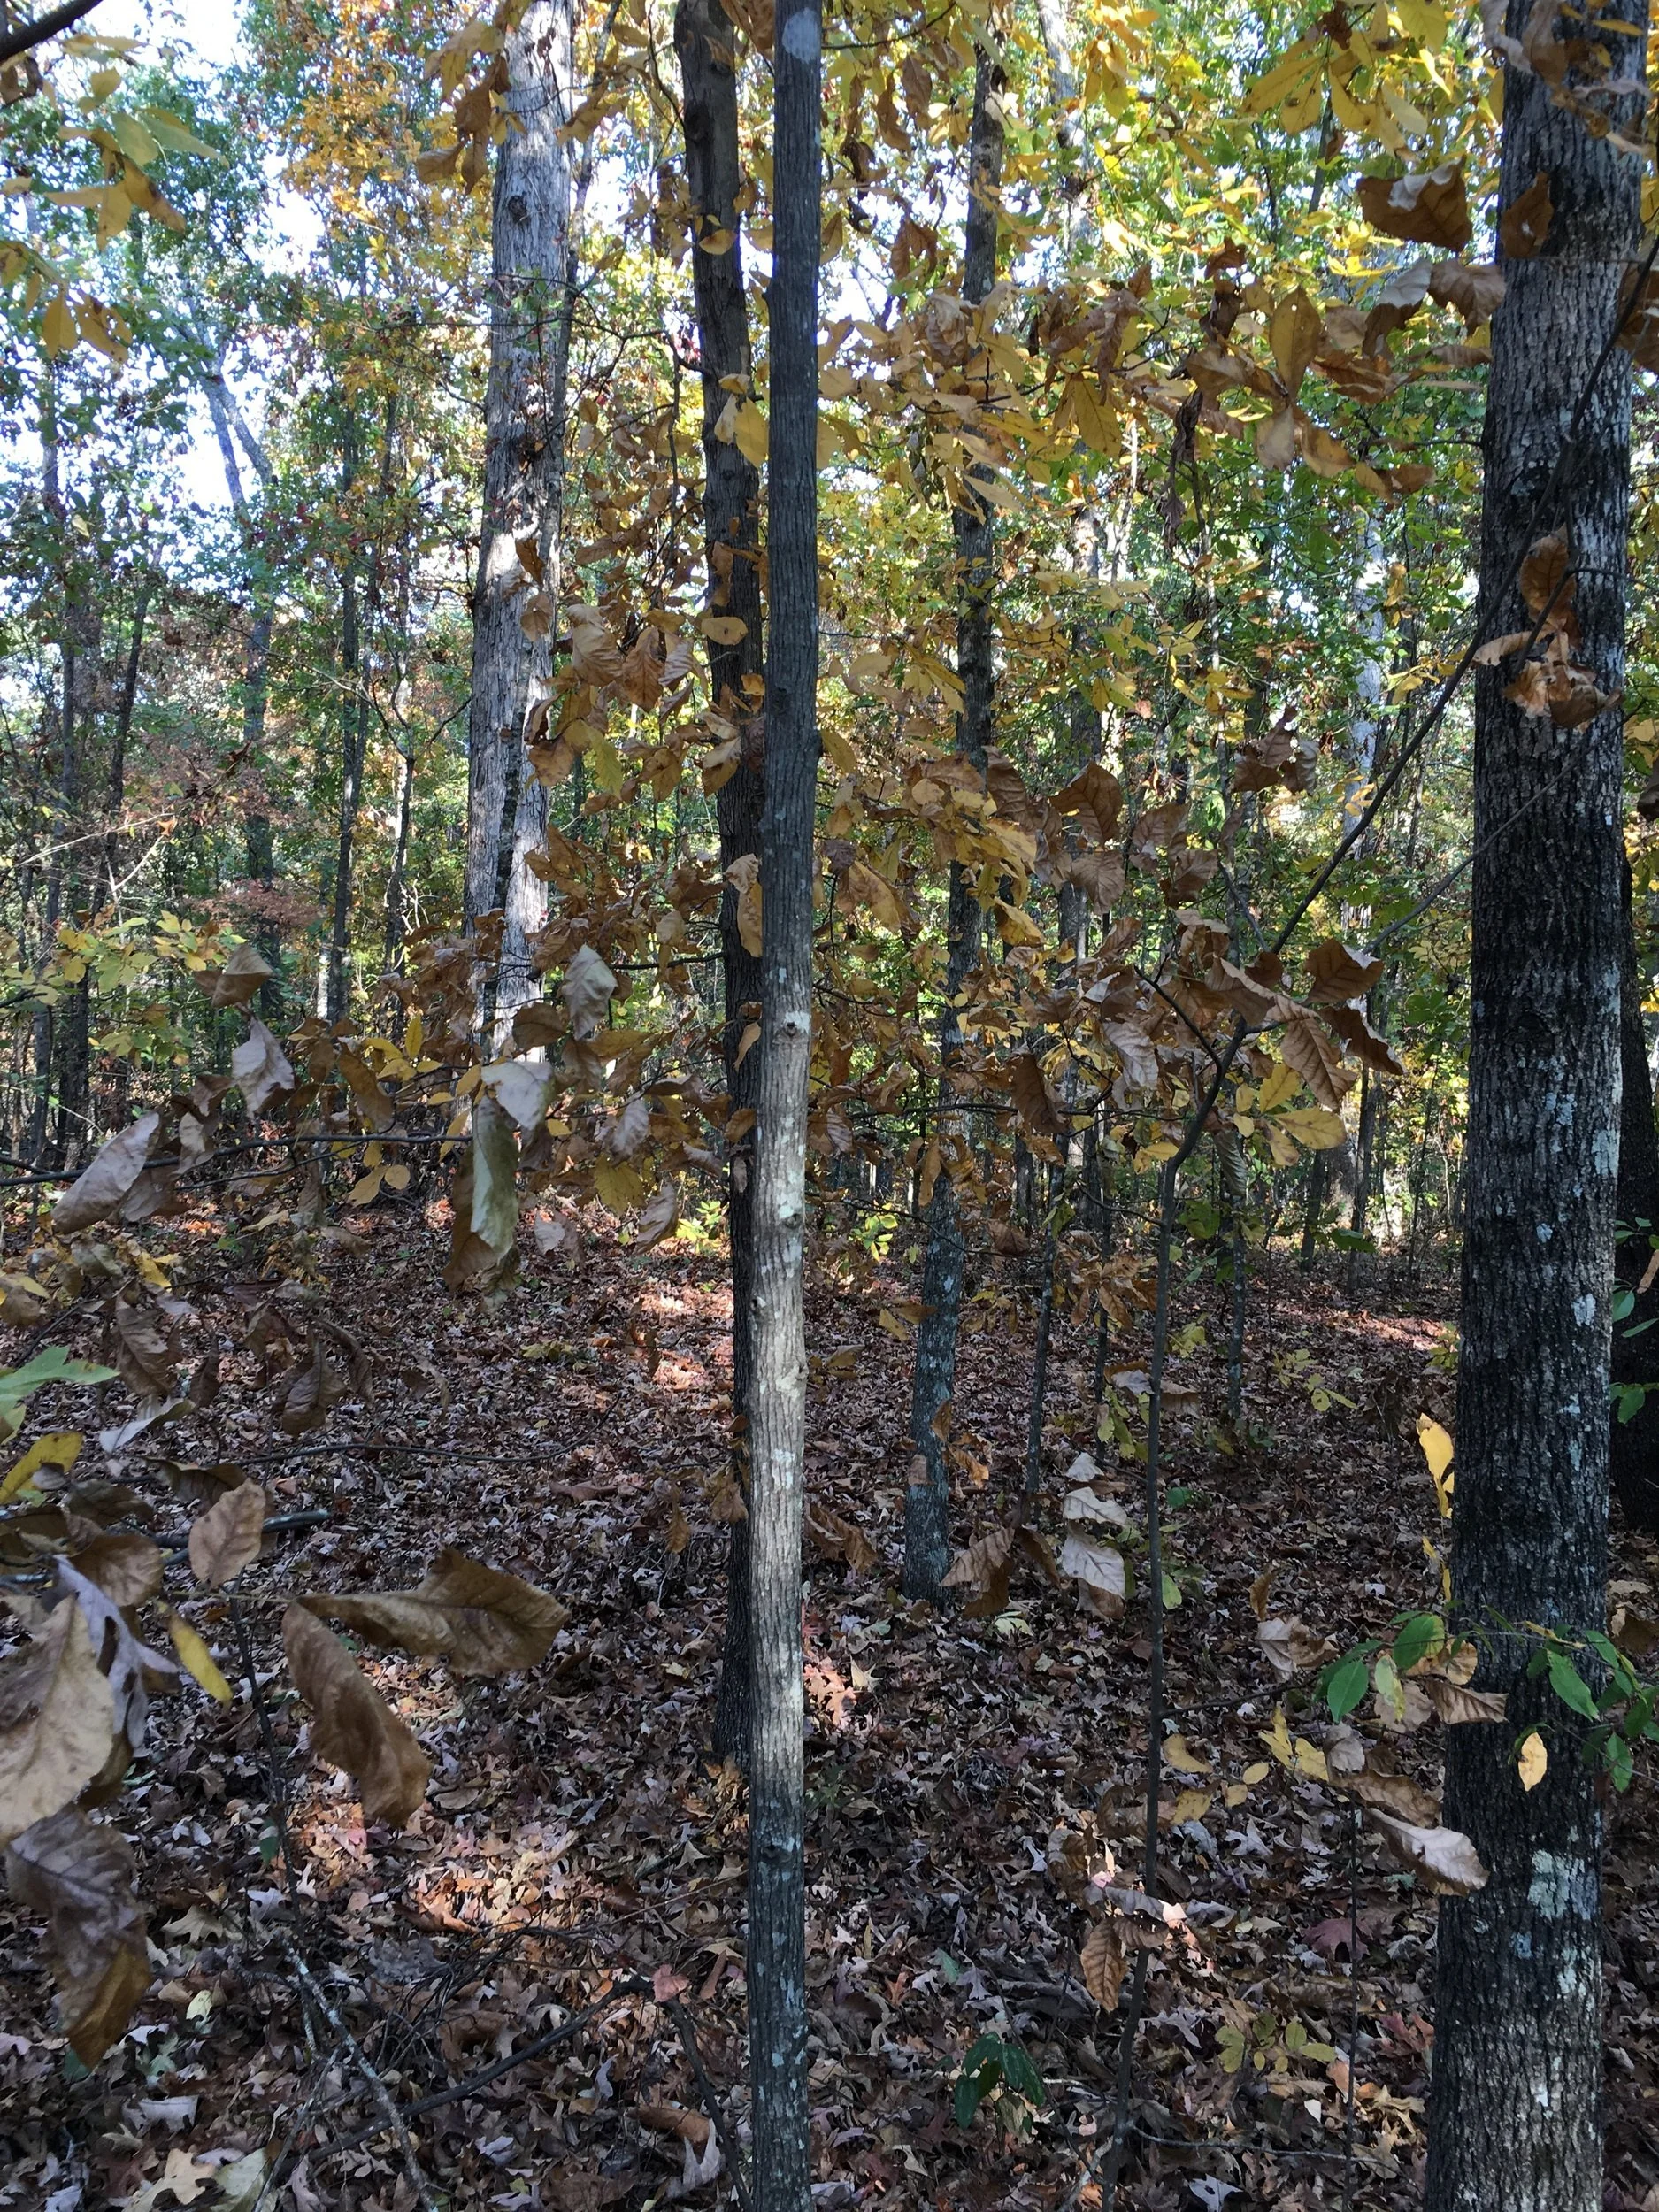
Find a green sapling. This one is hickory

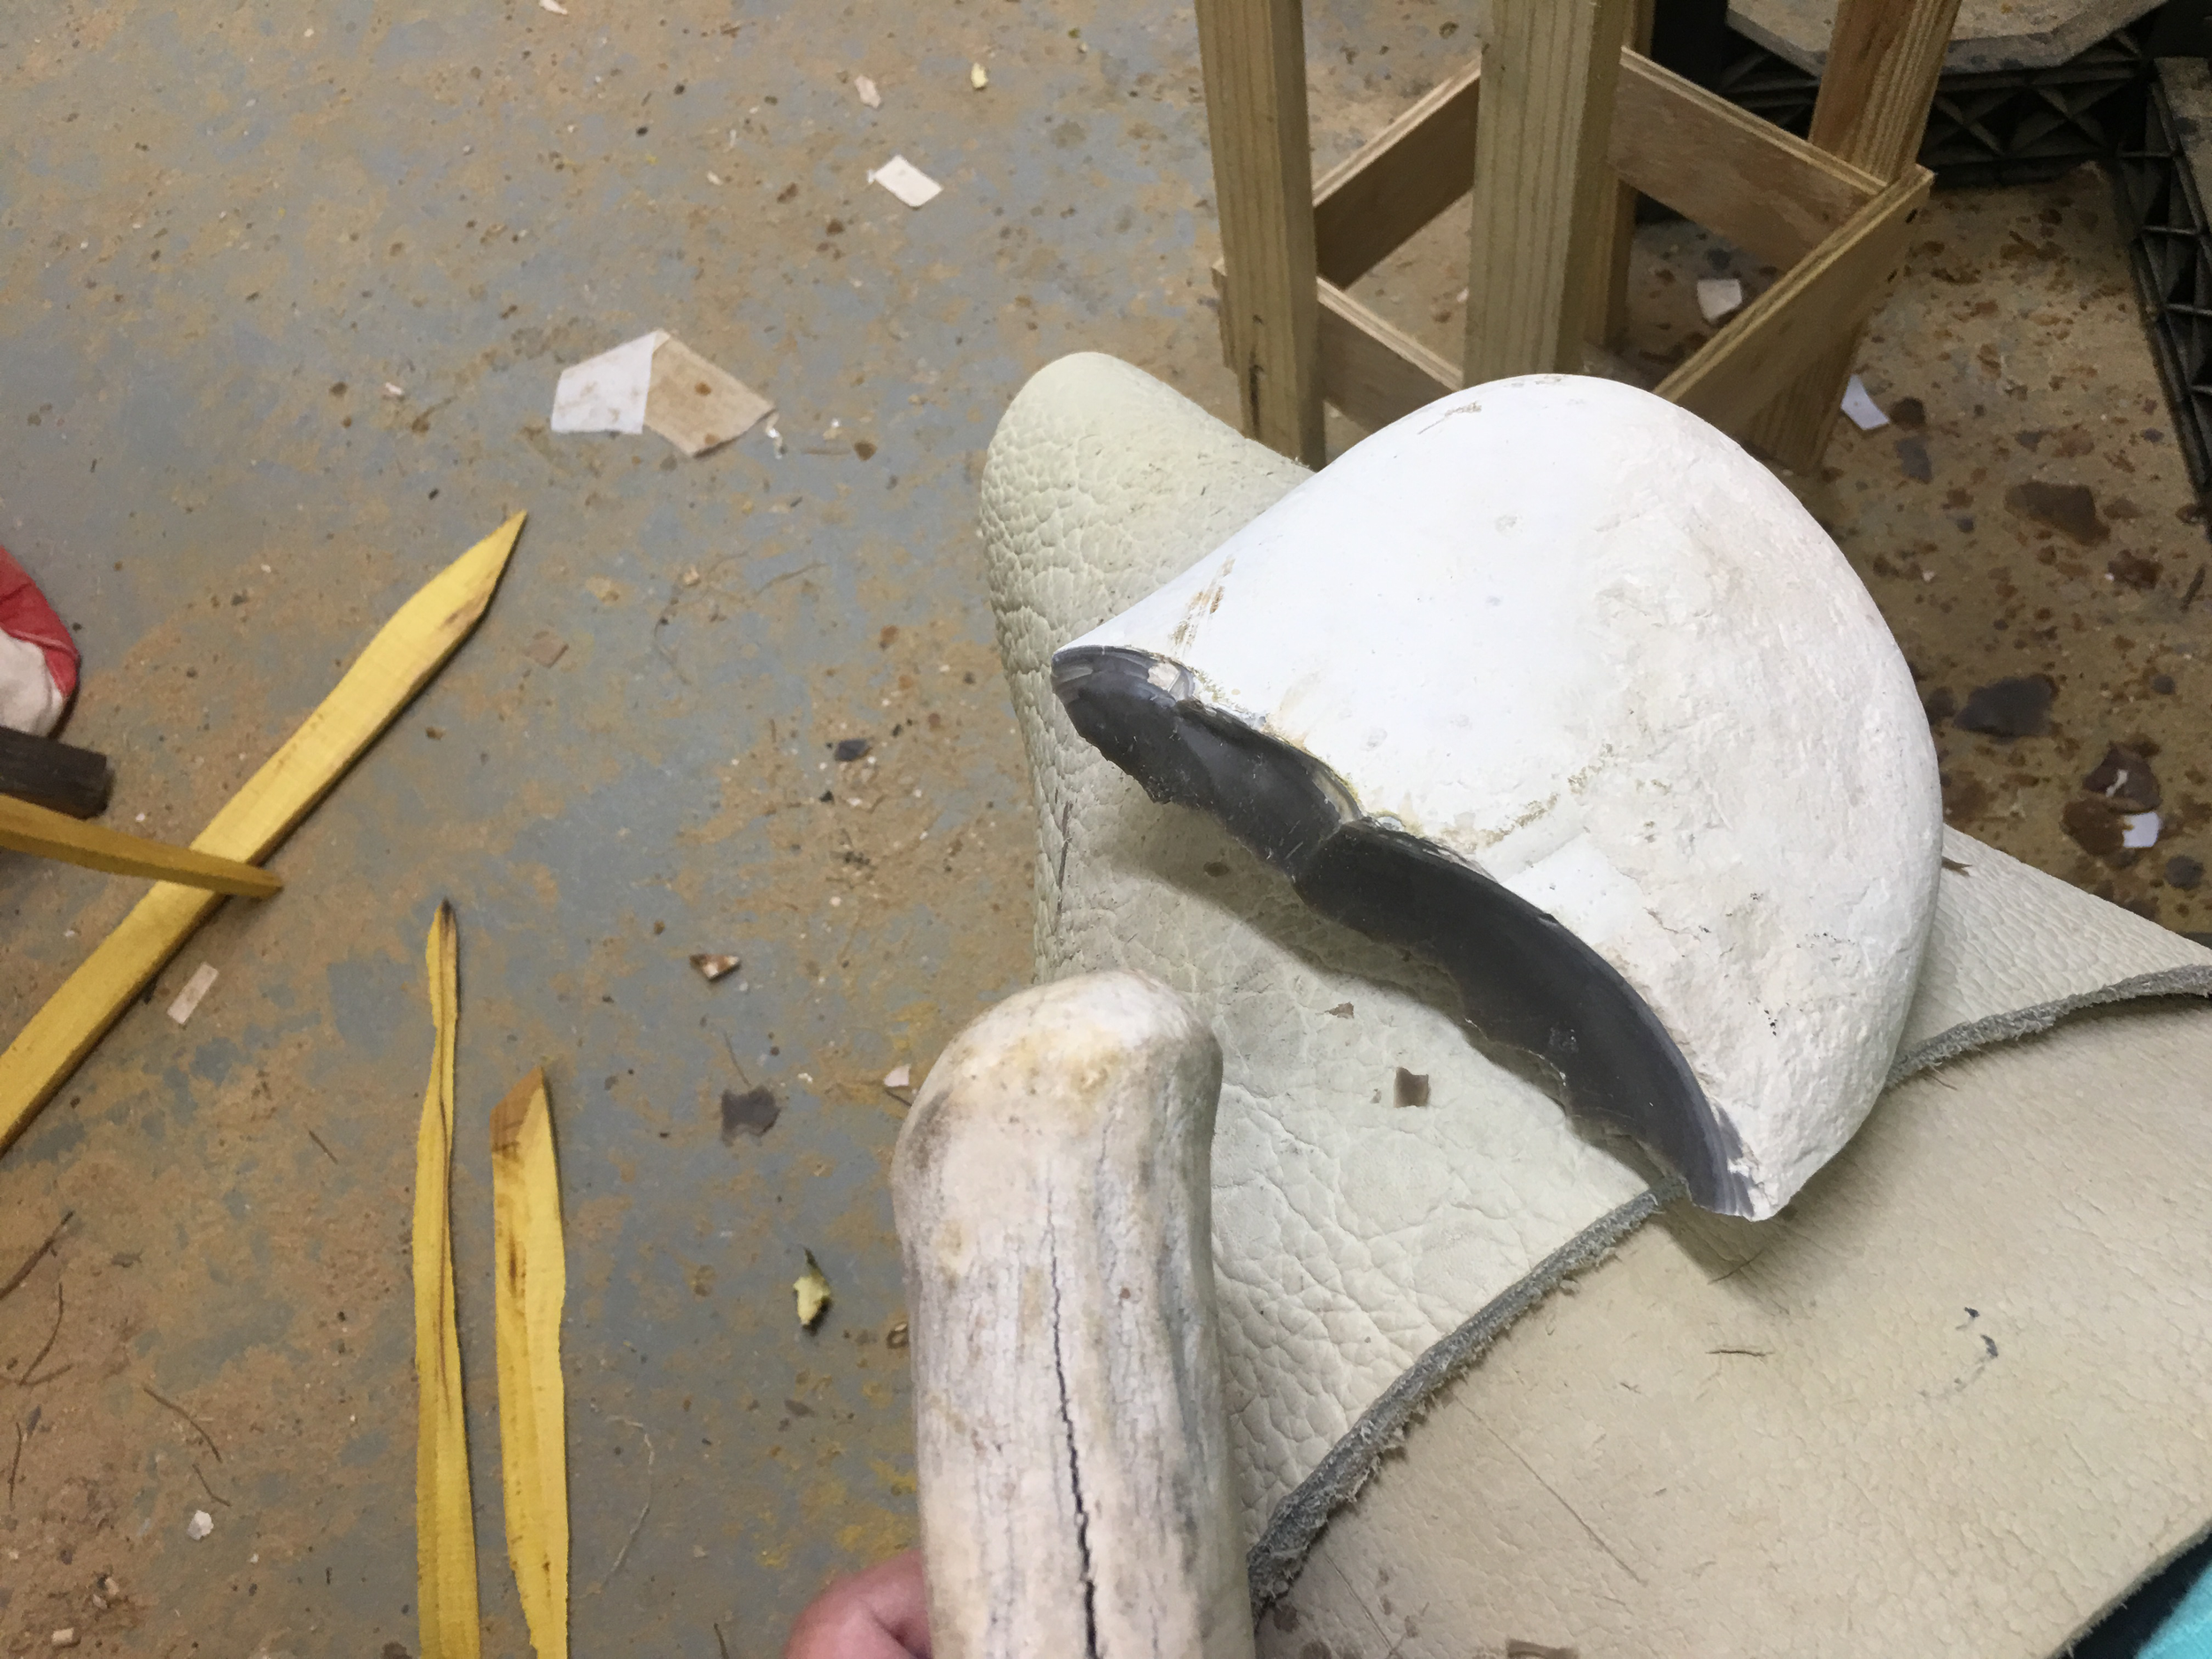
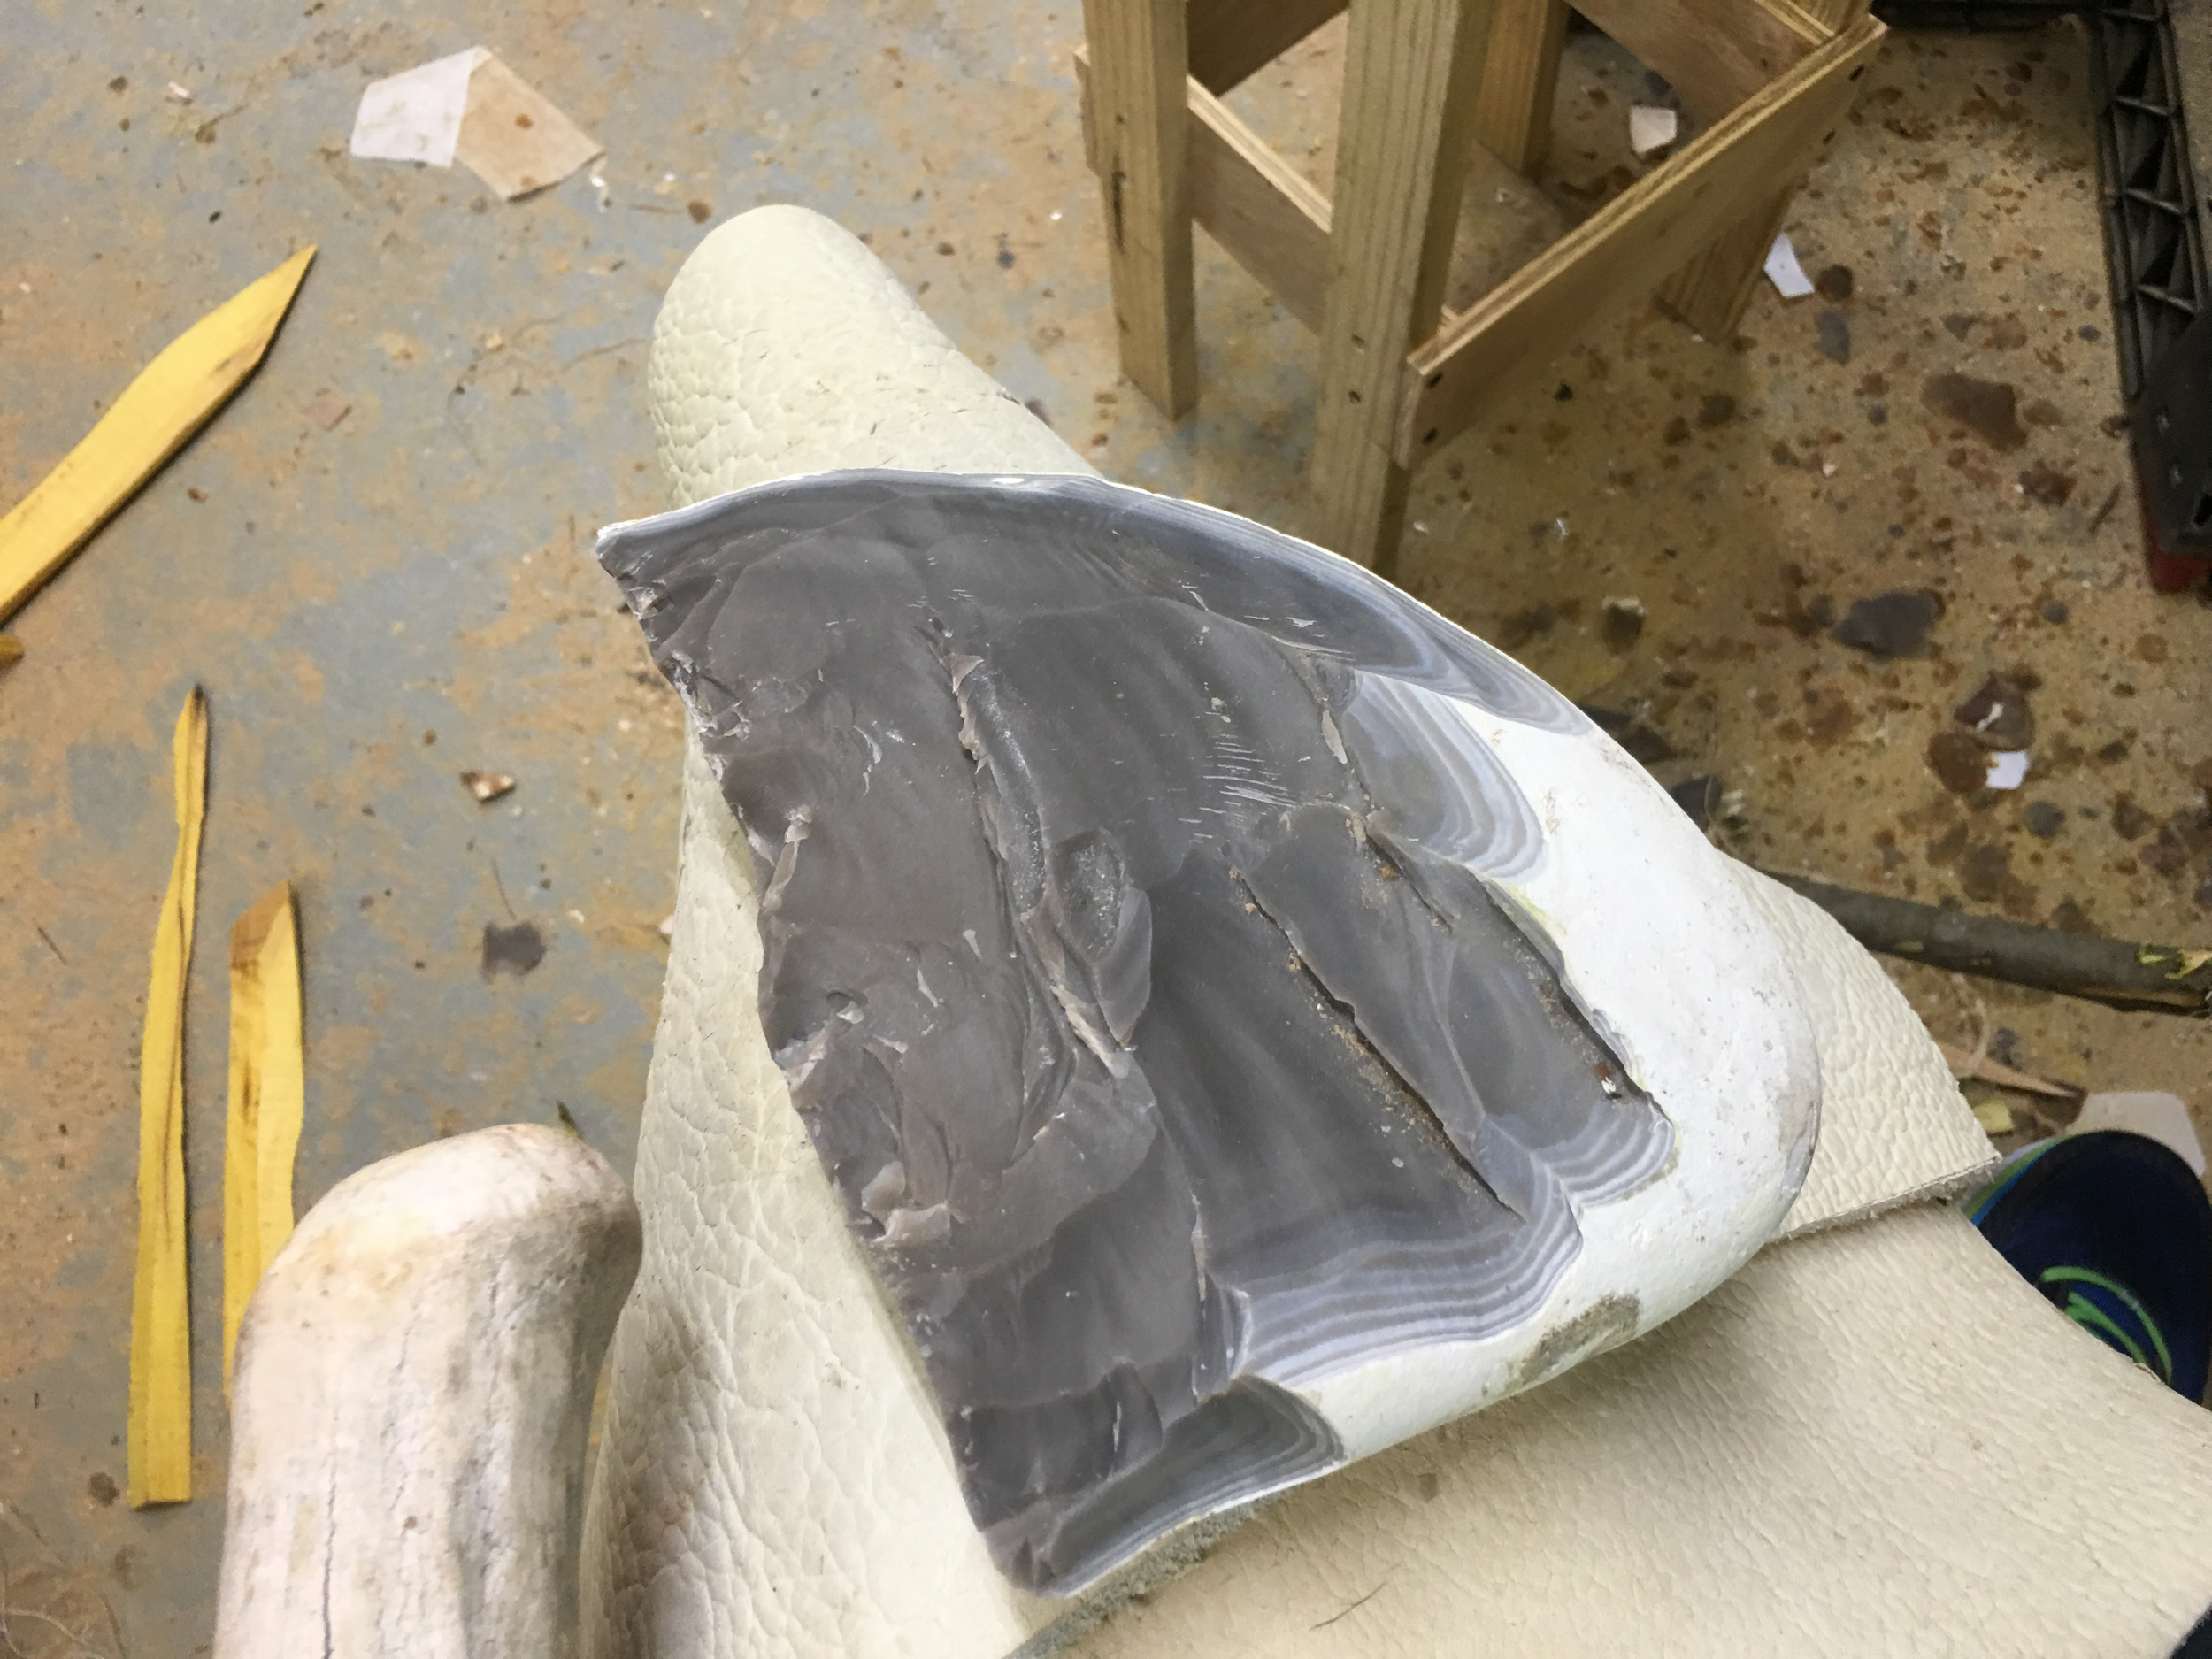
Then make a hand axe out of good flint. This good Georgetown flint from south Texas
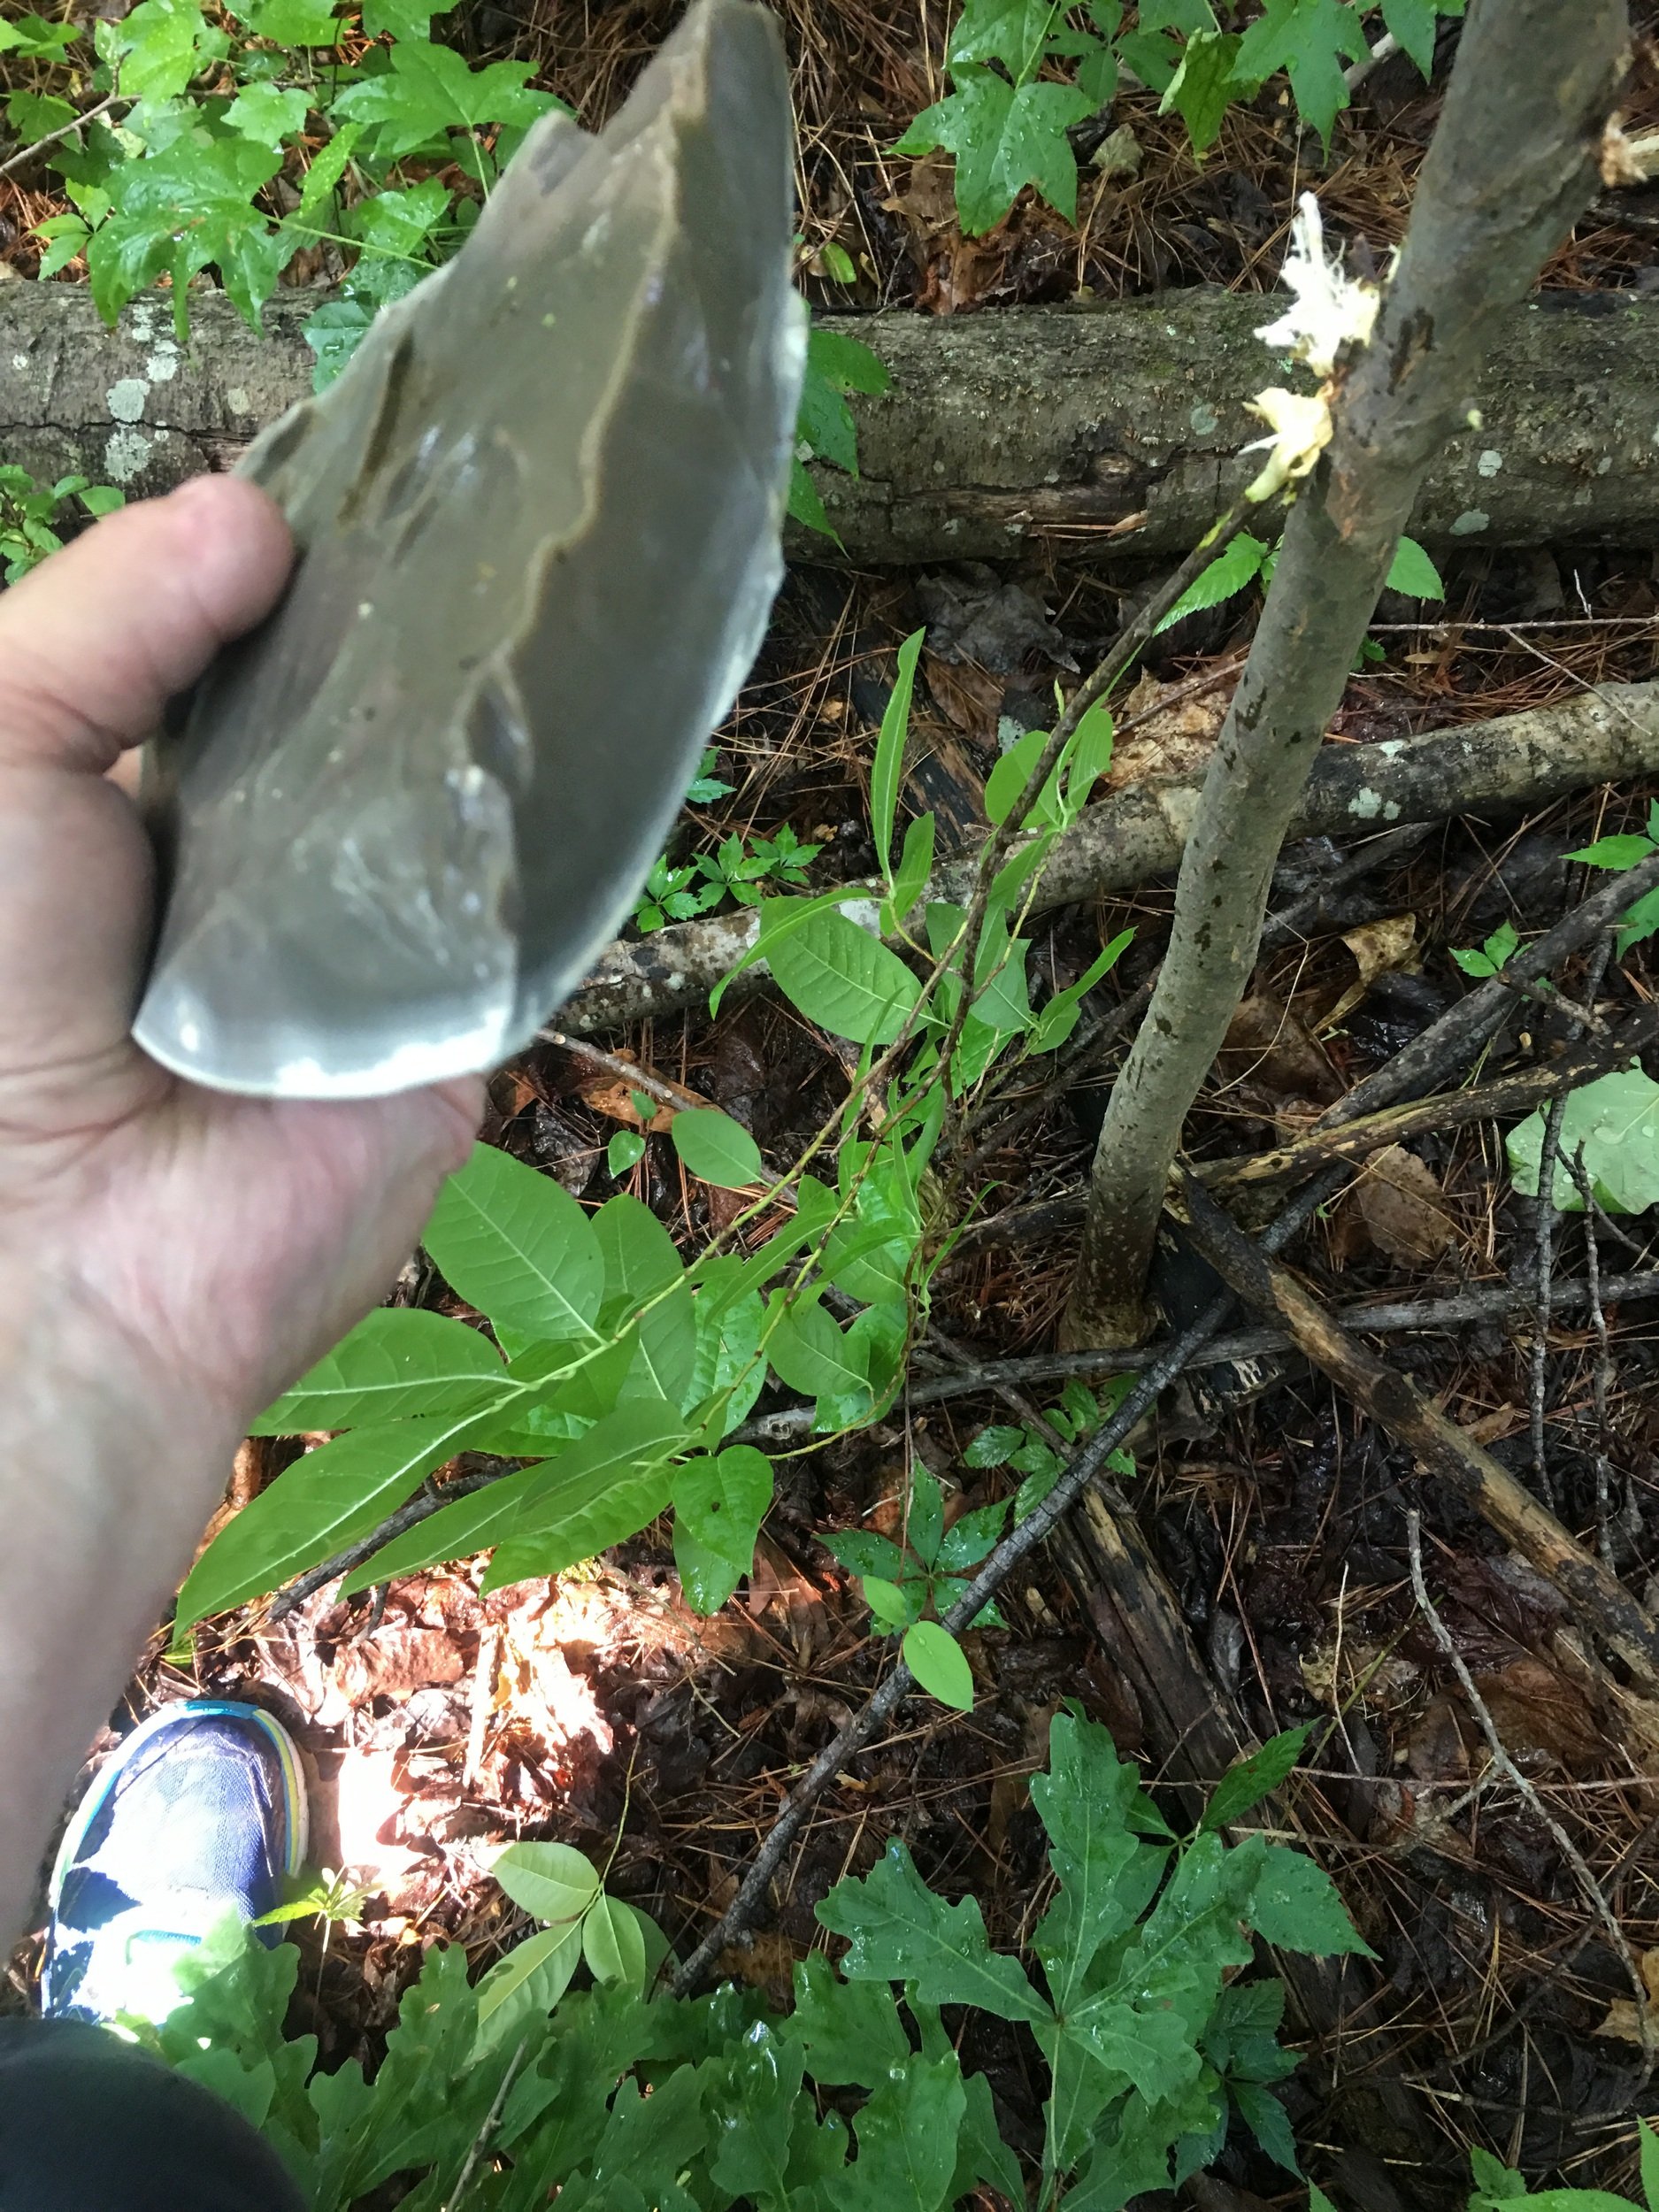
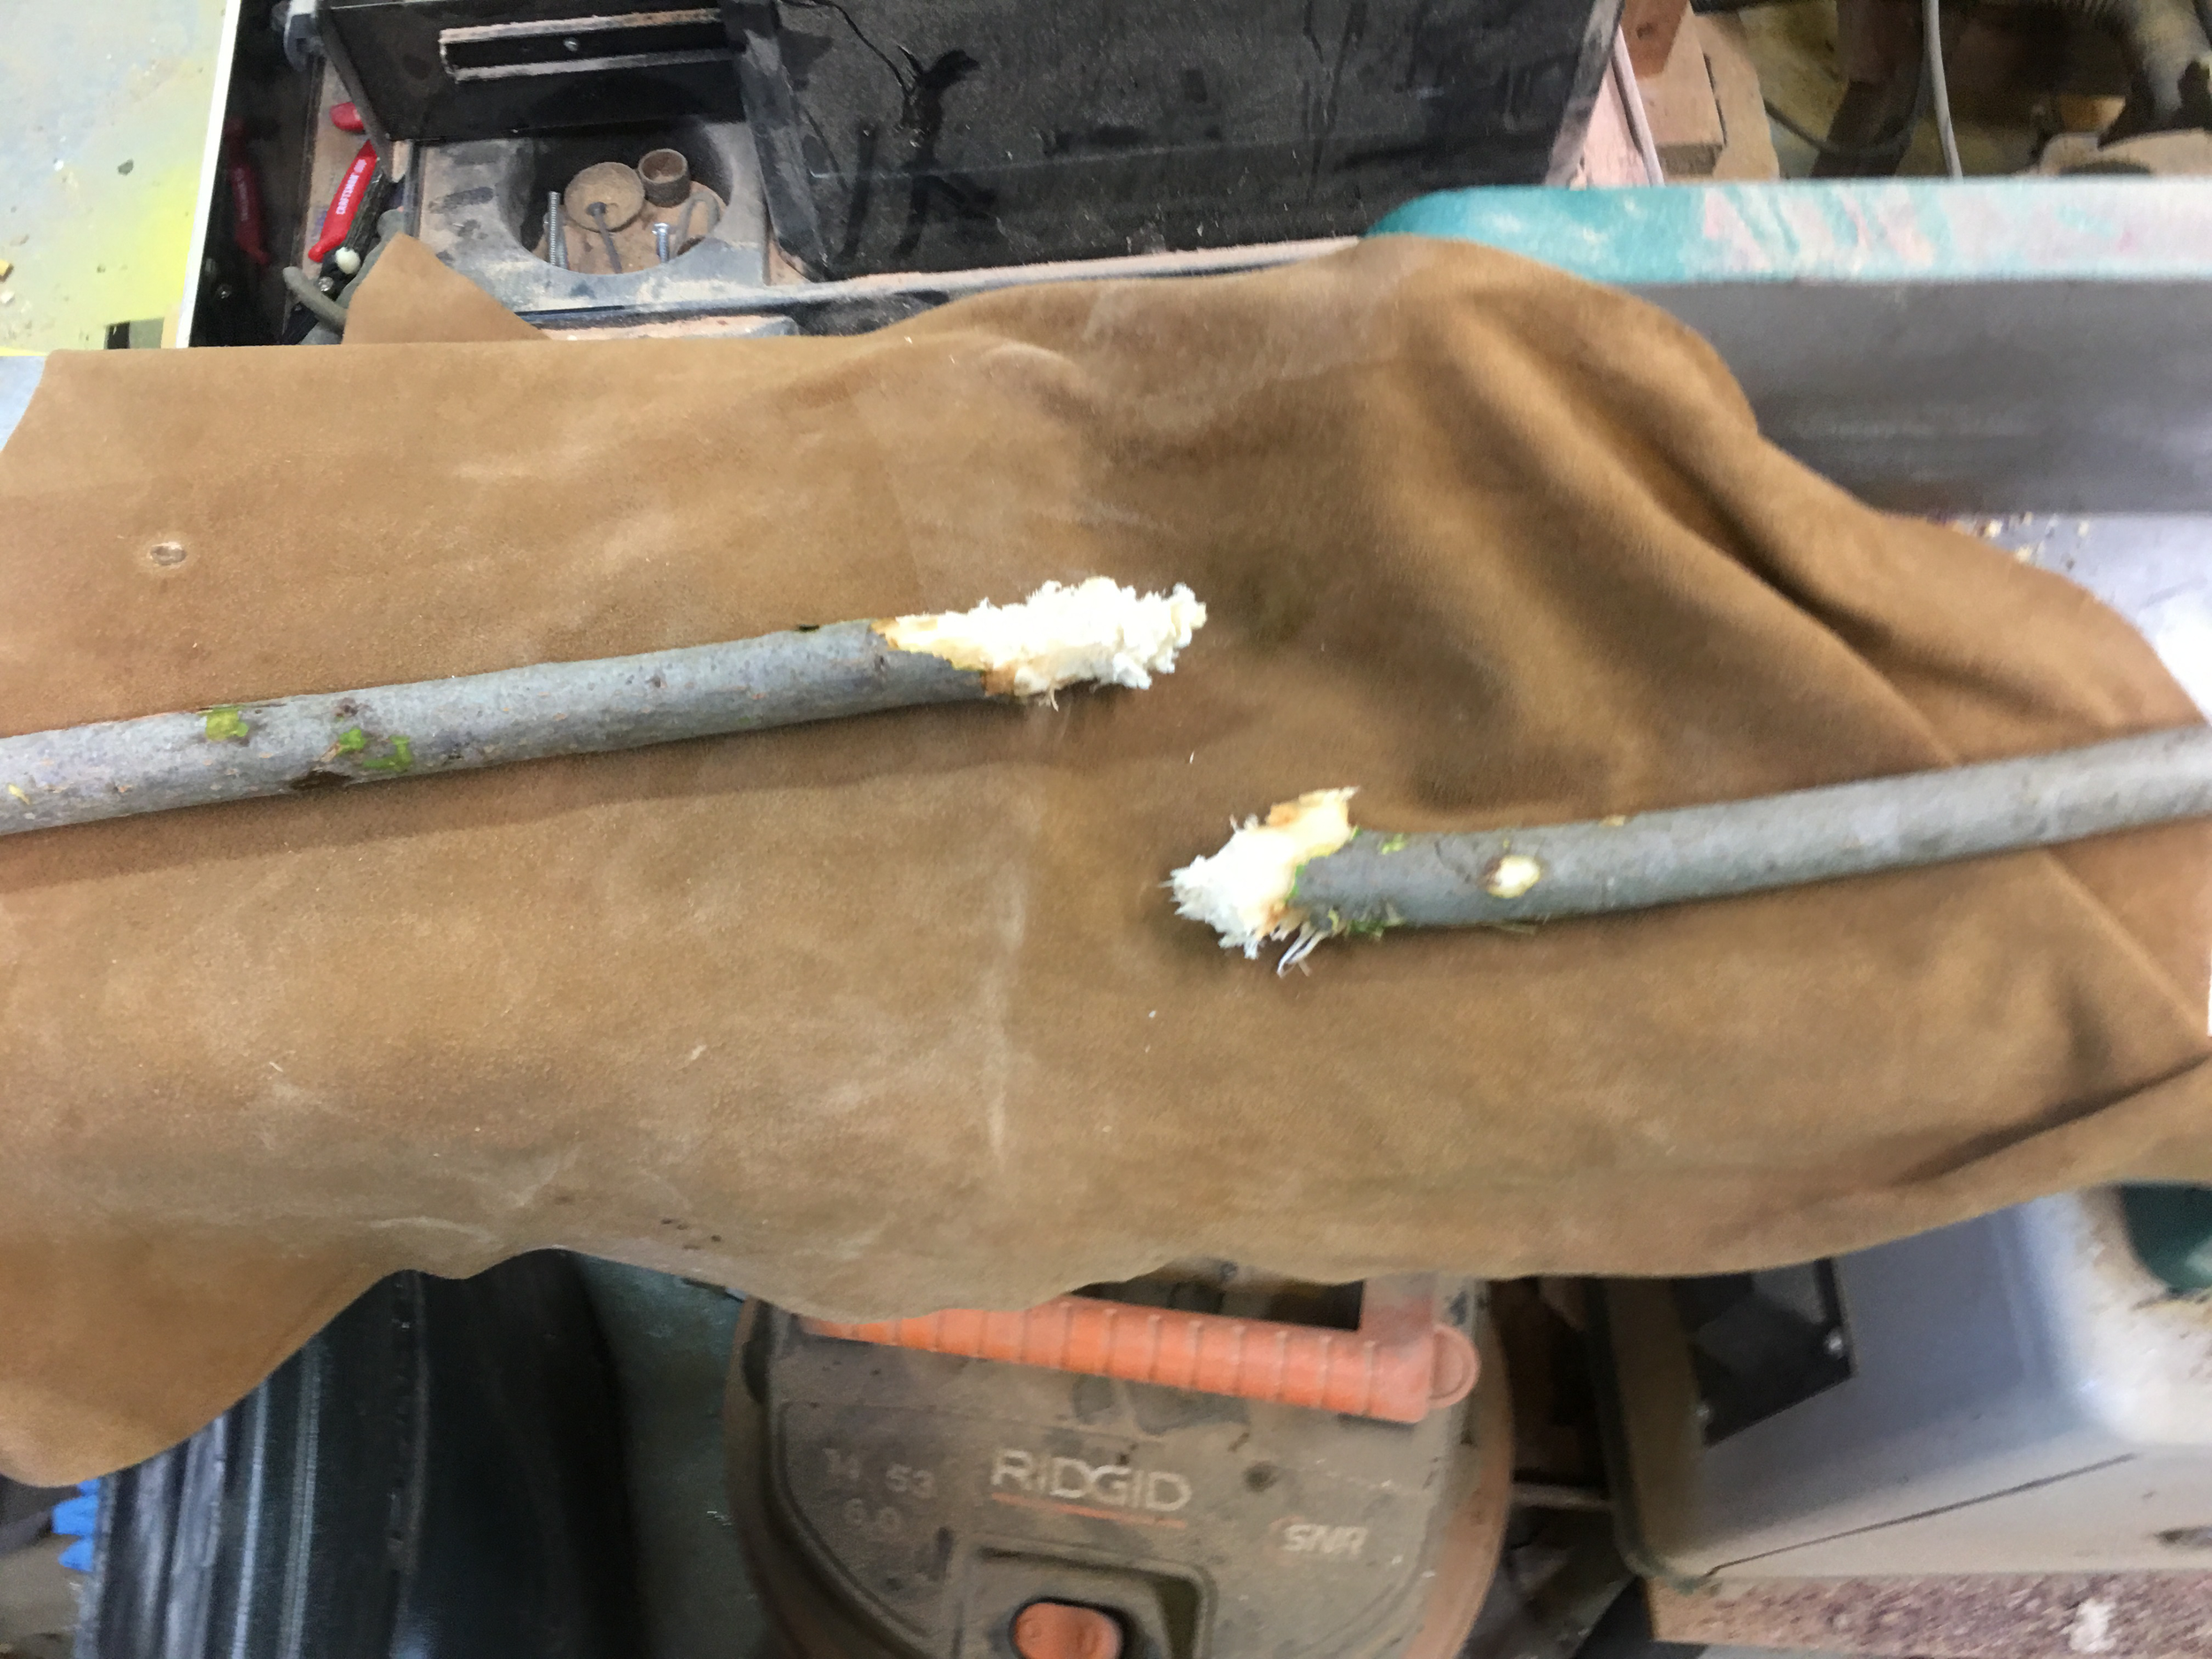
Chop the sapling like you would with a metal axe. It will break the fibers and eventually you can break it off.
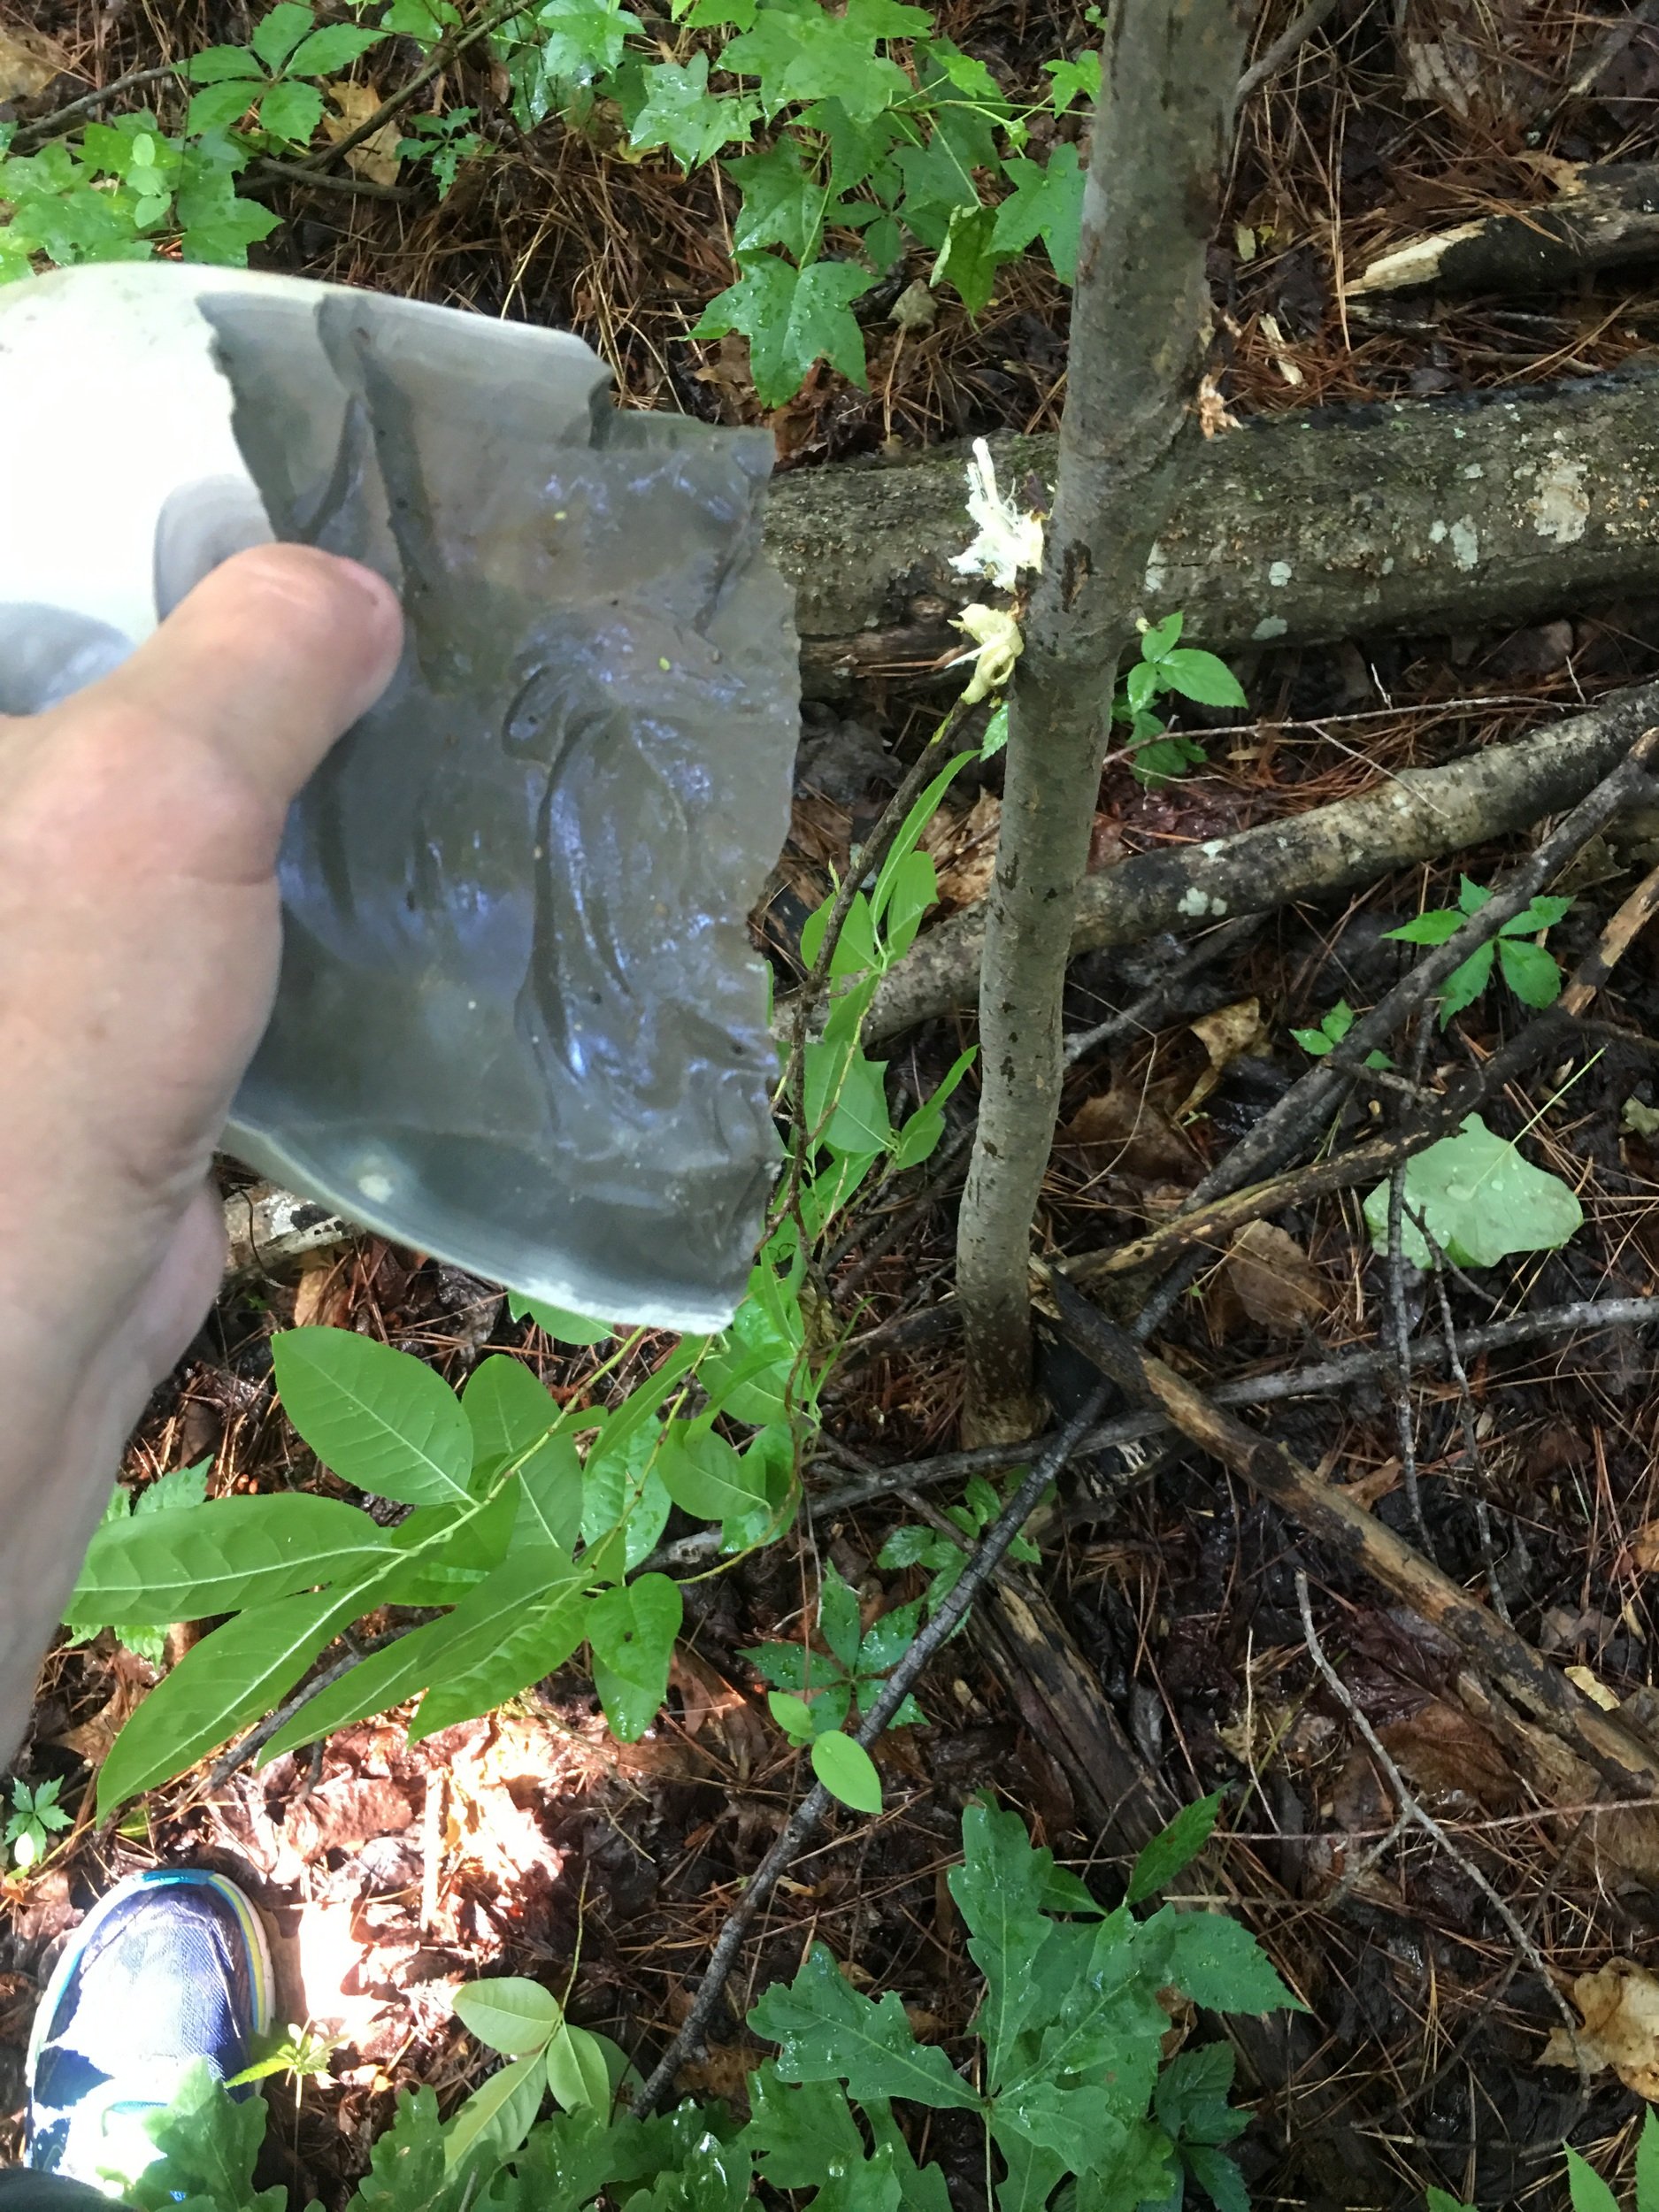
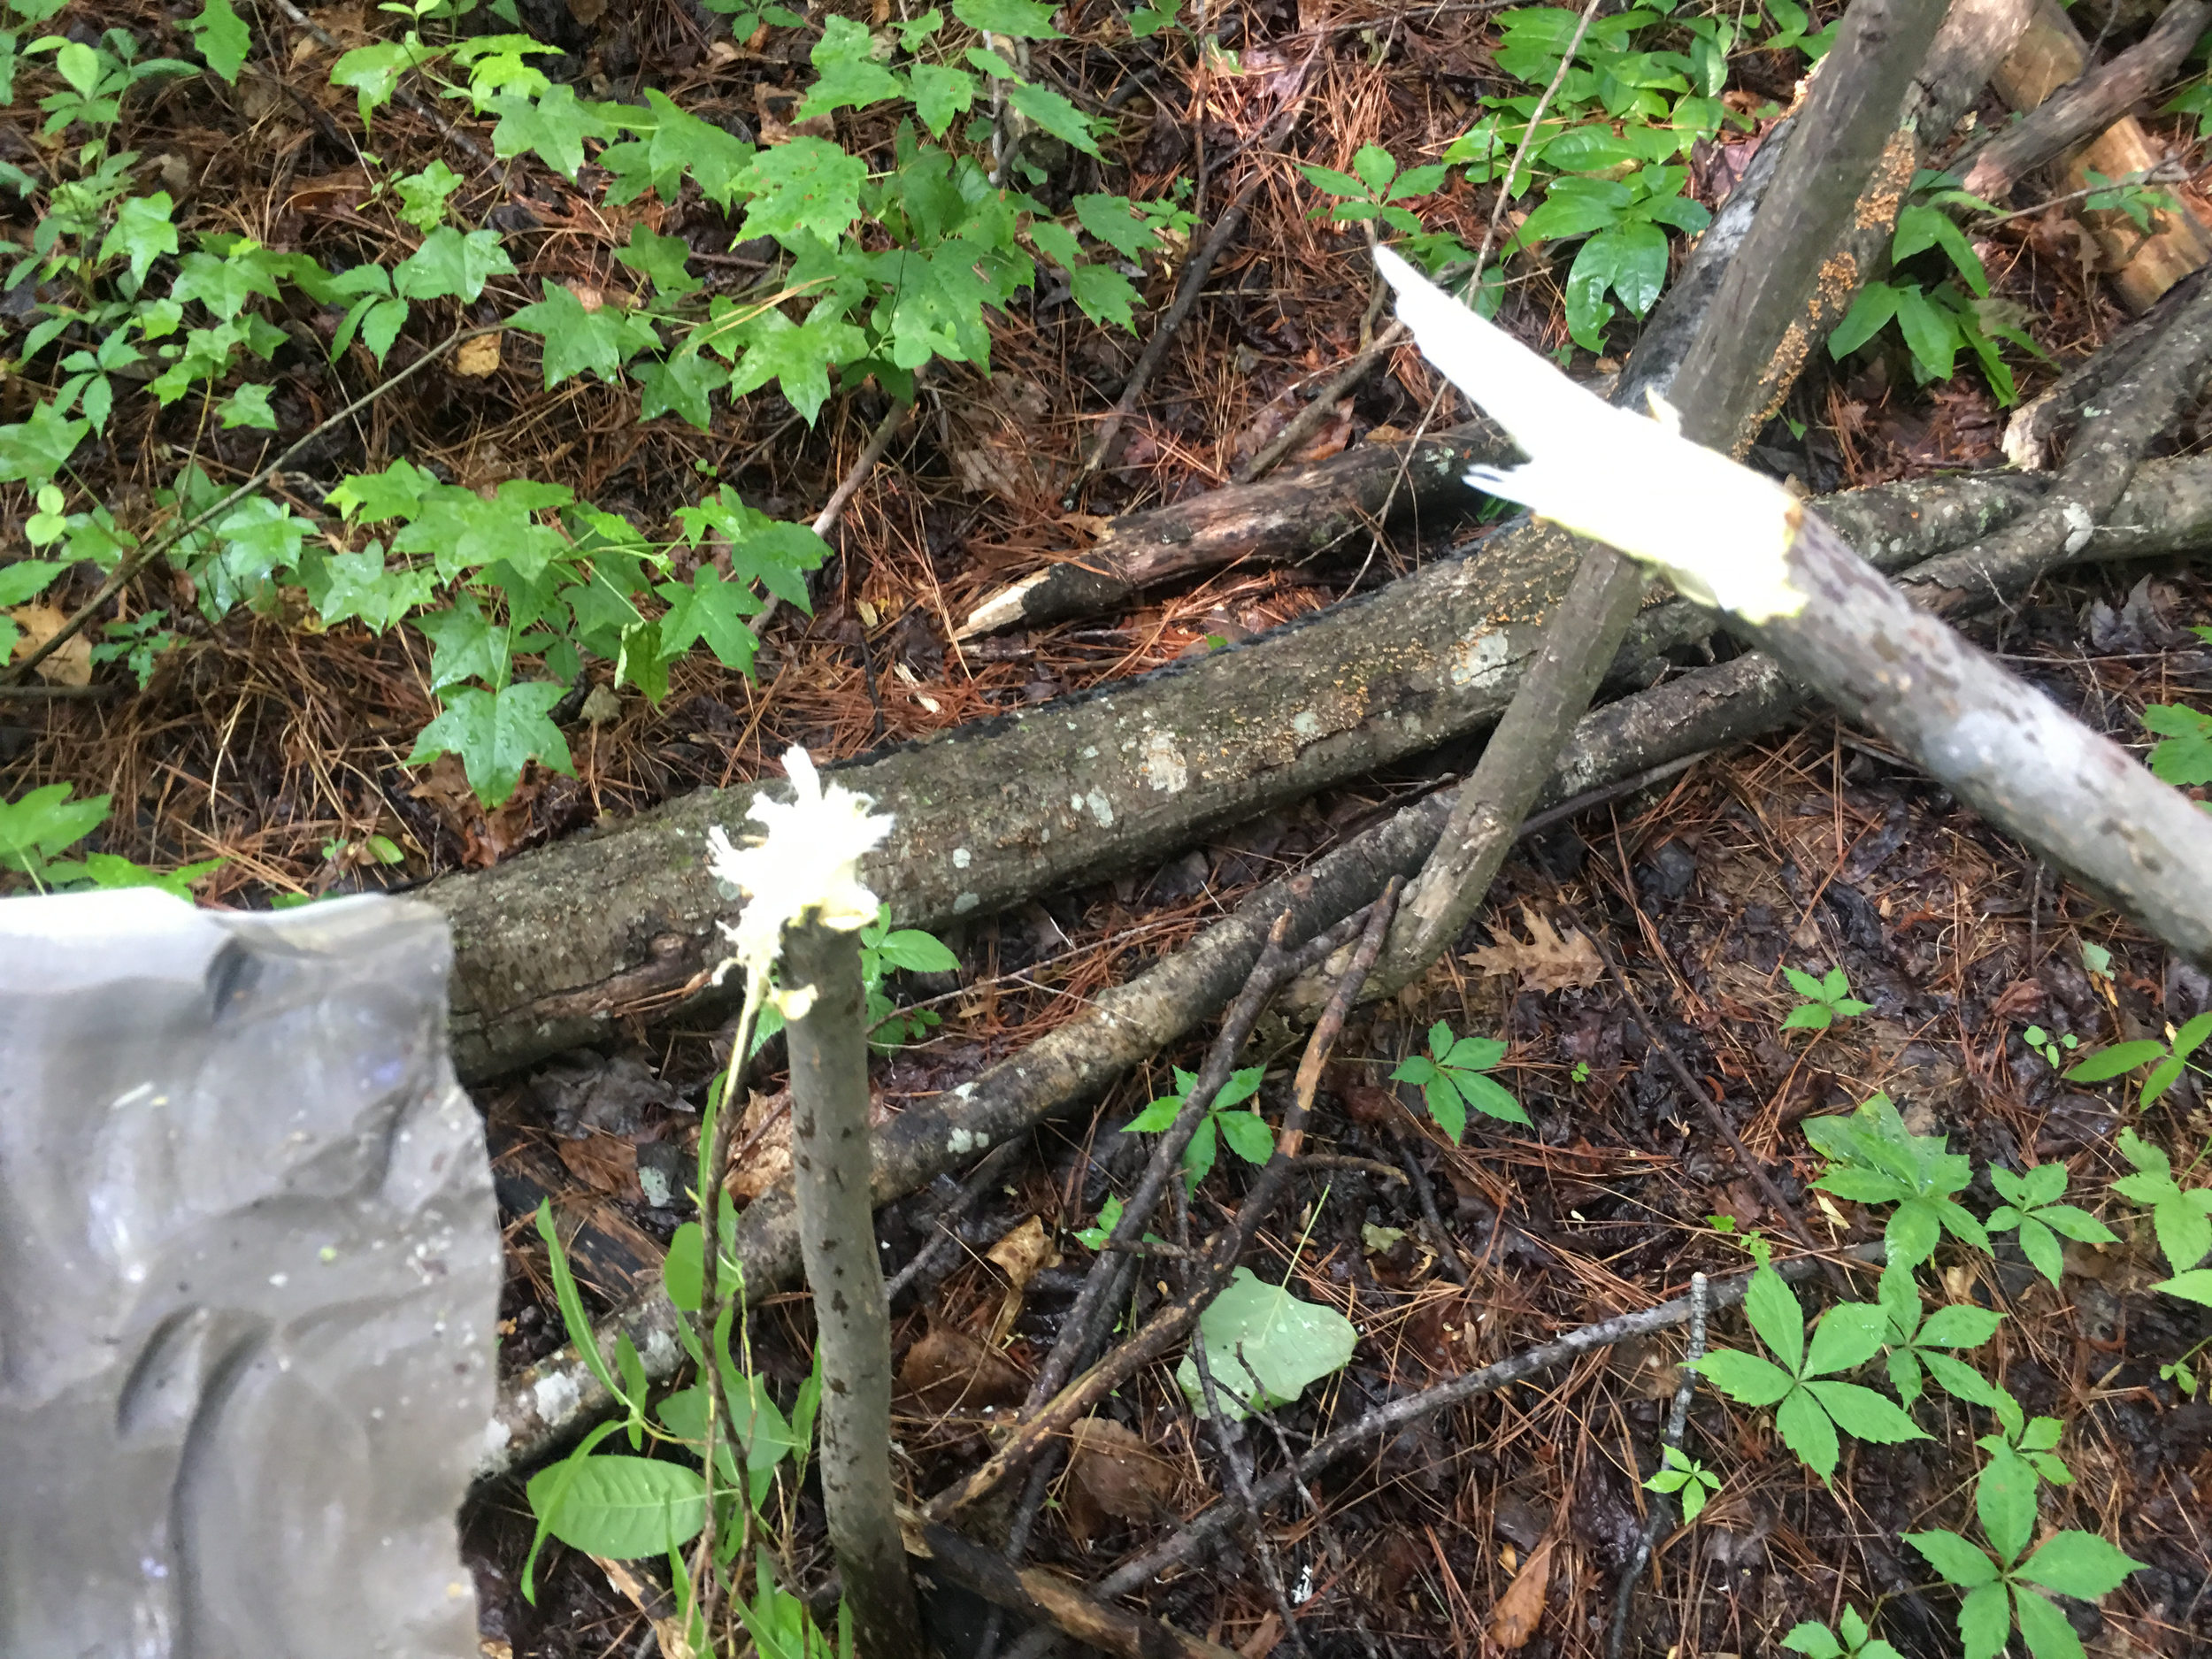
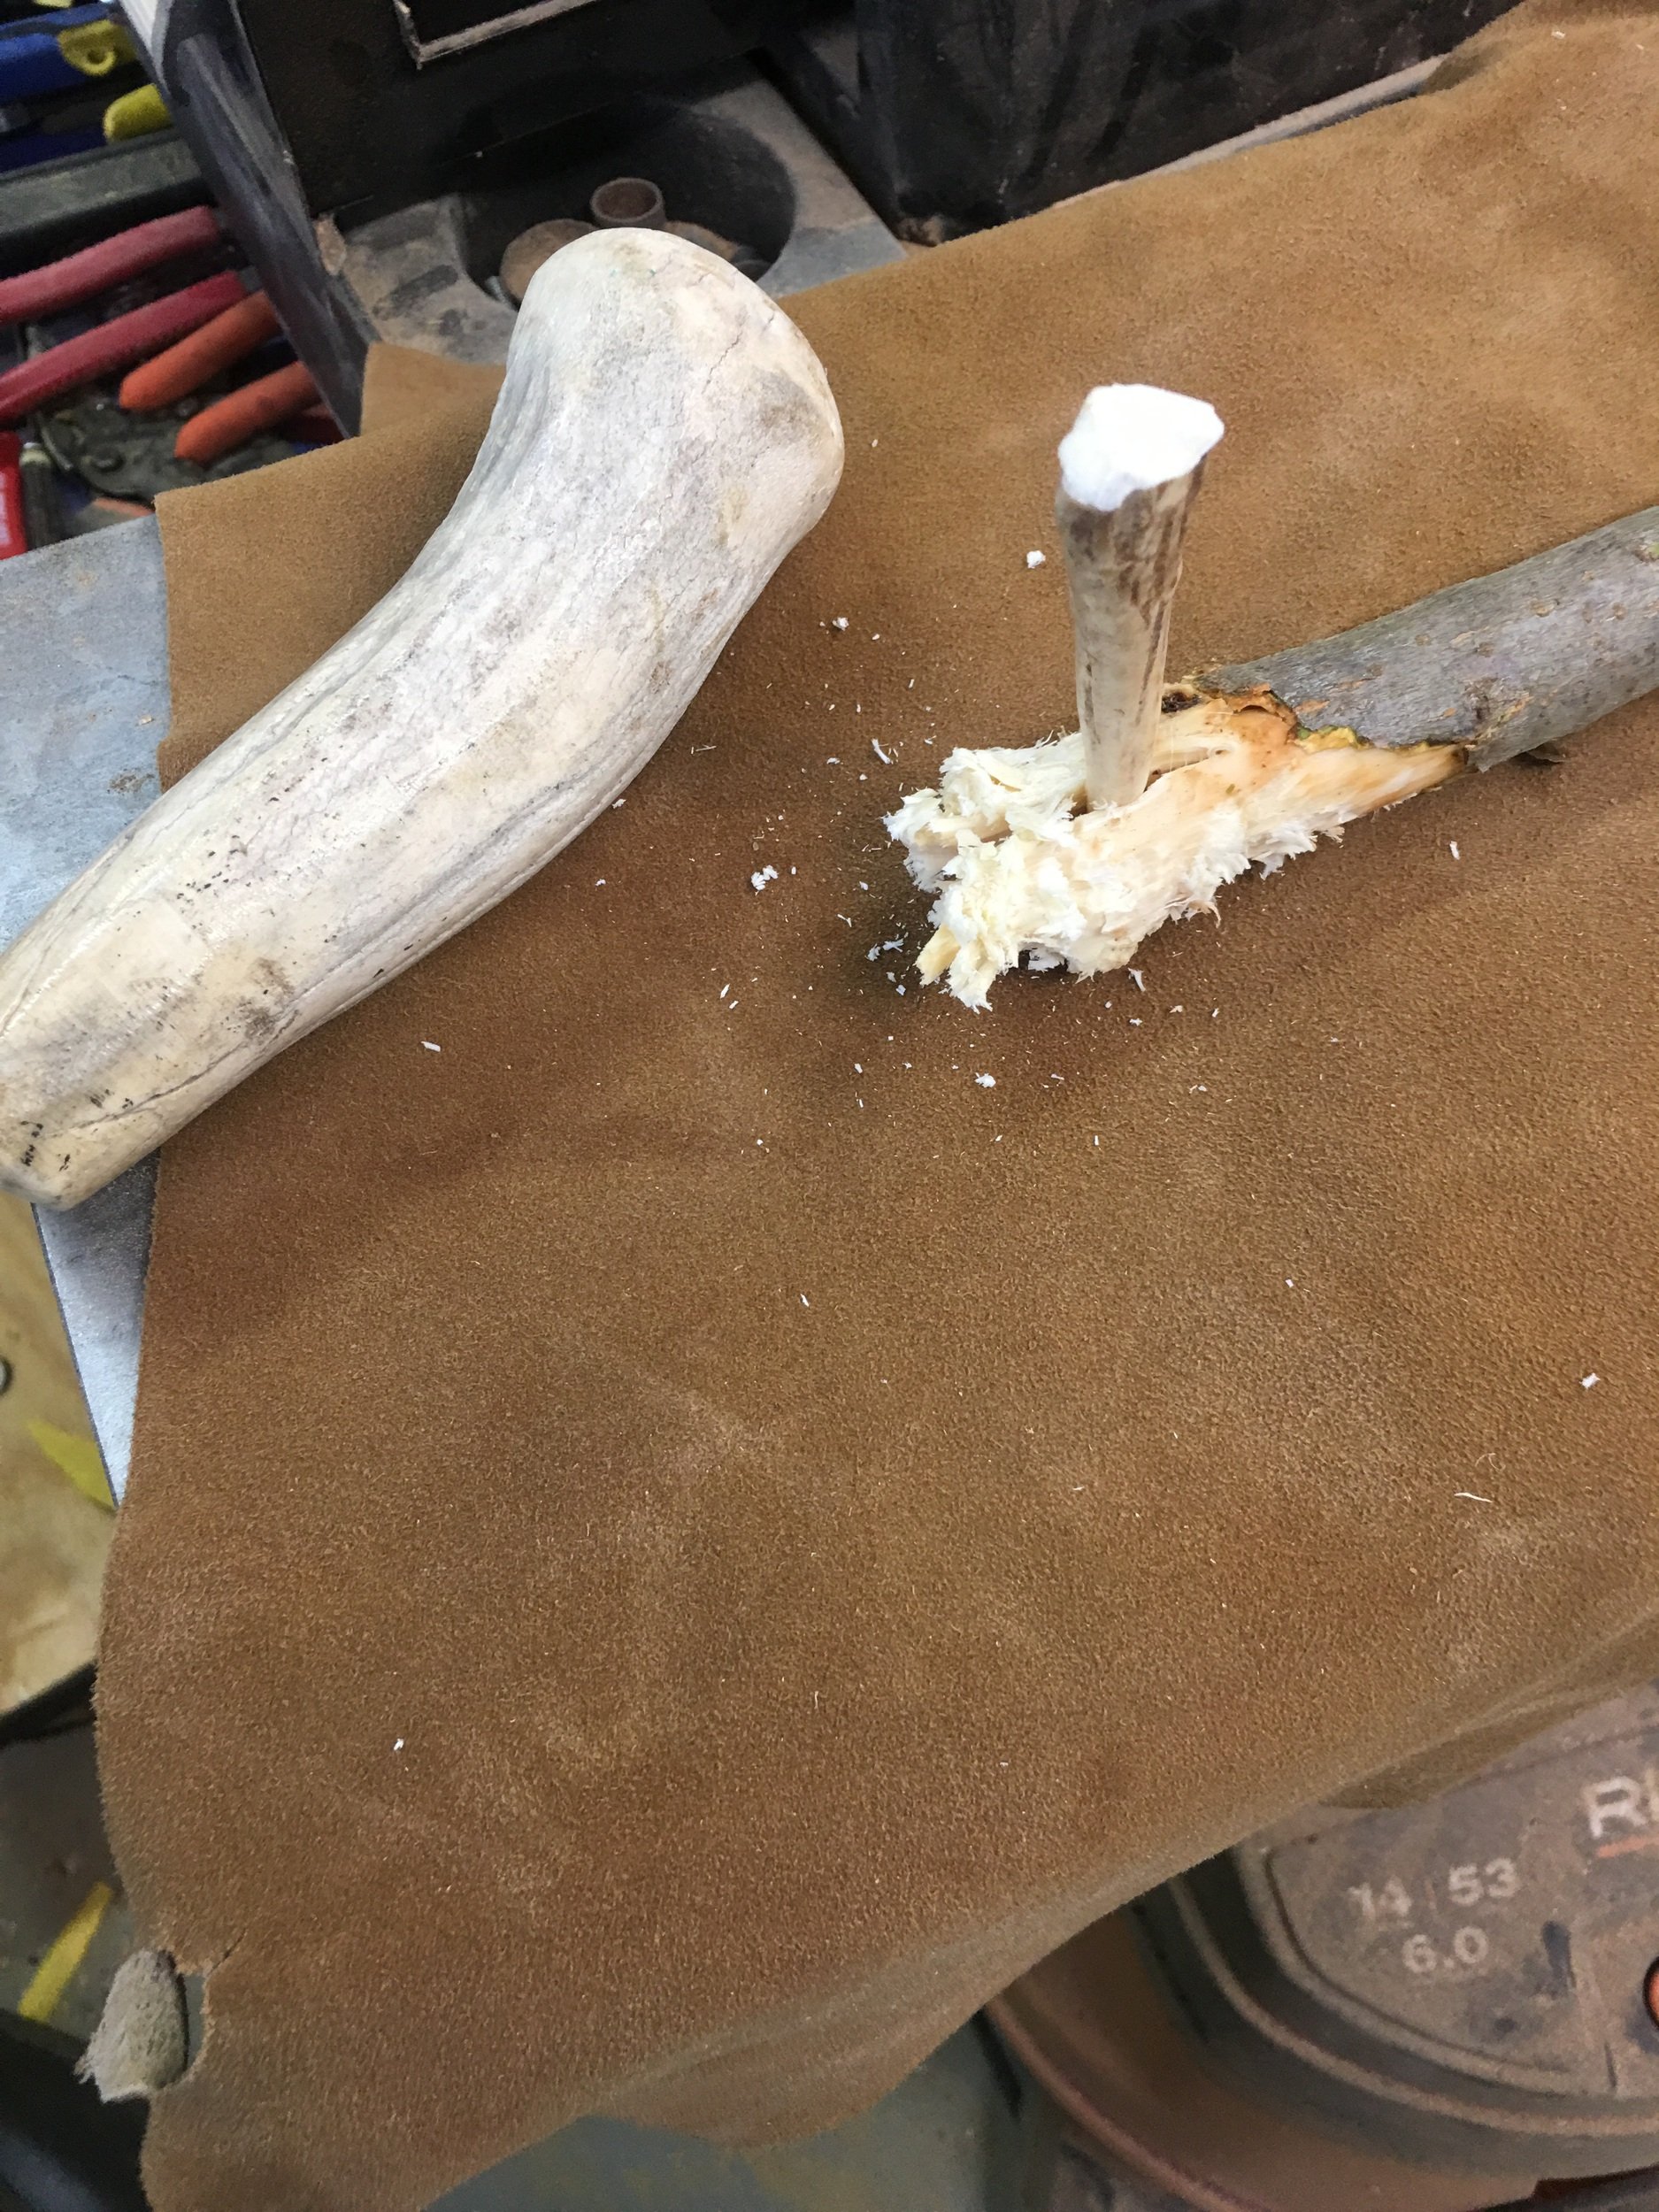
Now chop off a selected length for tomahawk shaft.
If you need to sharpen your hand axe during the process. Knock some flakes off the edge. Here I am using a moose antler billet.
Now, you need to cut off a usable length for the shaft.
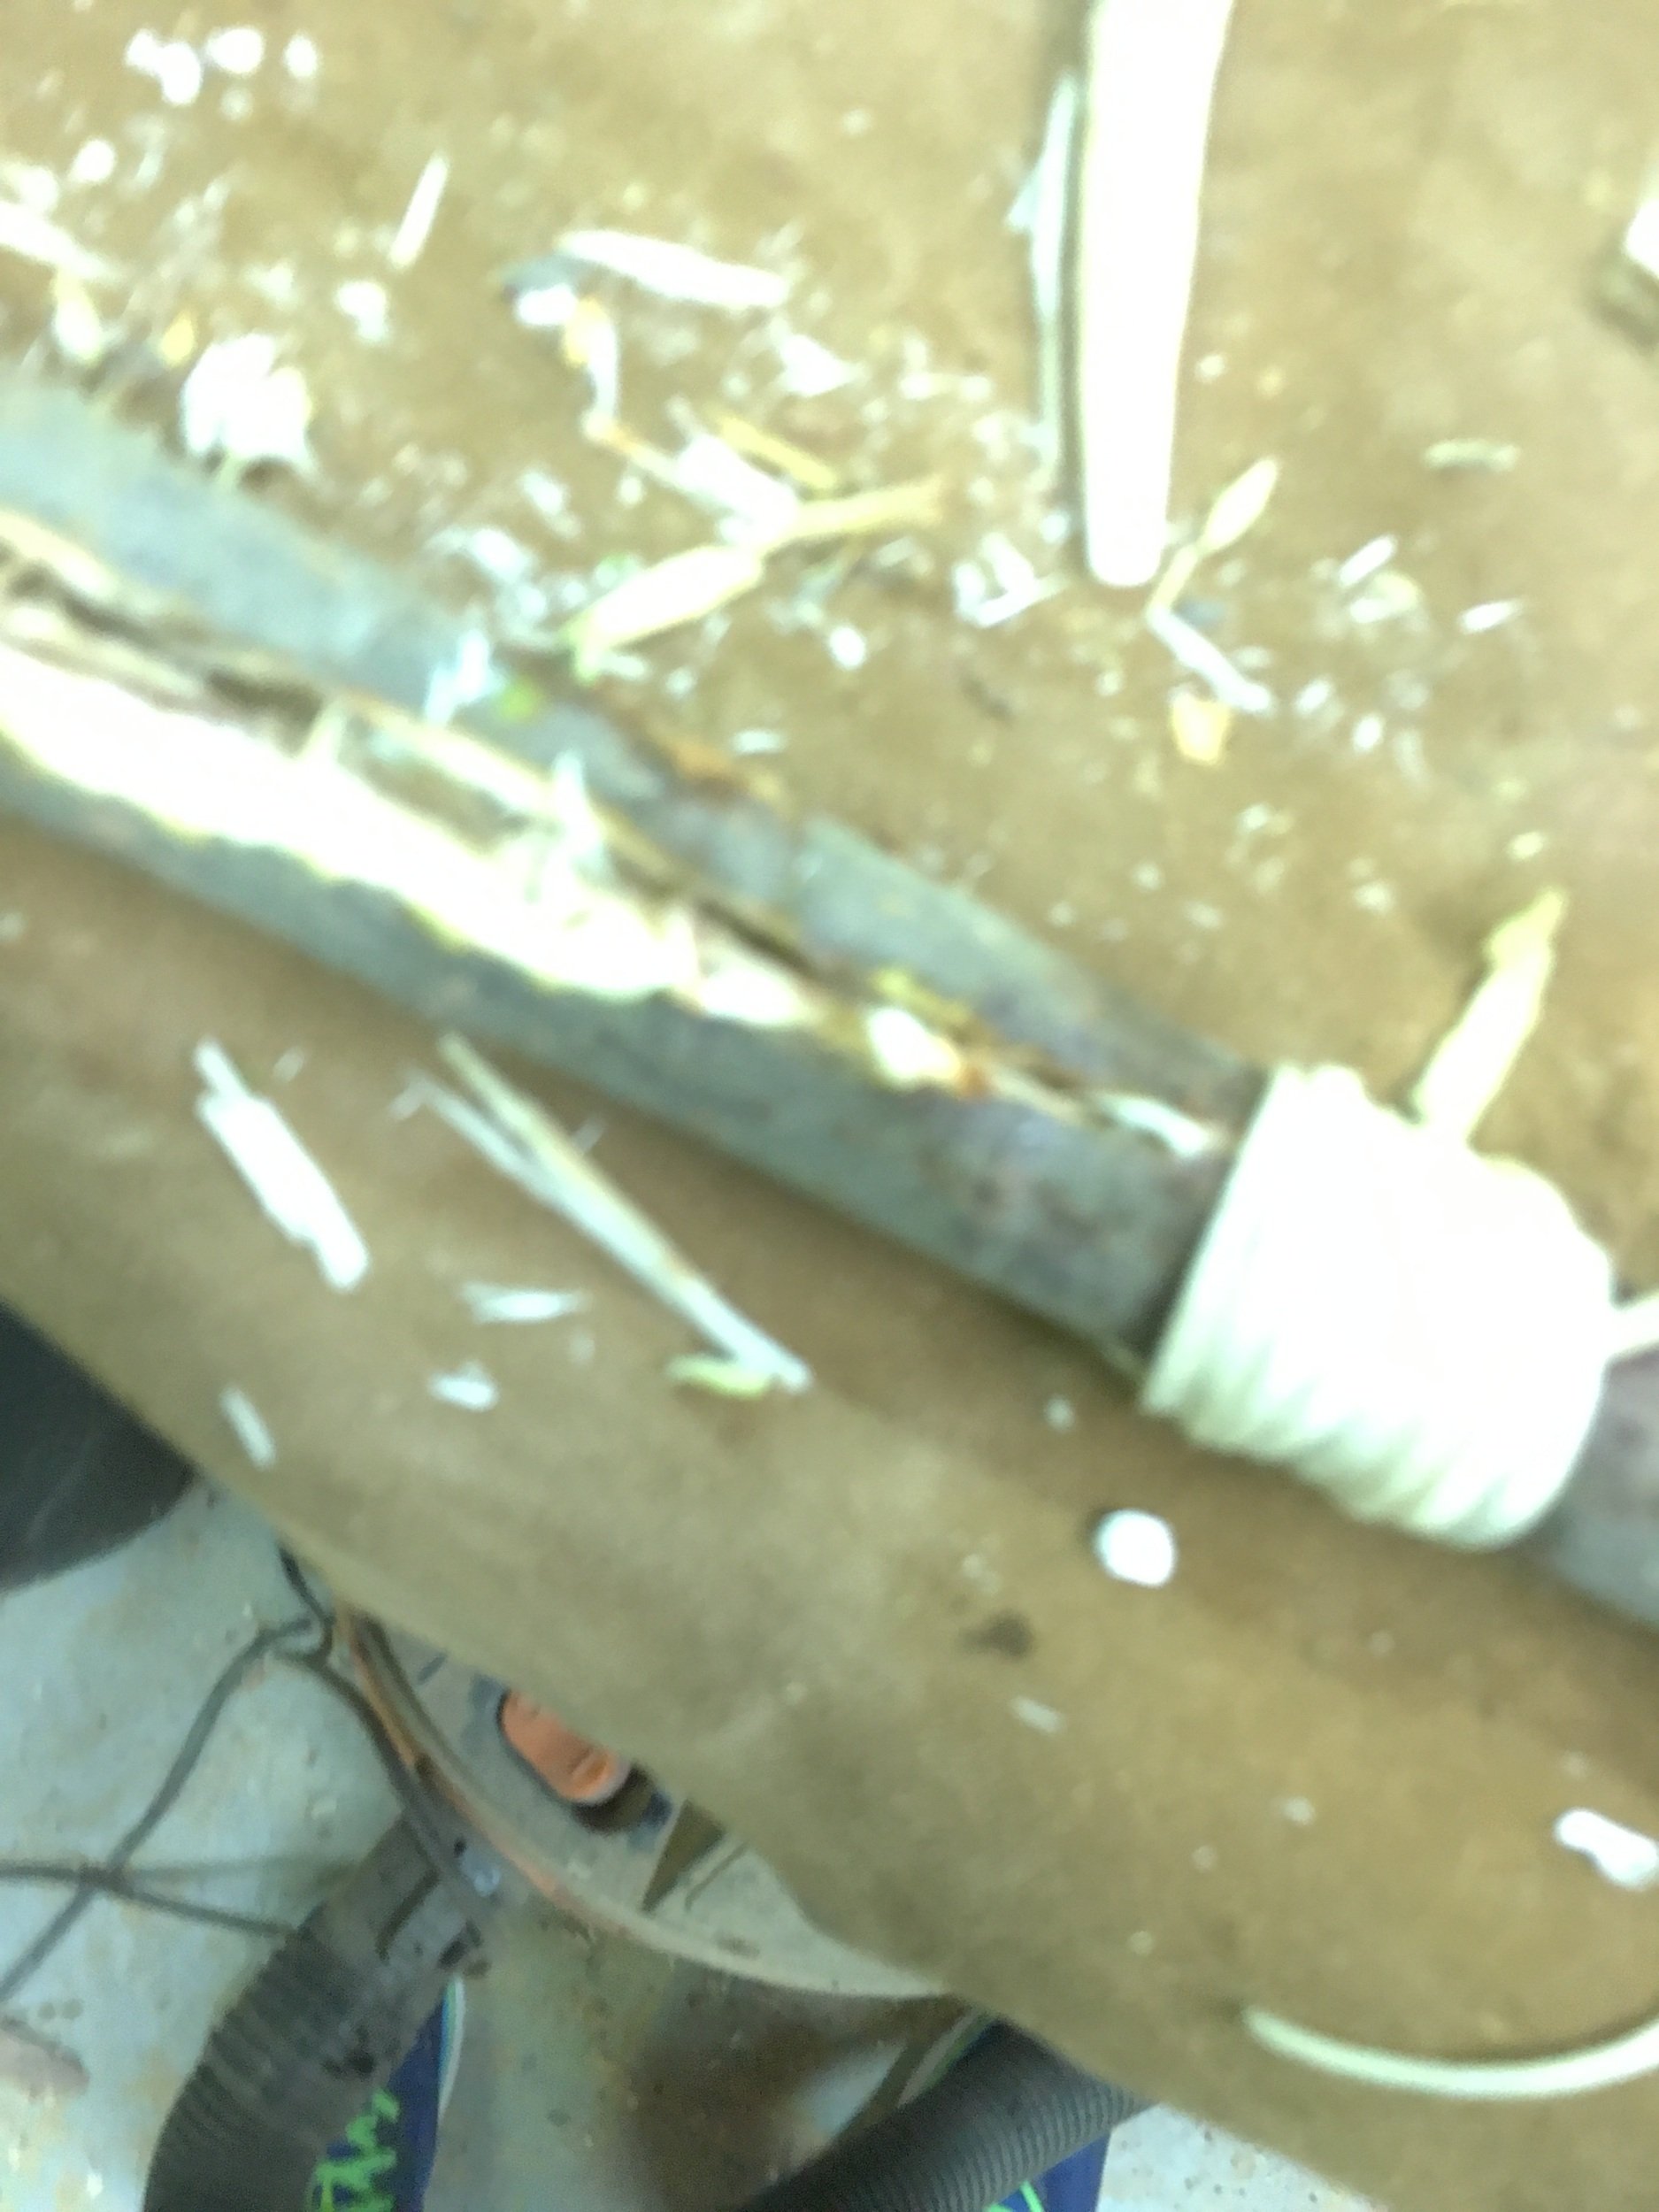
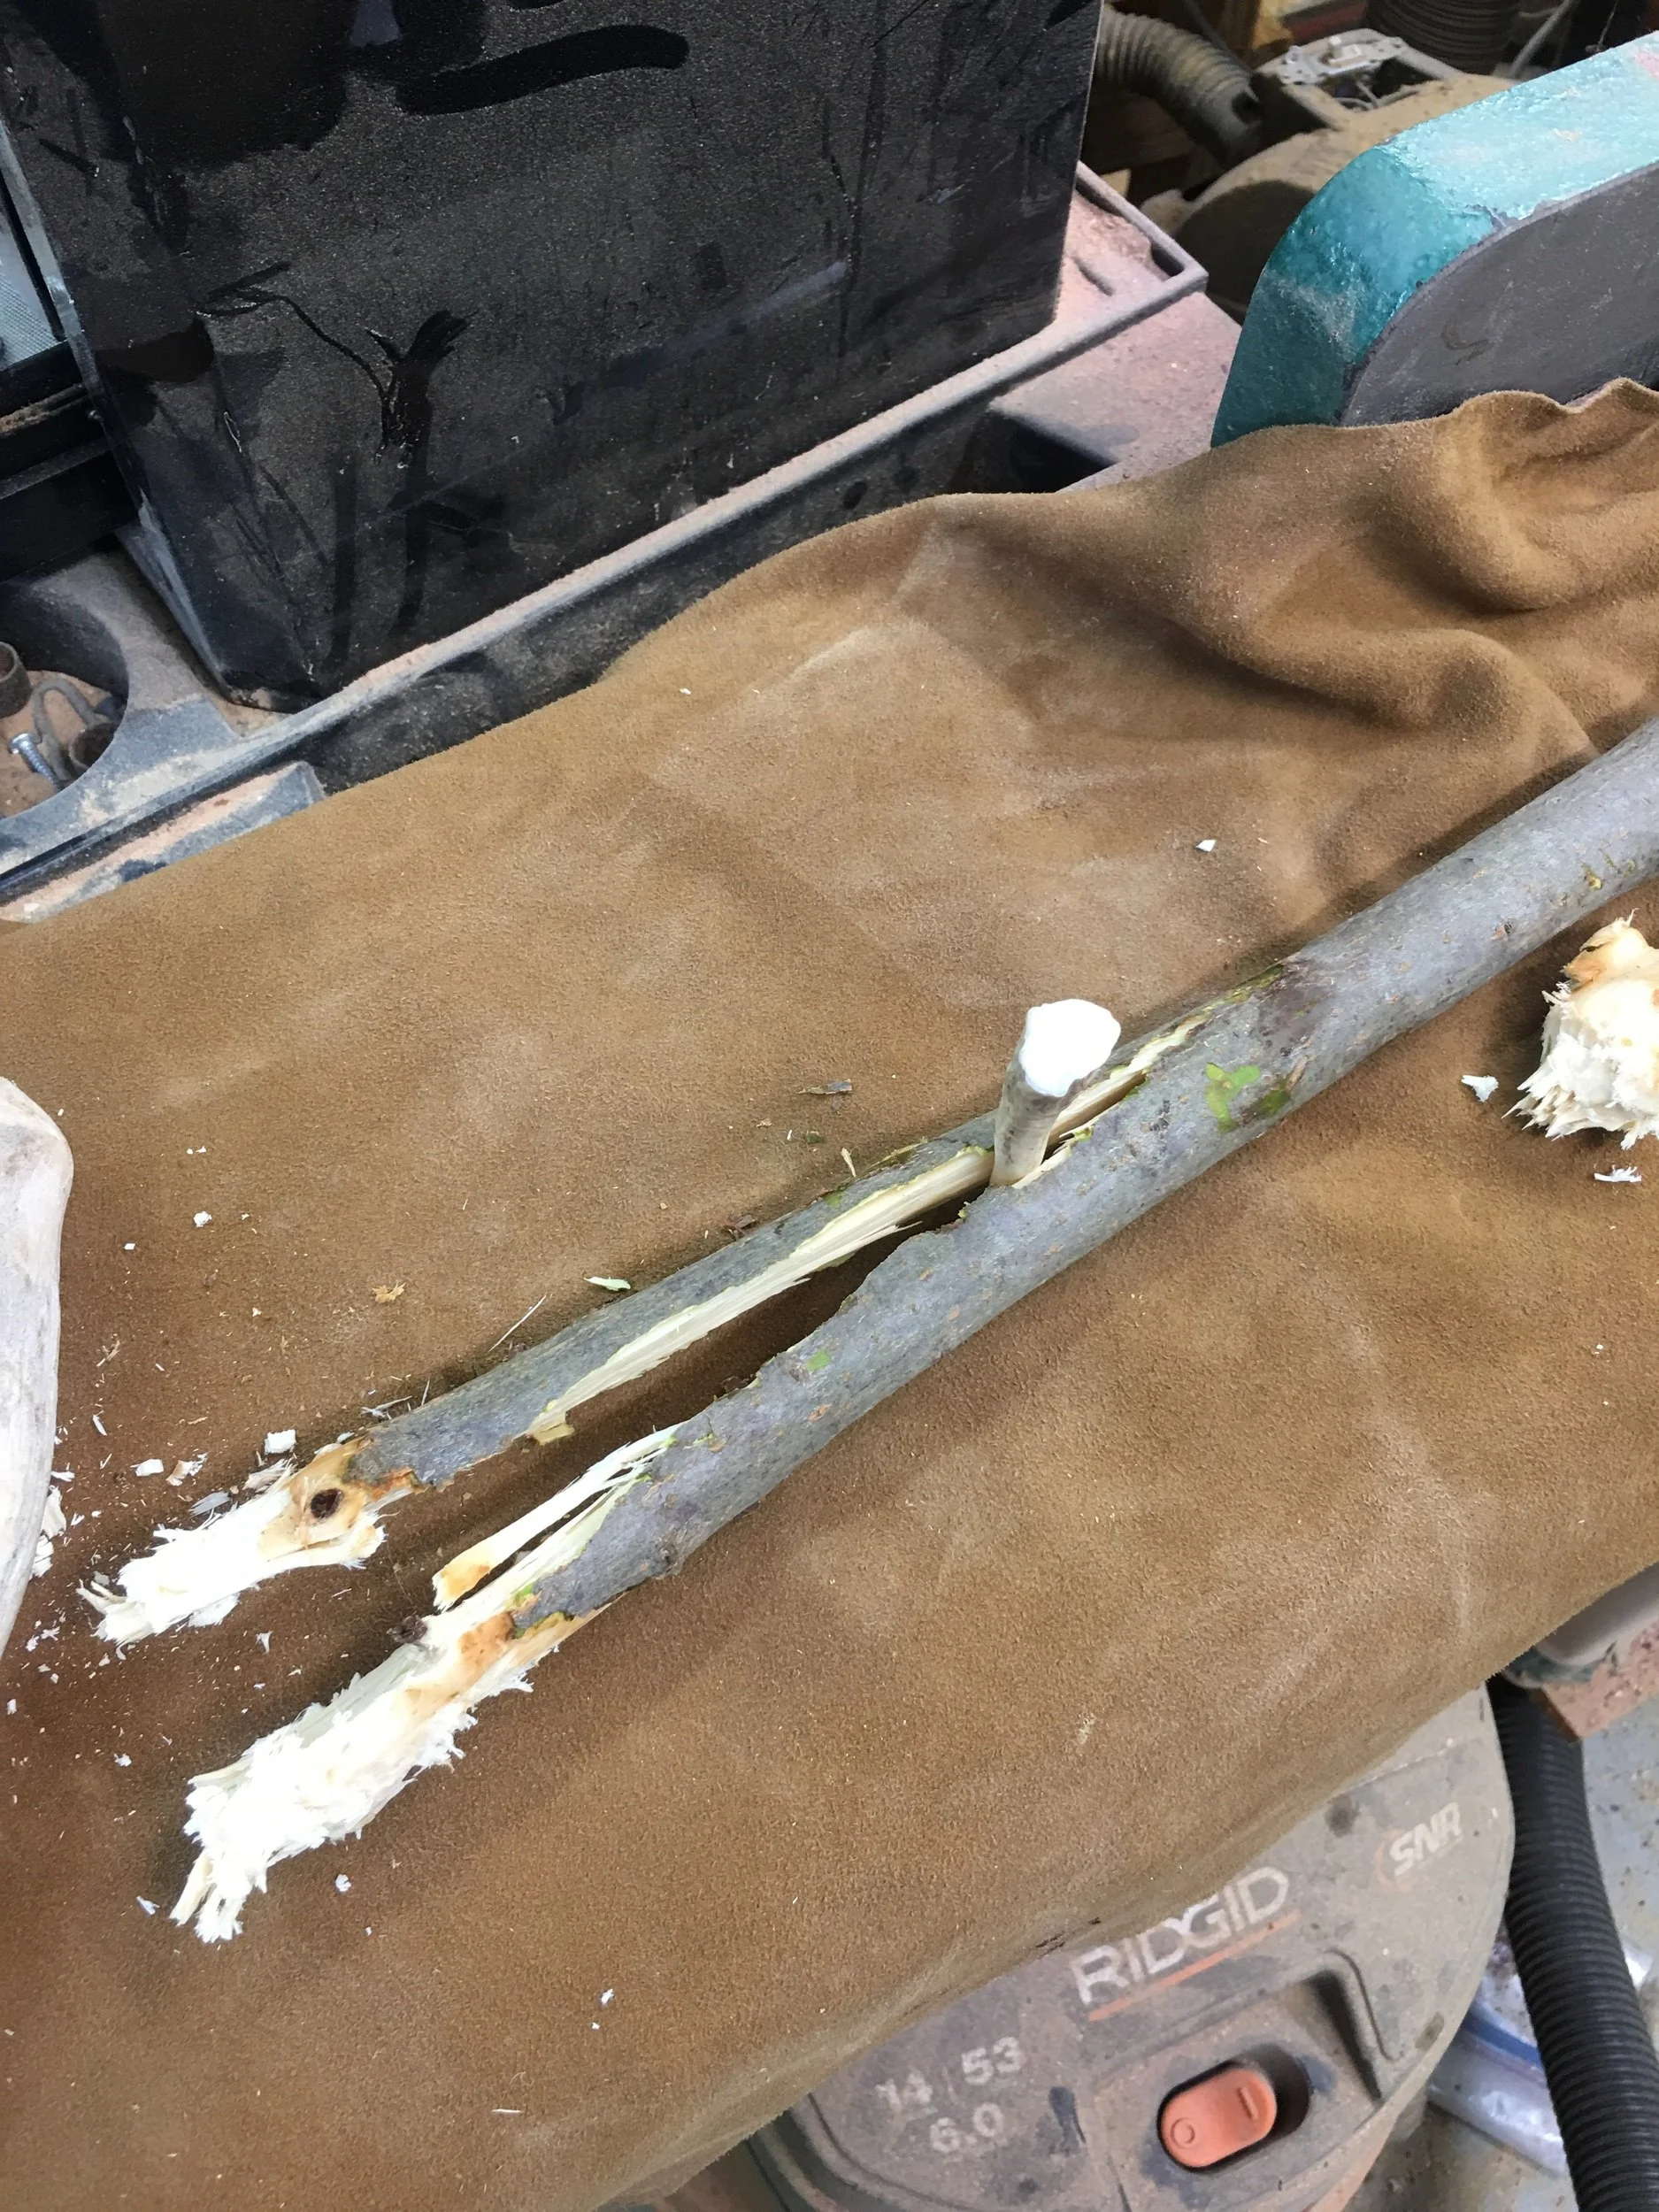
Now you need to split the top half of the shaft to accept the head. To restrict the split from going too far down the shaft, wrap the shaft with wet rawhide just below the head cavity.
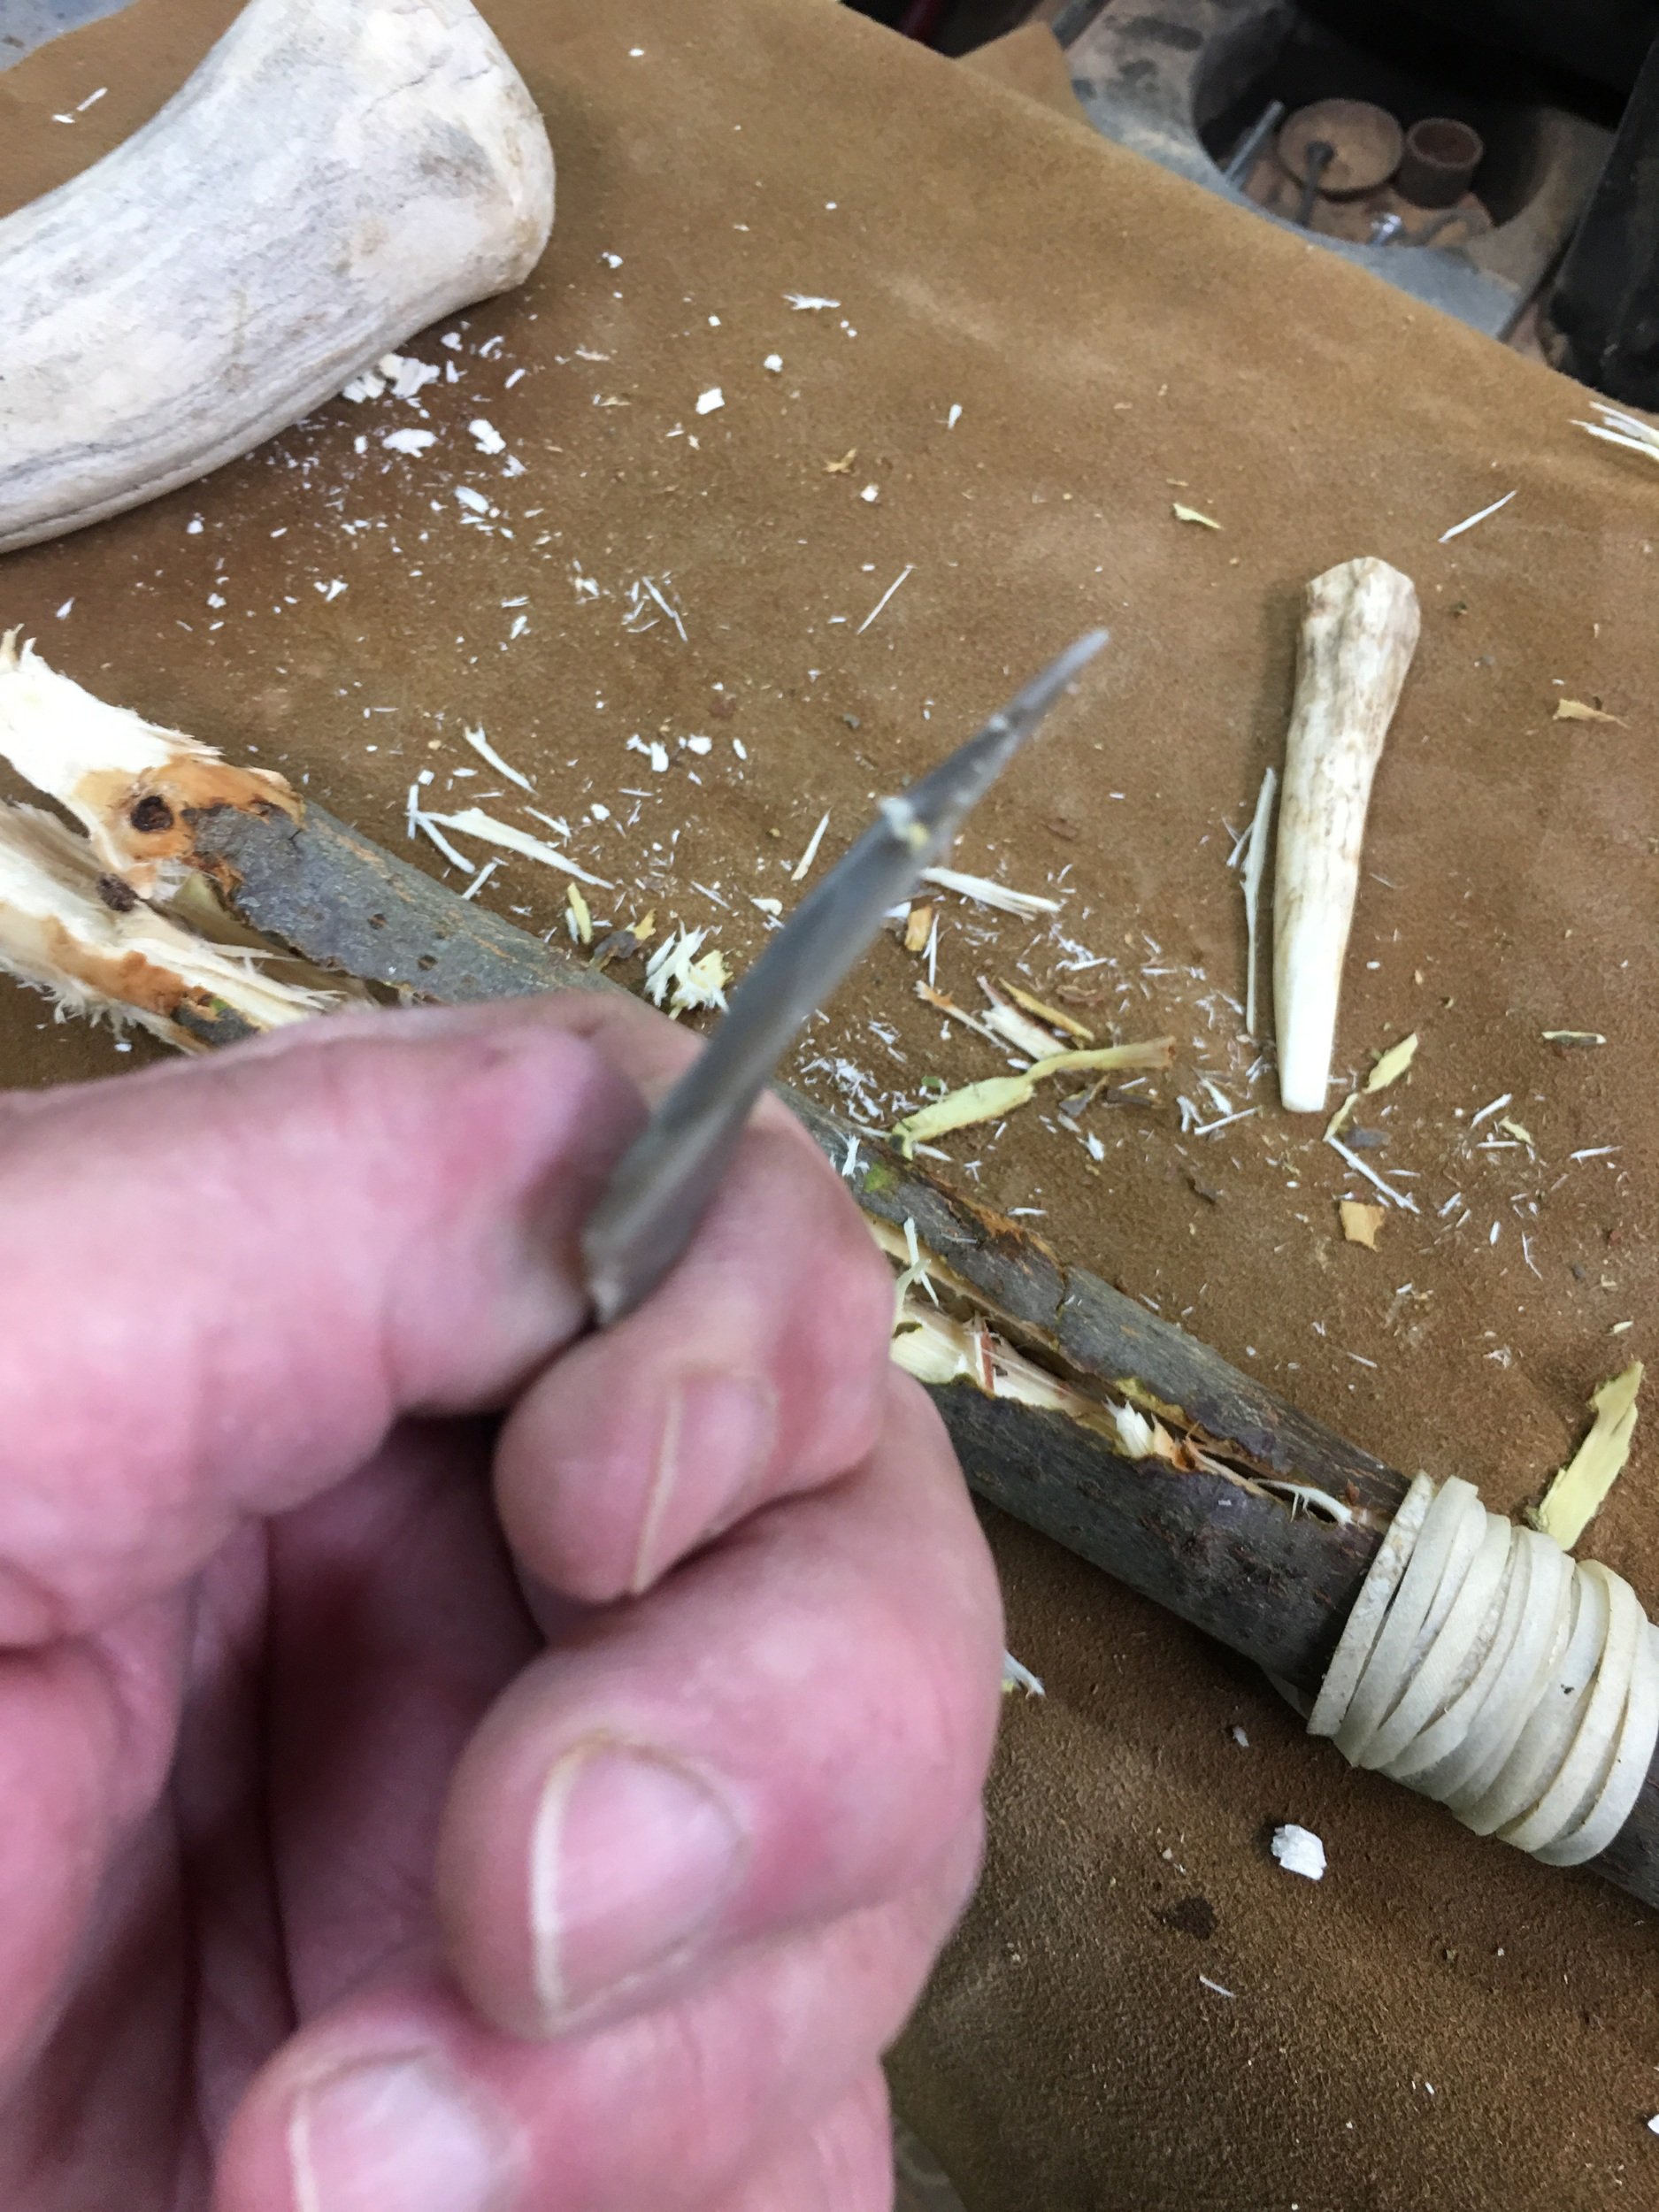
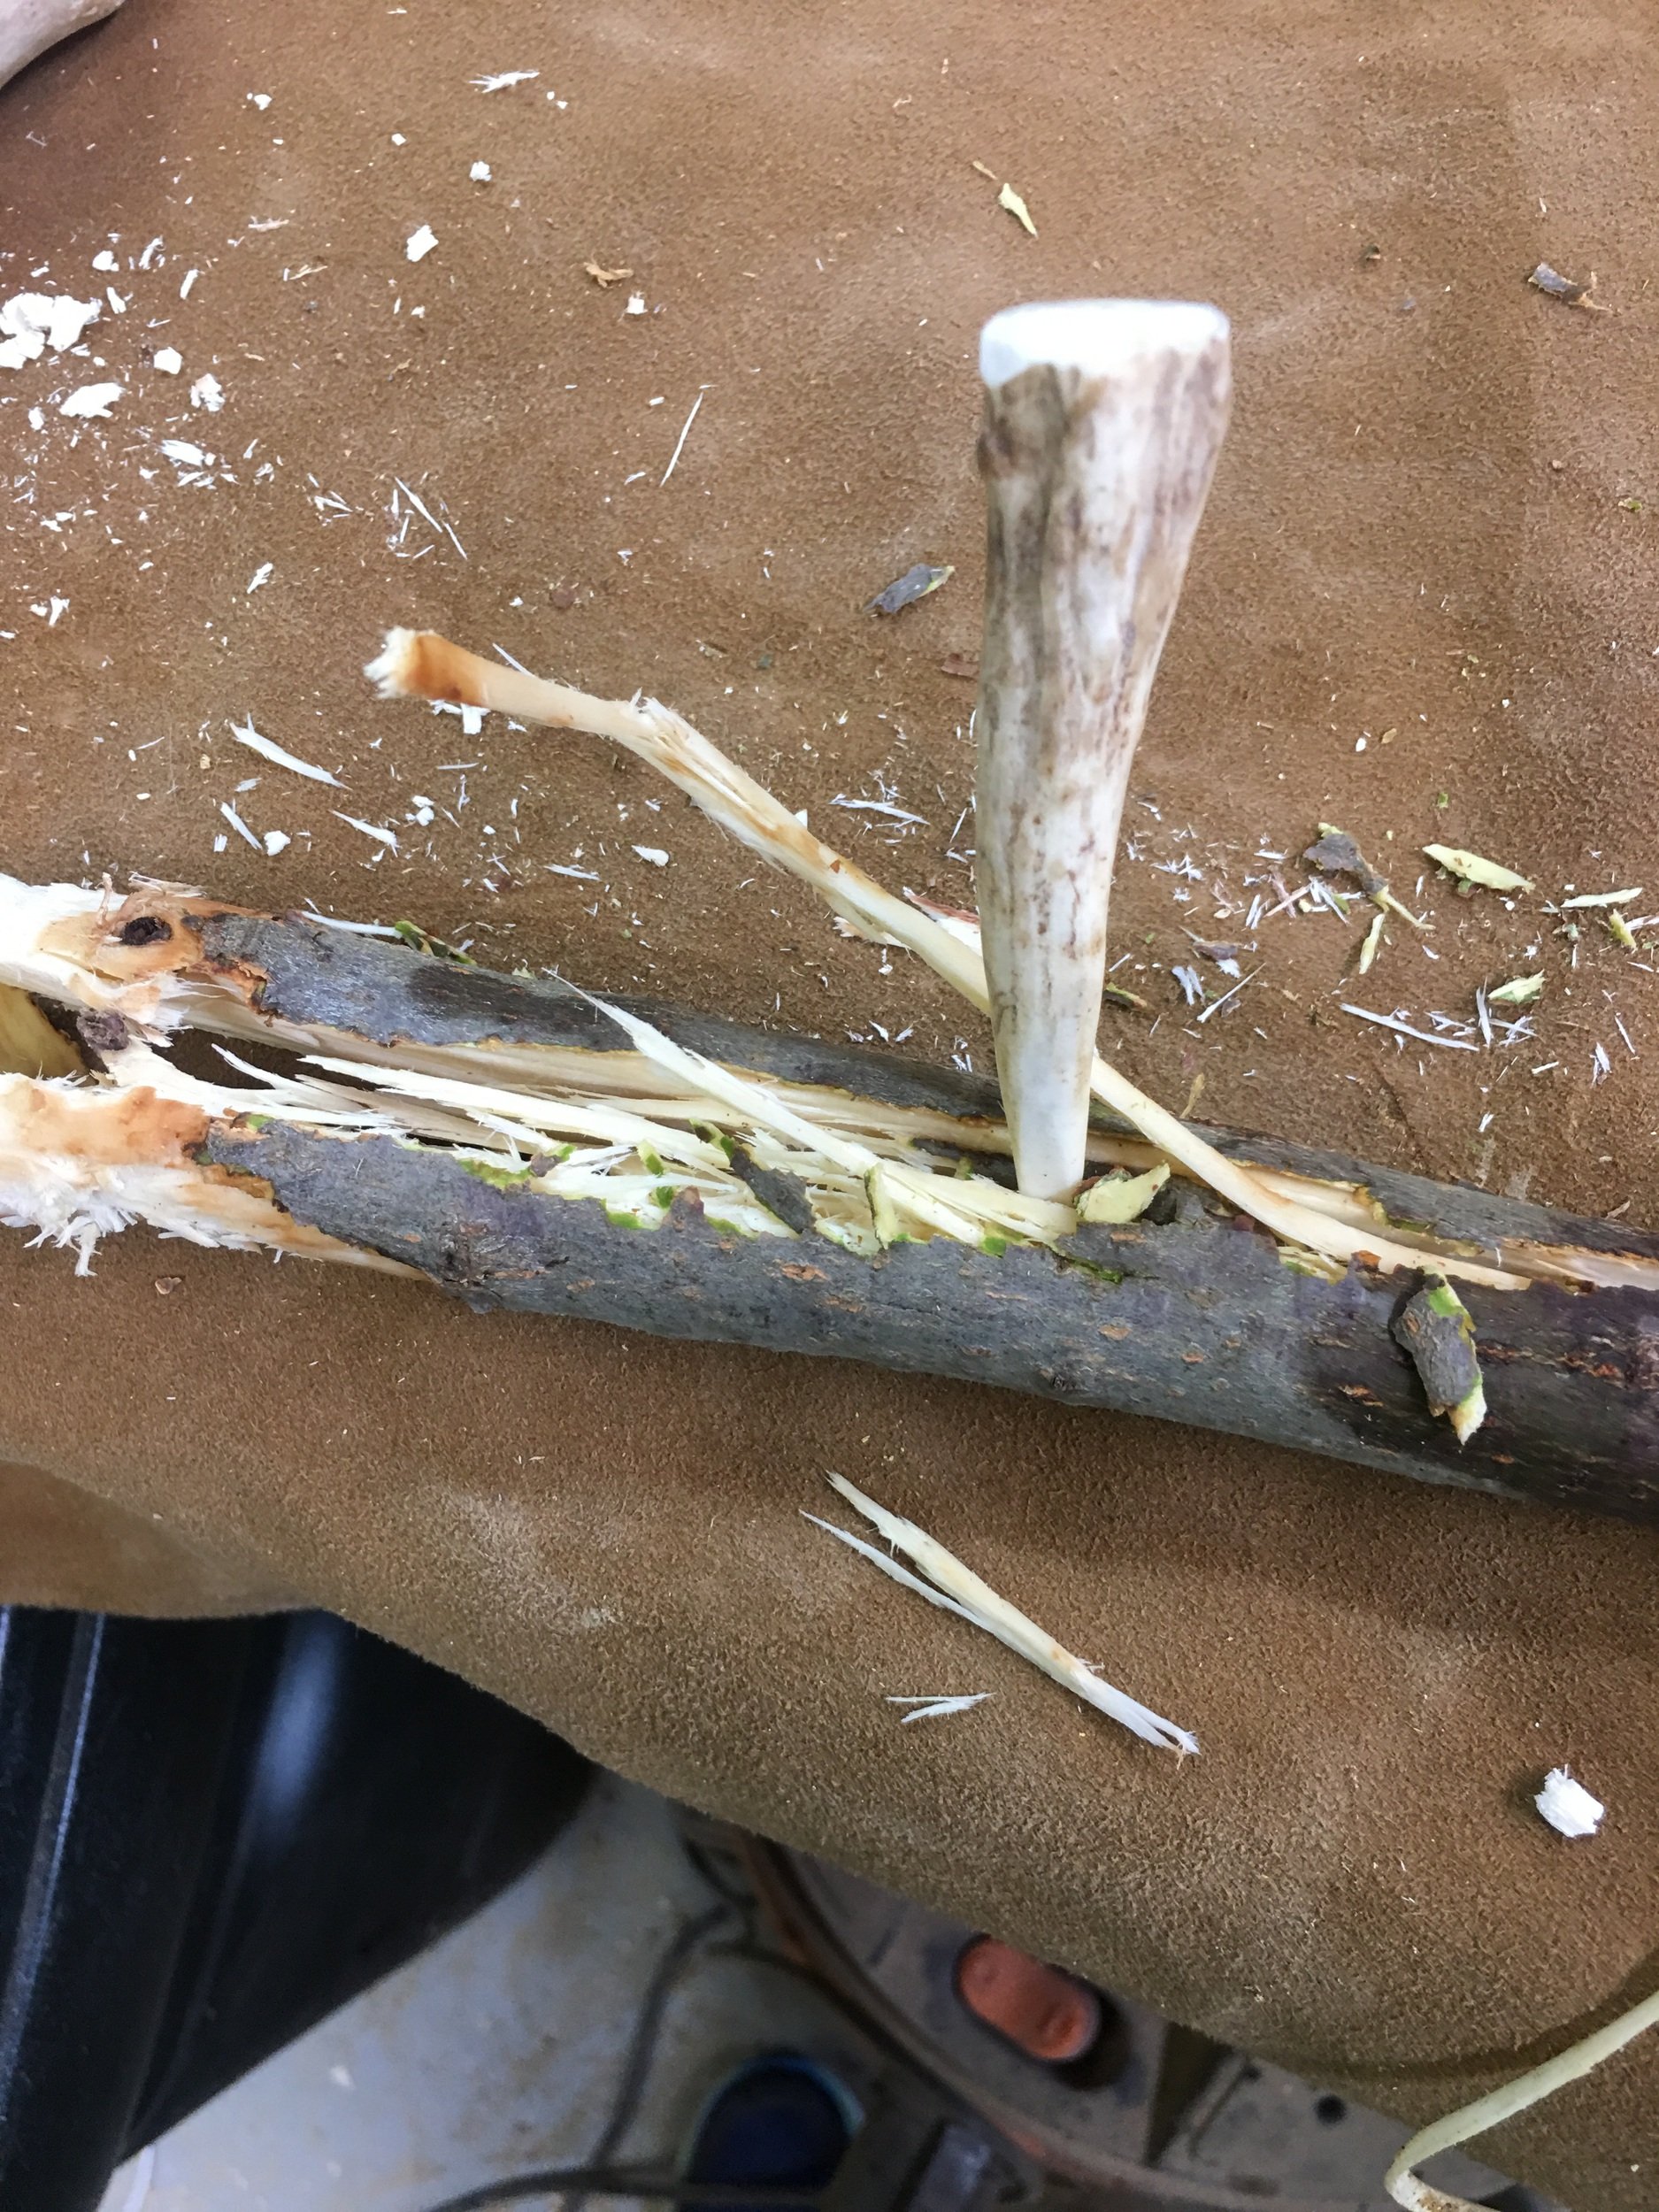
I am using a deer antler chisel to split the shaft, hammering it with the moose antler
Continue to chip out the cavity, using the antler chisel and a sharp flint flake

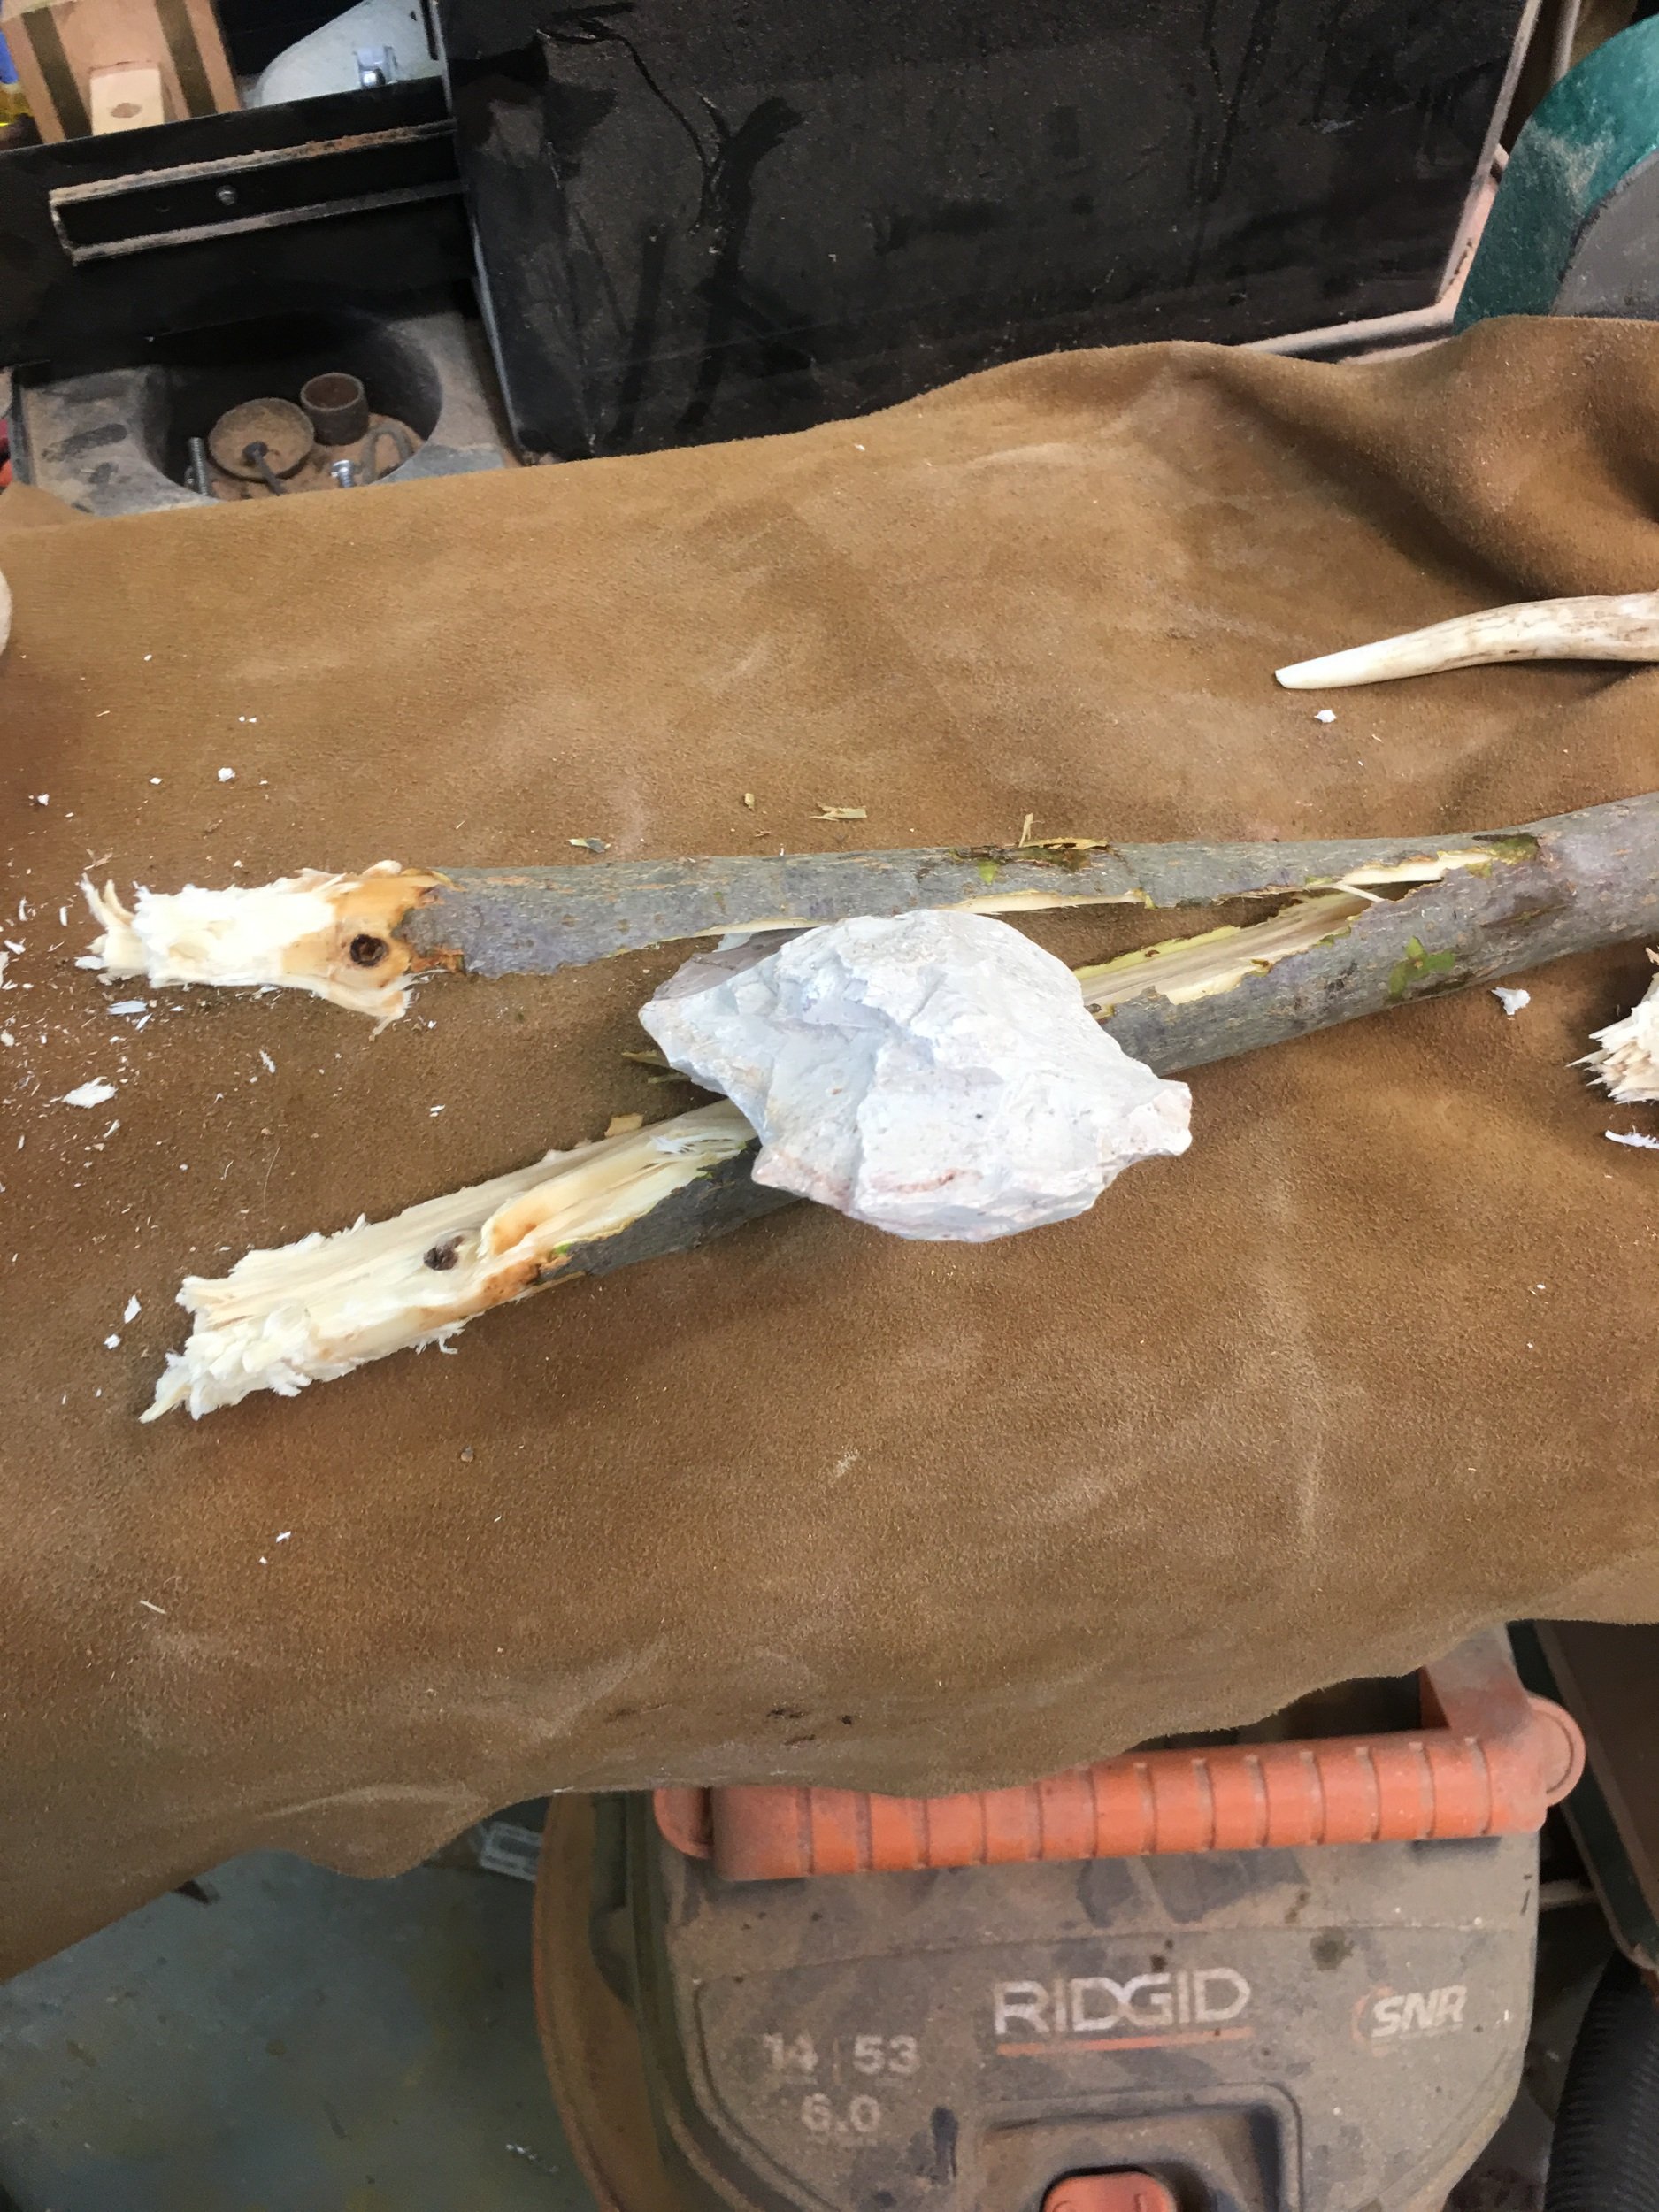
Put a stone in the cavity and wrap the ends together with wet rawhide. Wrap tightly and let dry for a day or two.
Building a Sapling Bow
In case any of you would like to make a bow out of the trees in your backyard or on your hunt lease property, here is a simple how-to in pictures.
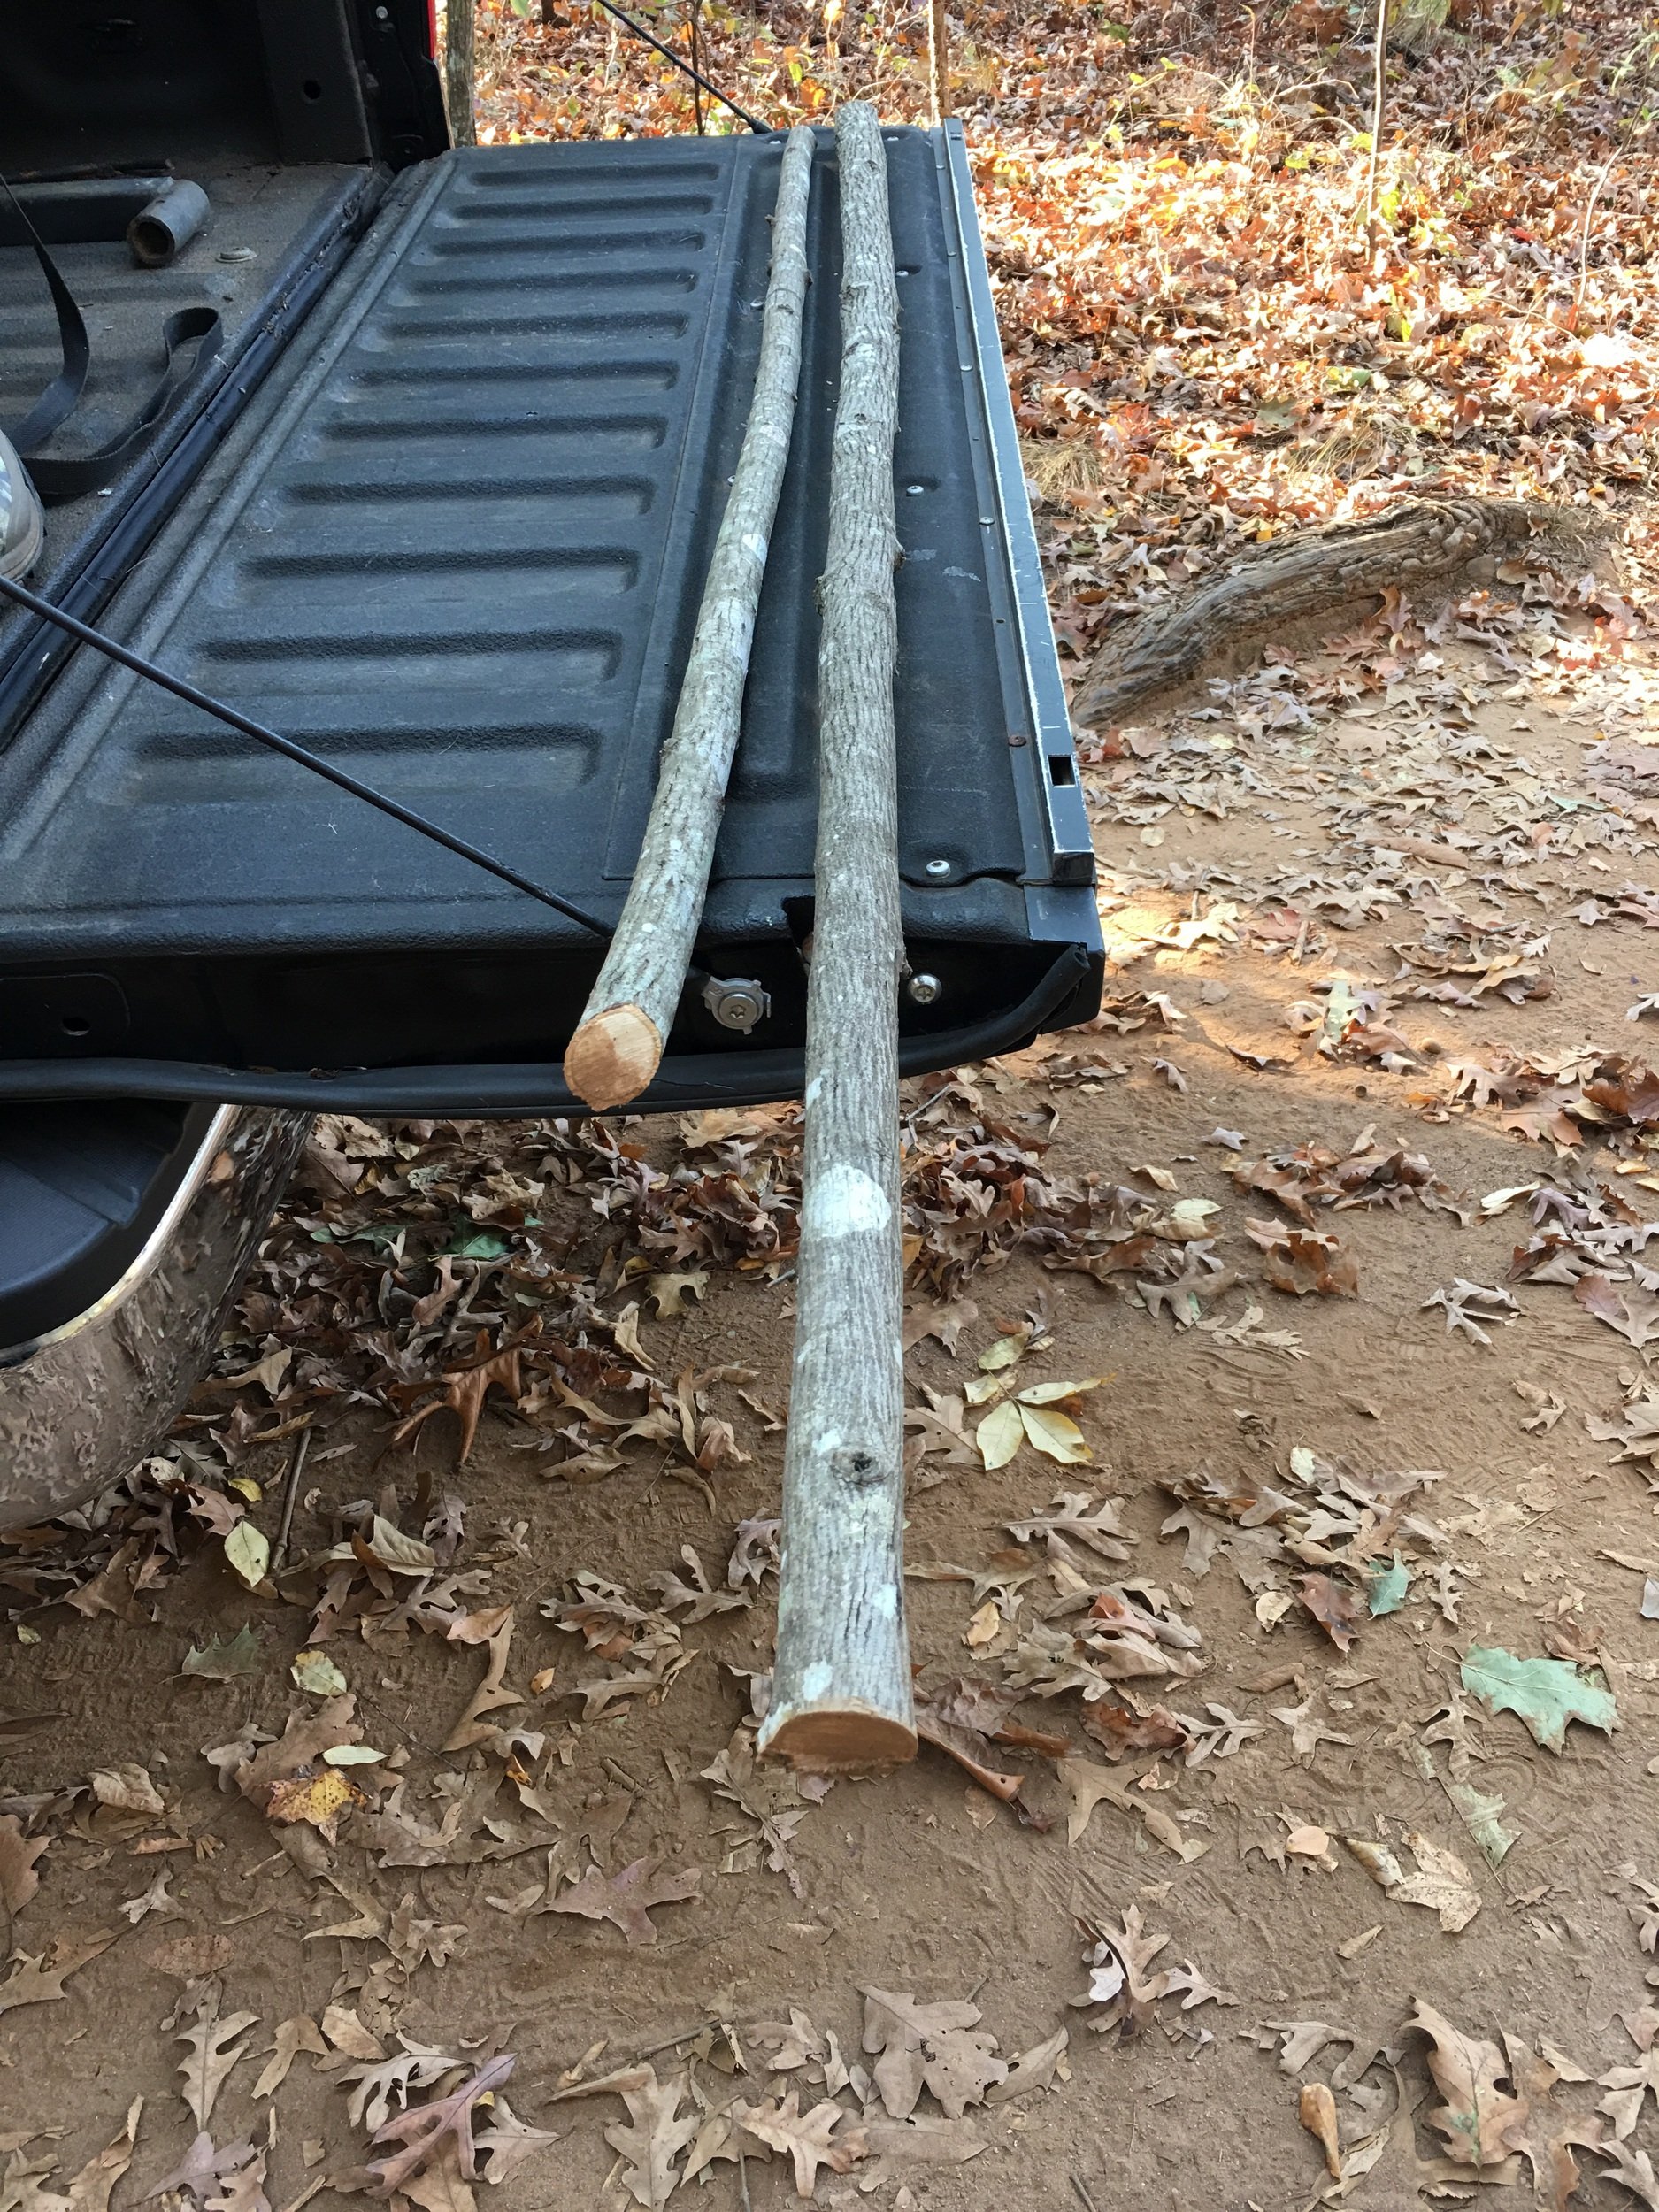
Find a nice straight hickory sapling, at least 3" in diameter. Cut it at the straightest part--at least 72" long.
Cut an extra one just in case. Smaller one can be used for a bend through the handle bow
Find the center point and mark.
Mark handle area 4", and fades 2" past handle

Trim belly off one side of the bow, starting at handle. Taper toward tip, leaving at least 1/2" thickness at the tip. Repeat on other side.

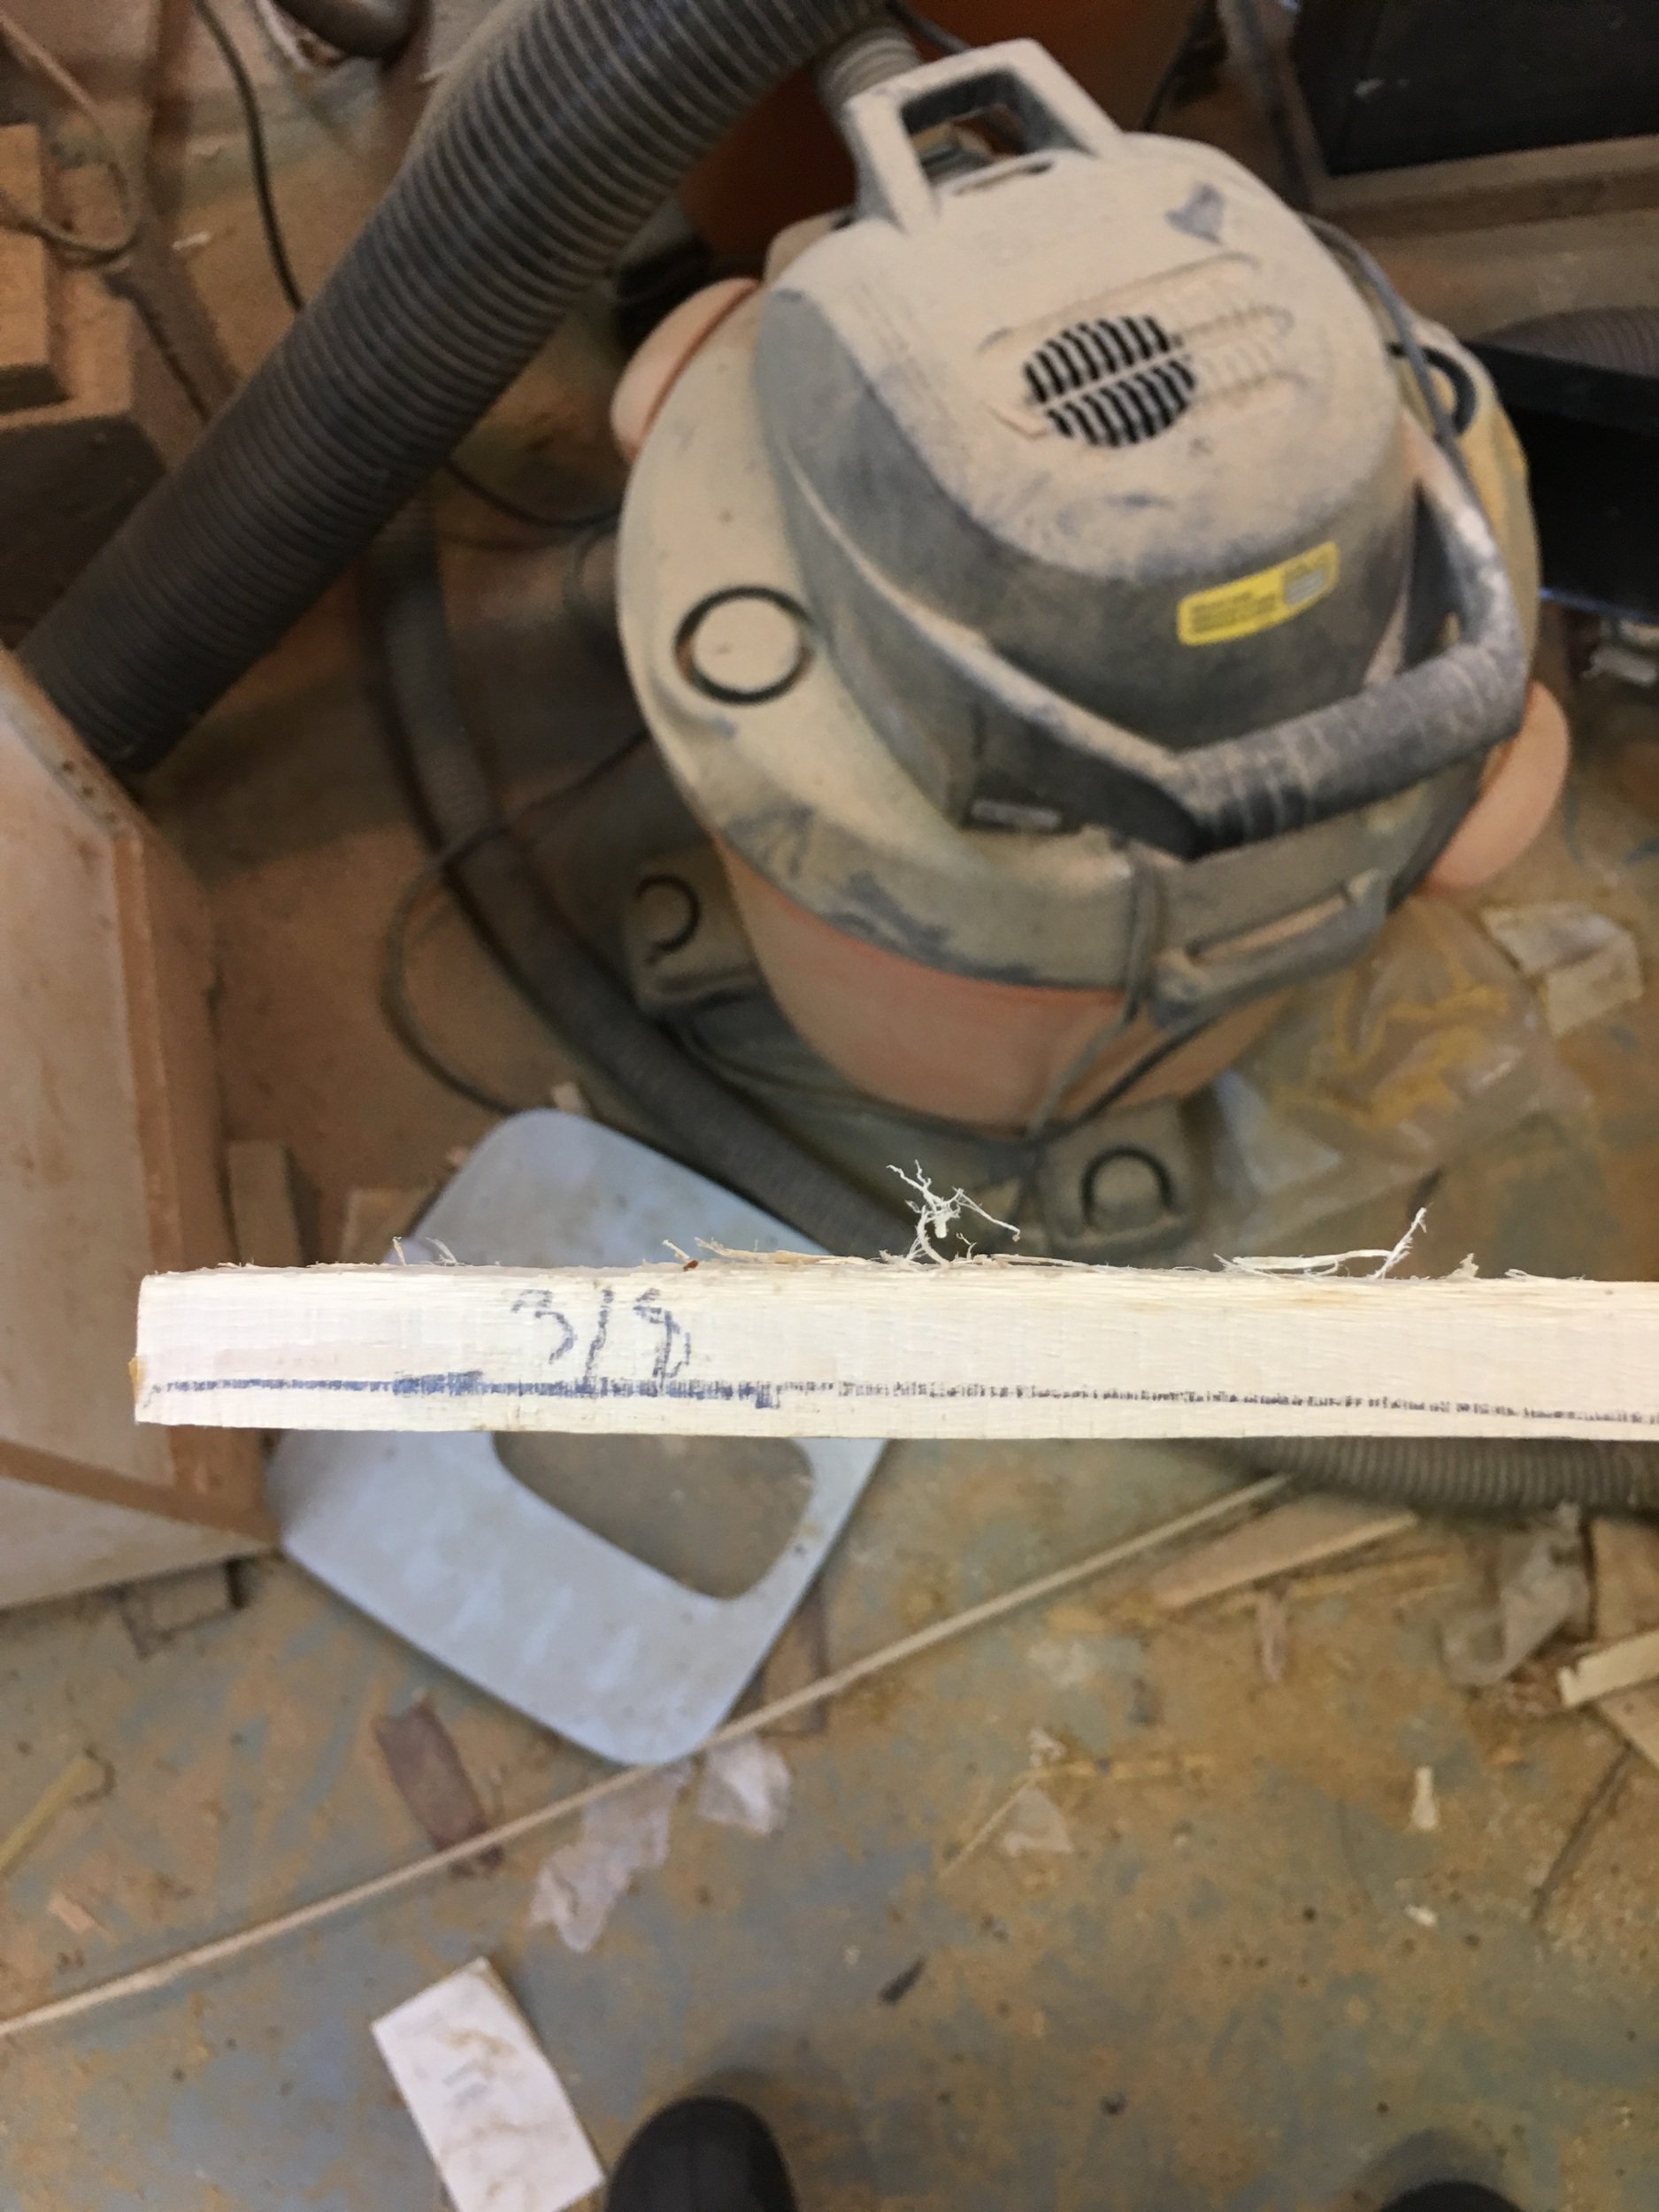
Now trim off the back of the bow, making sure to keep the limbs straight. You should be about 3/4" thick at the fades down to 1/2" thick at the tips. The handle area can be kept round or flattened.
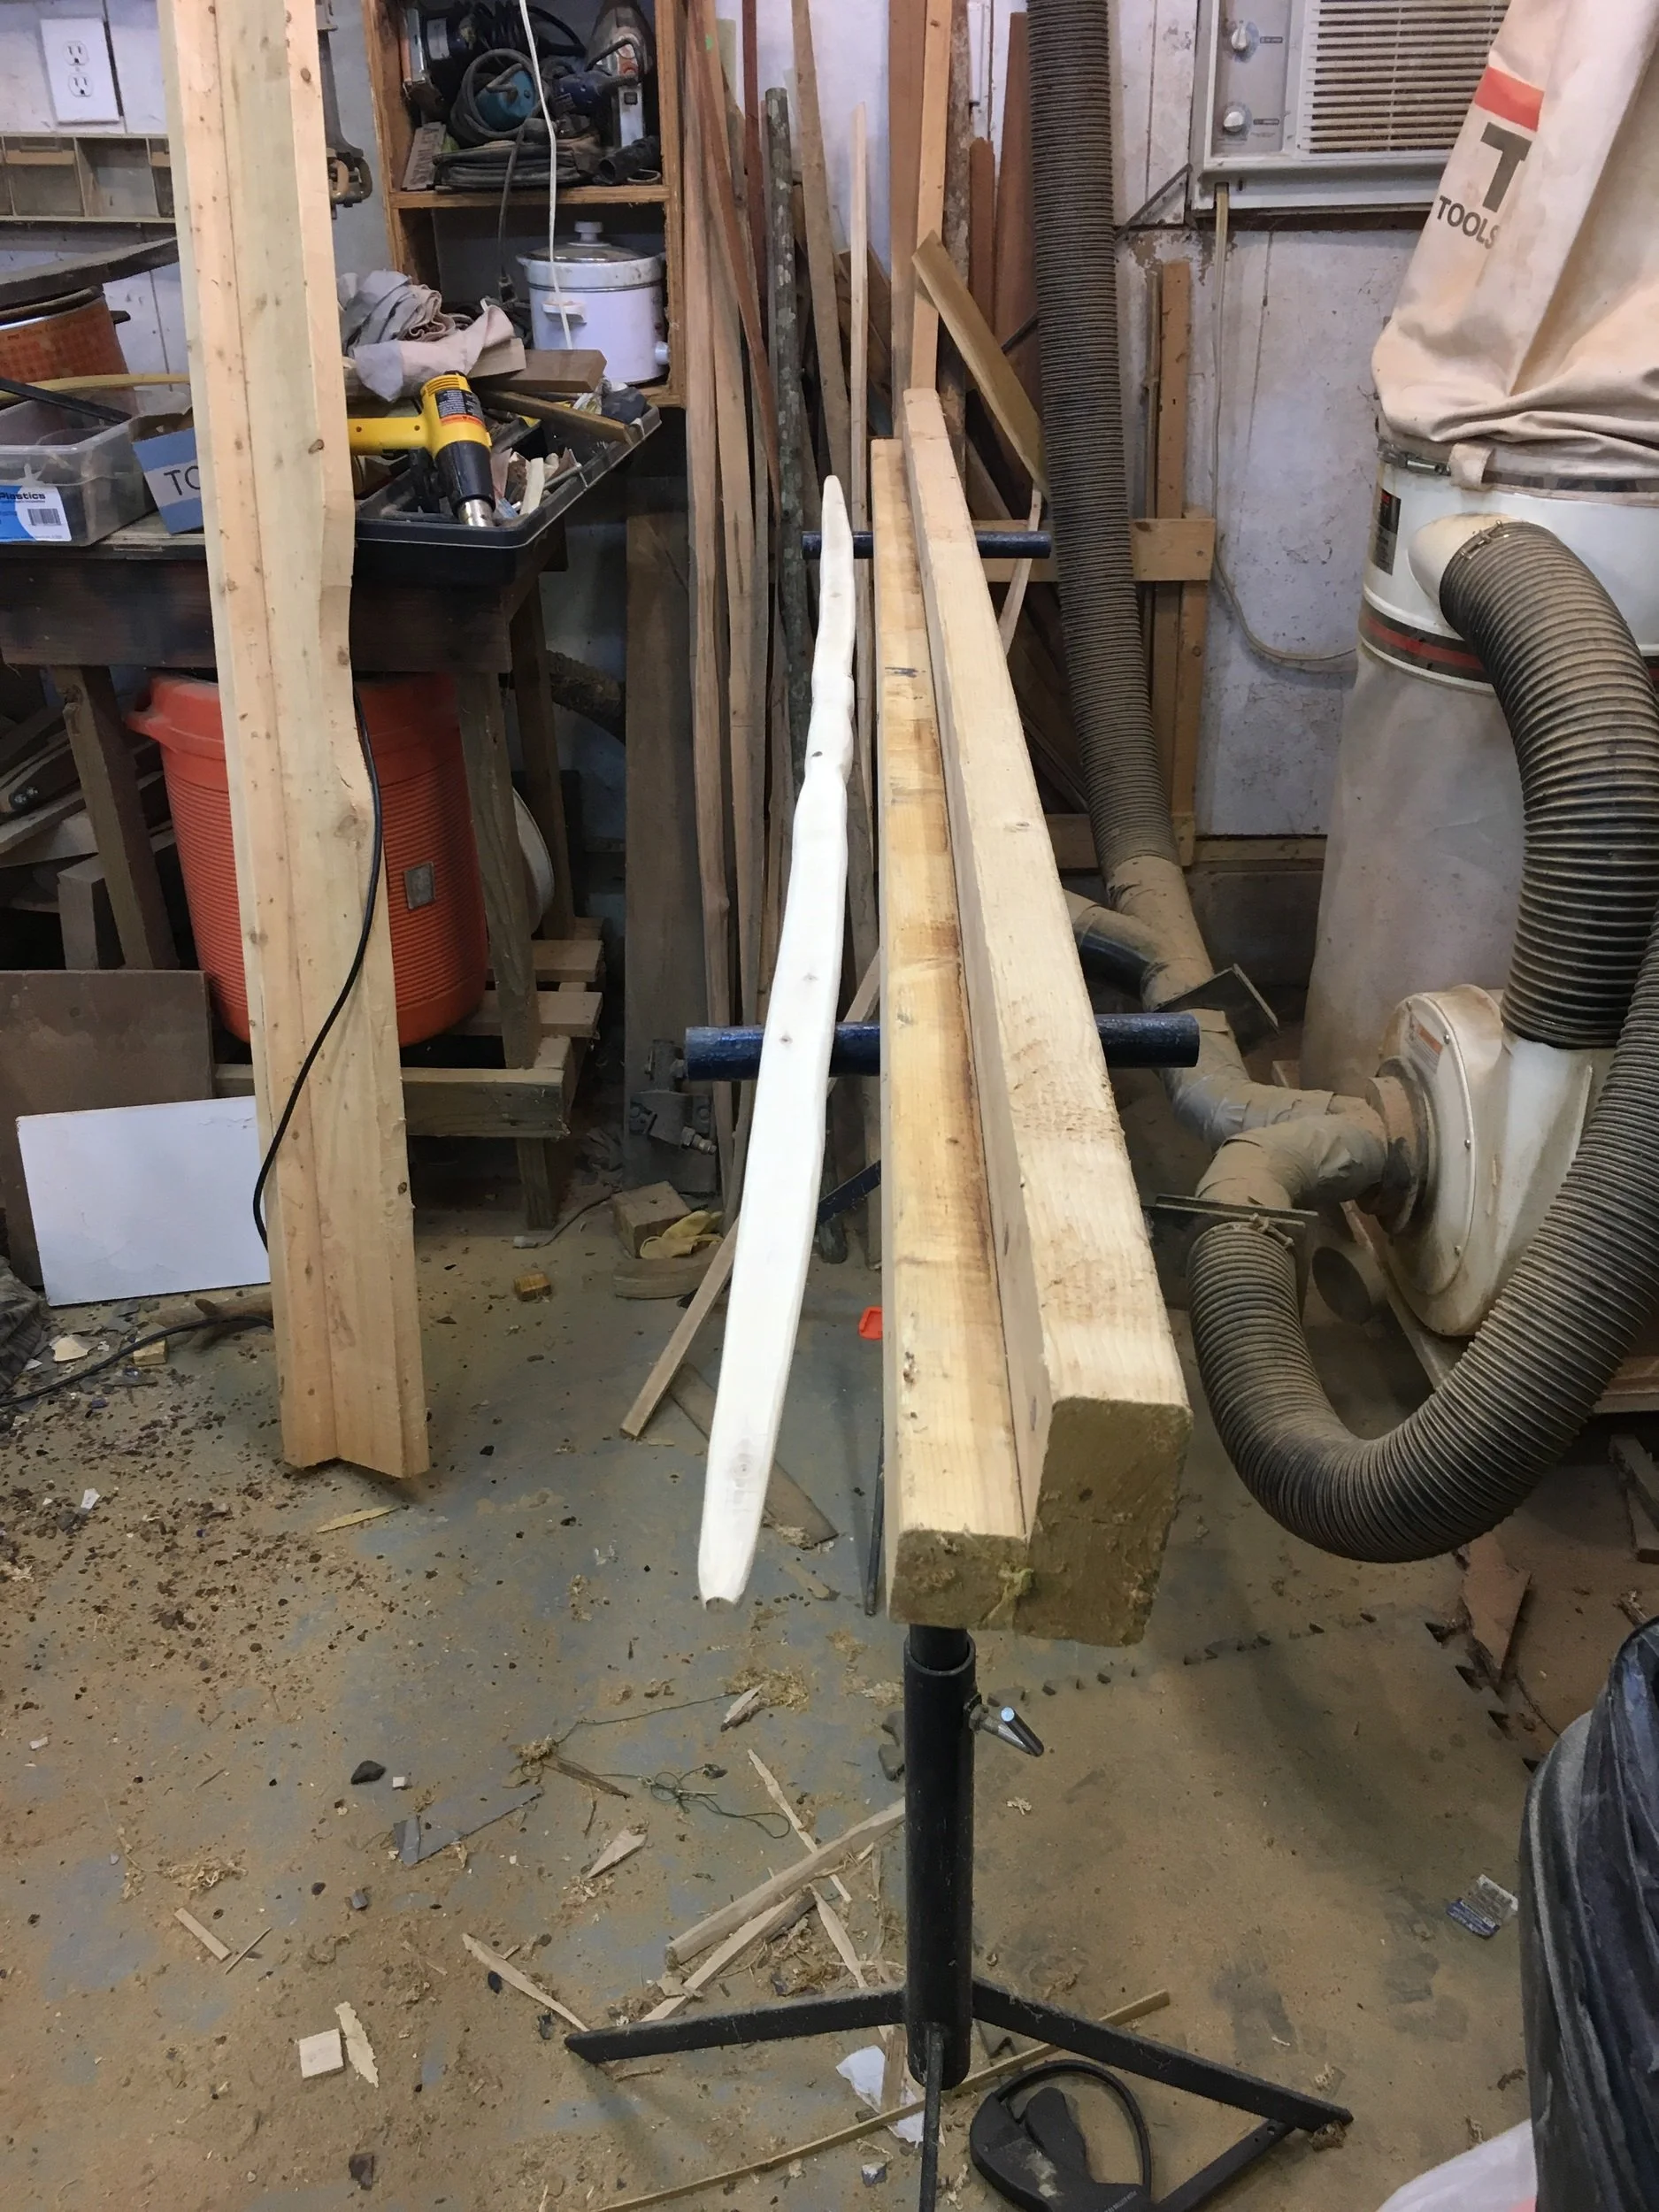
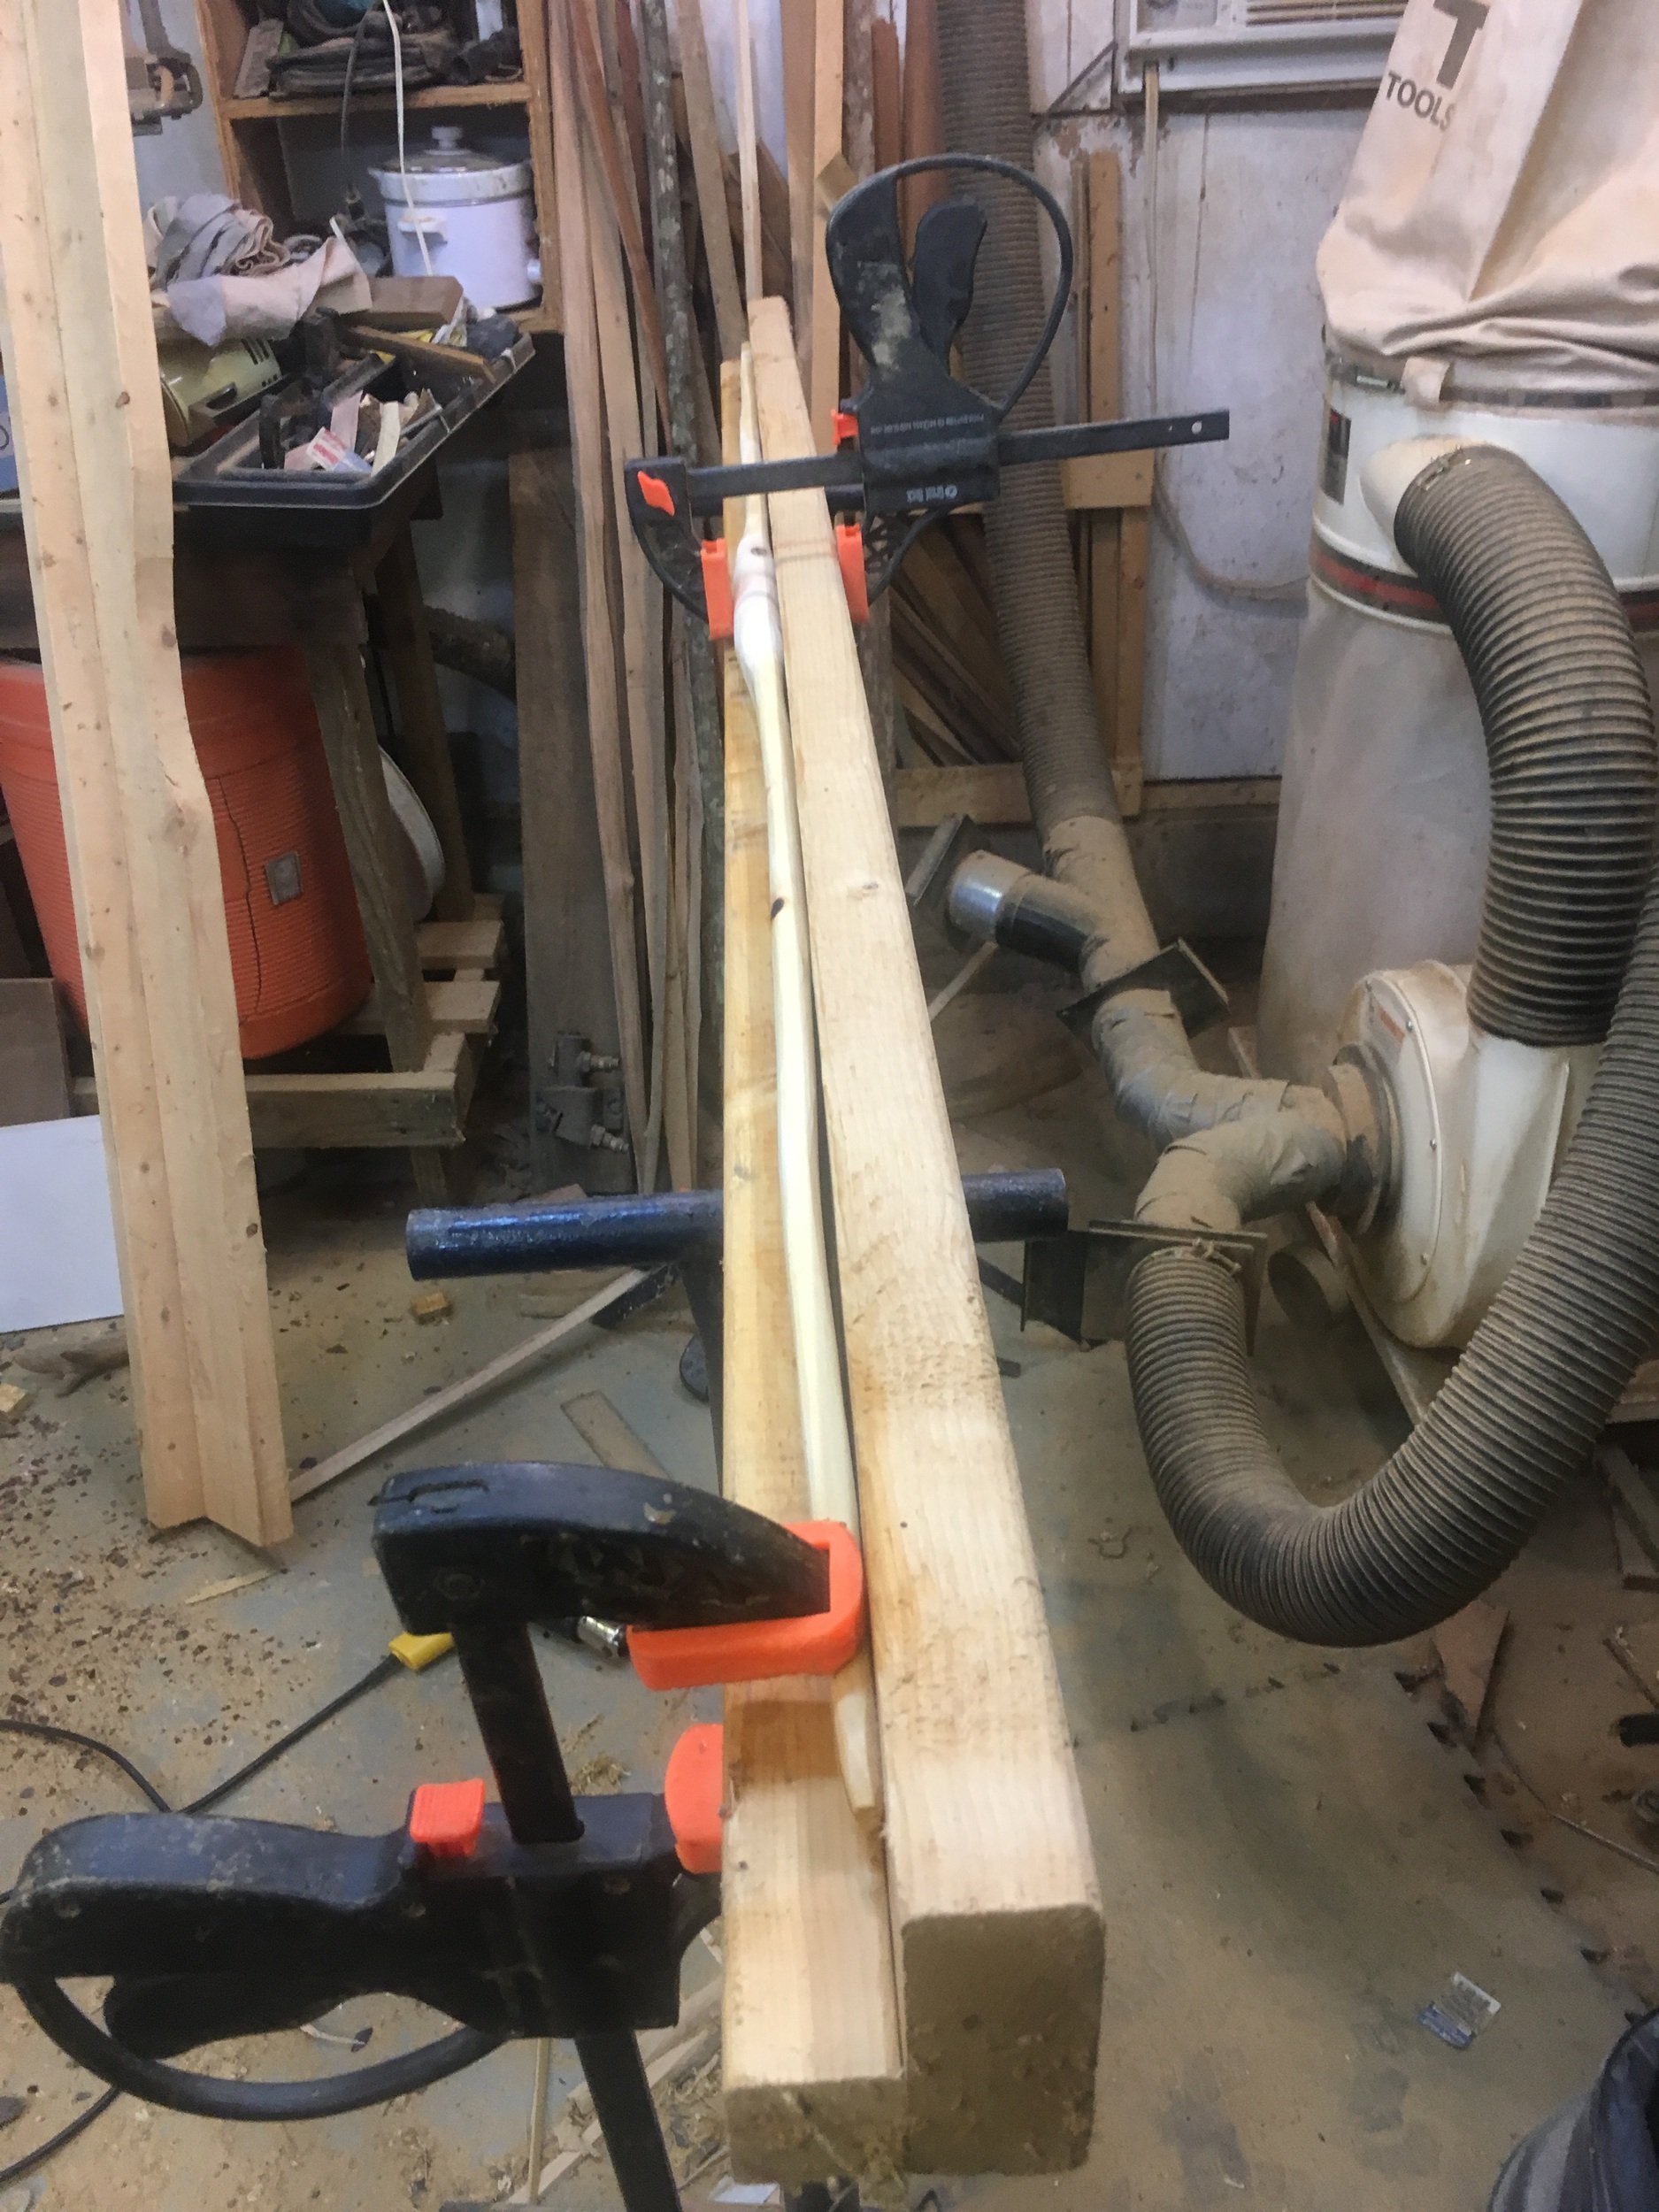
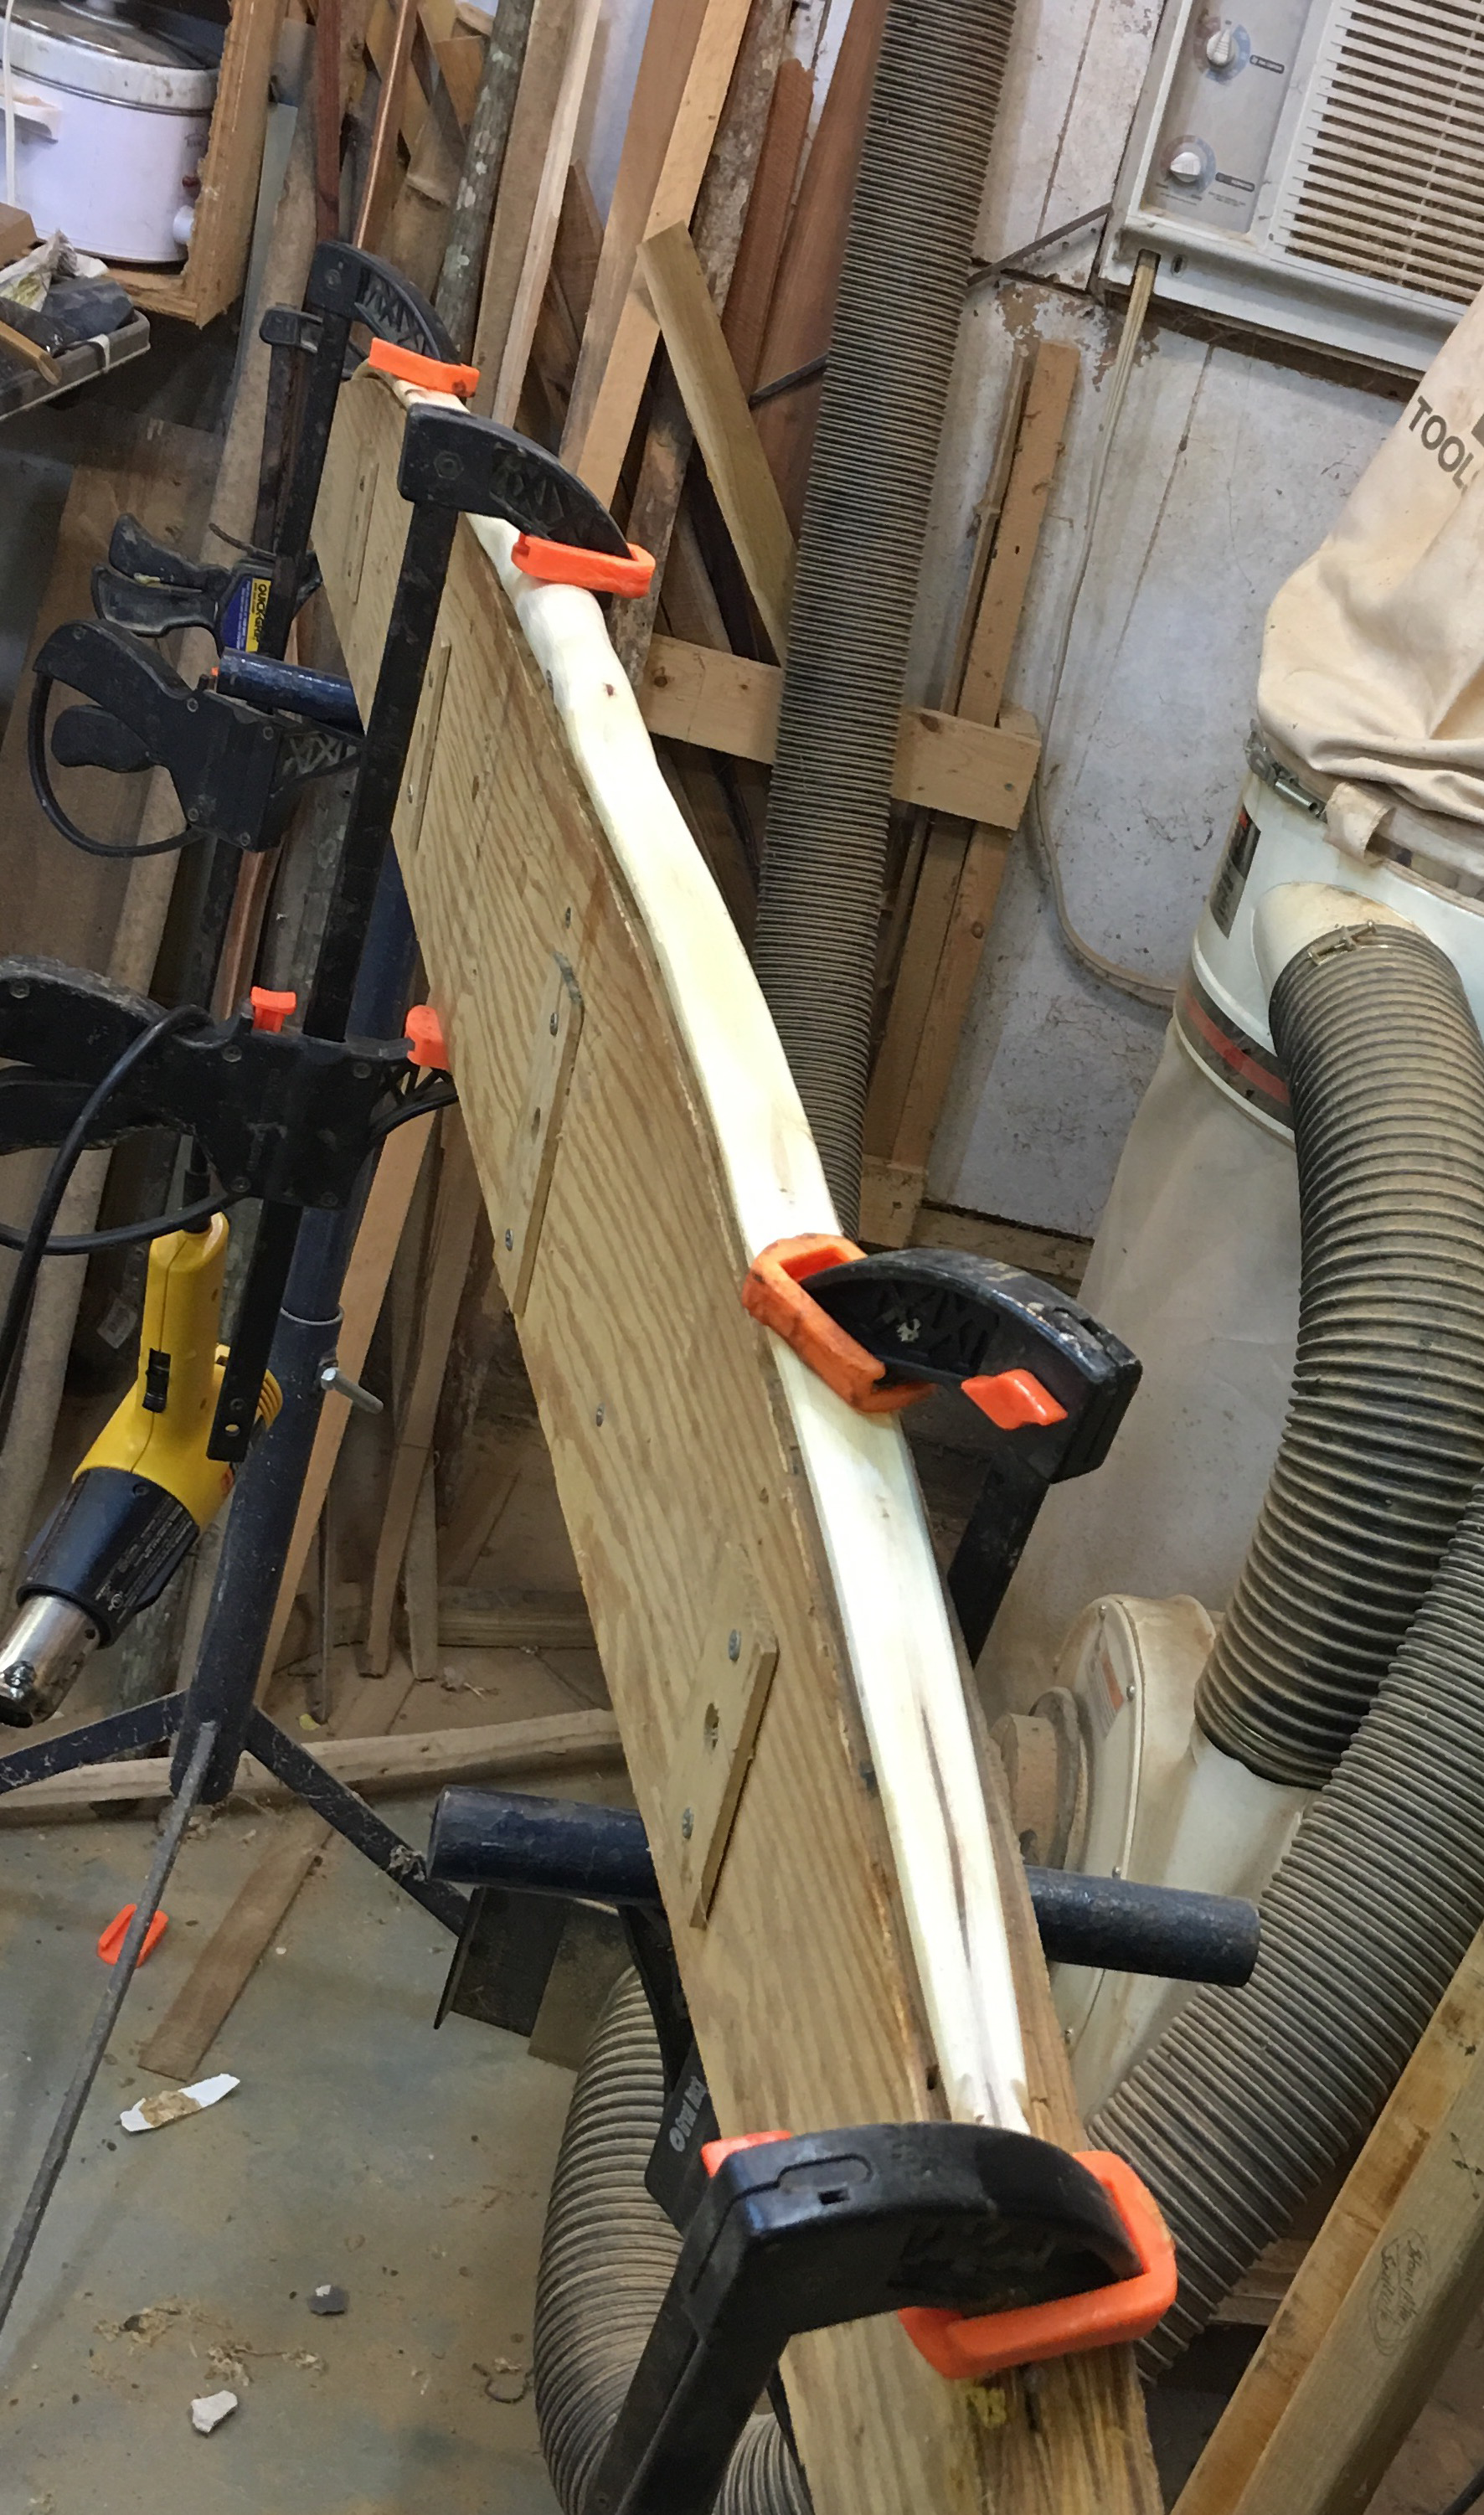
Make yourself a form like the one pictured. We will use it to straighten the sapling.
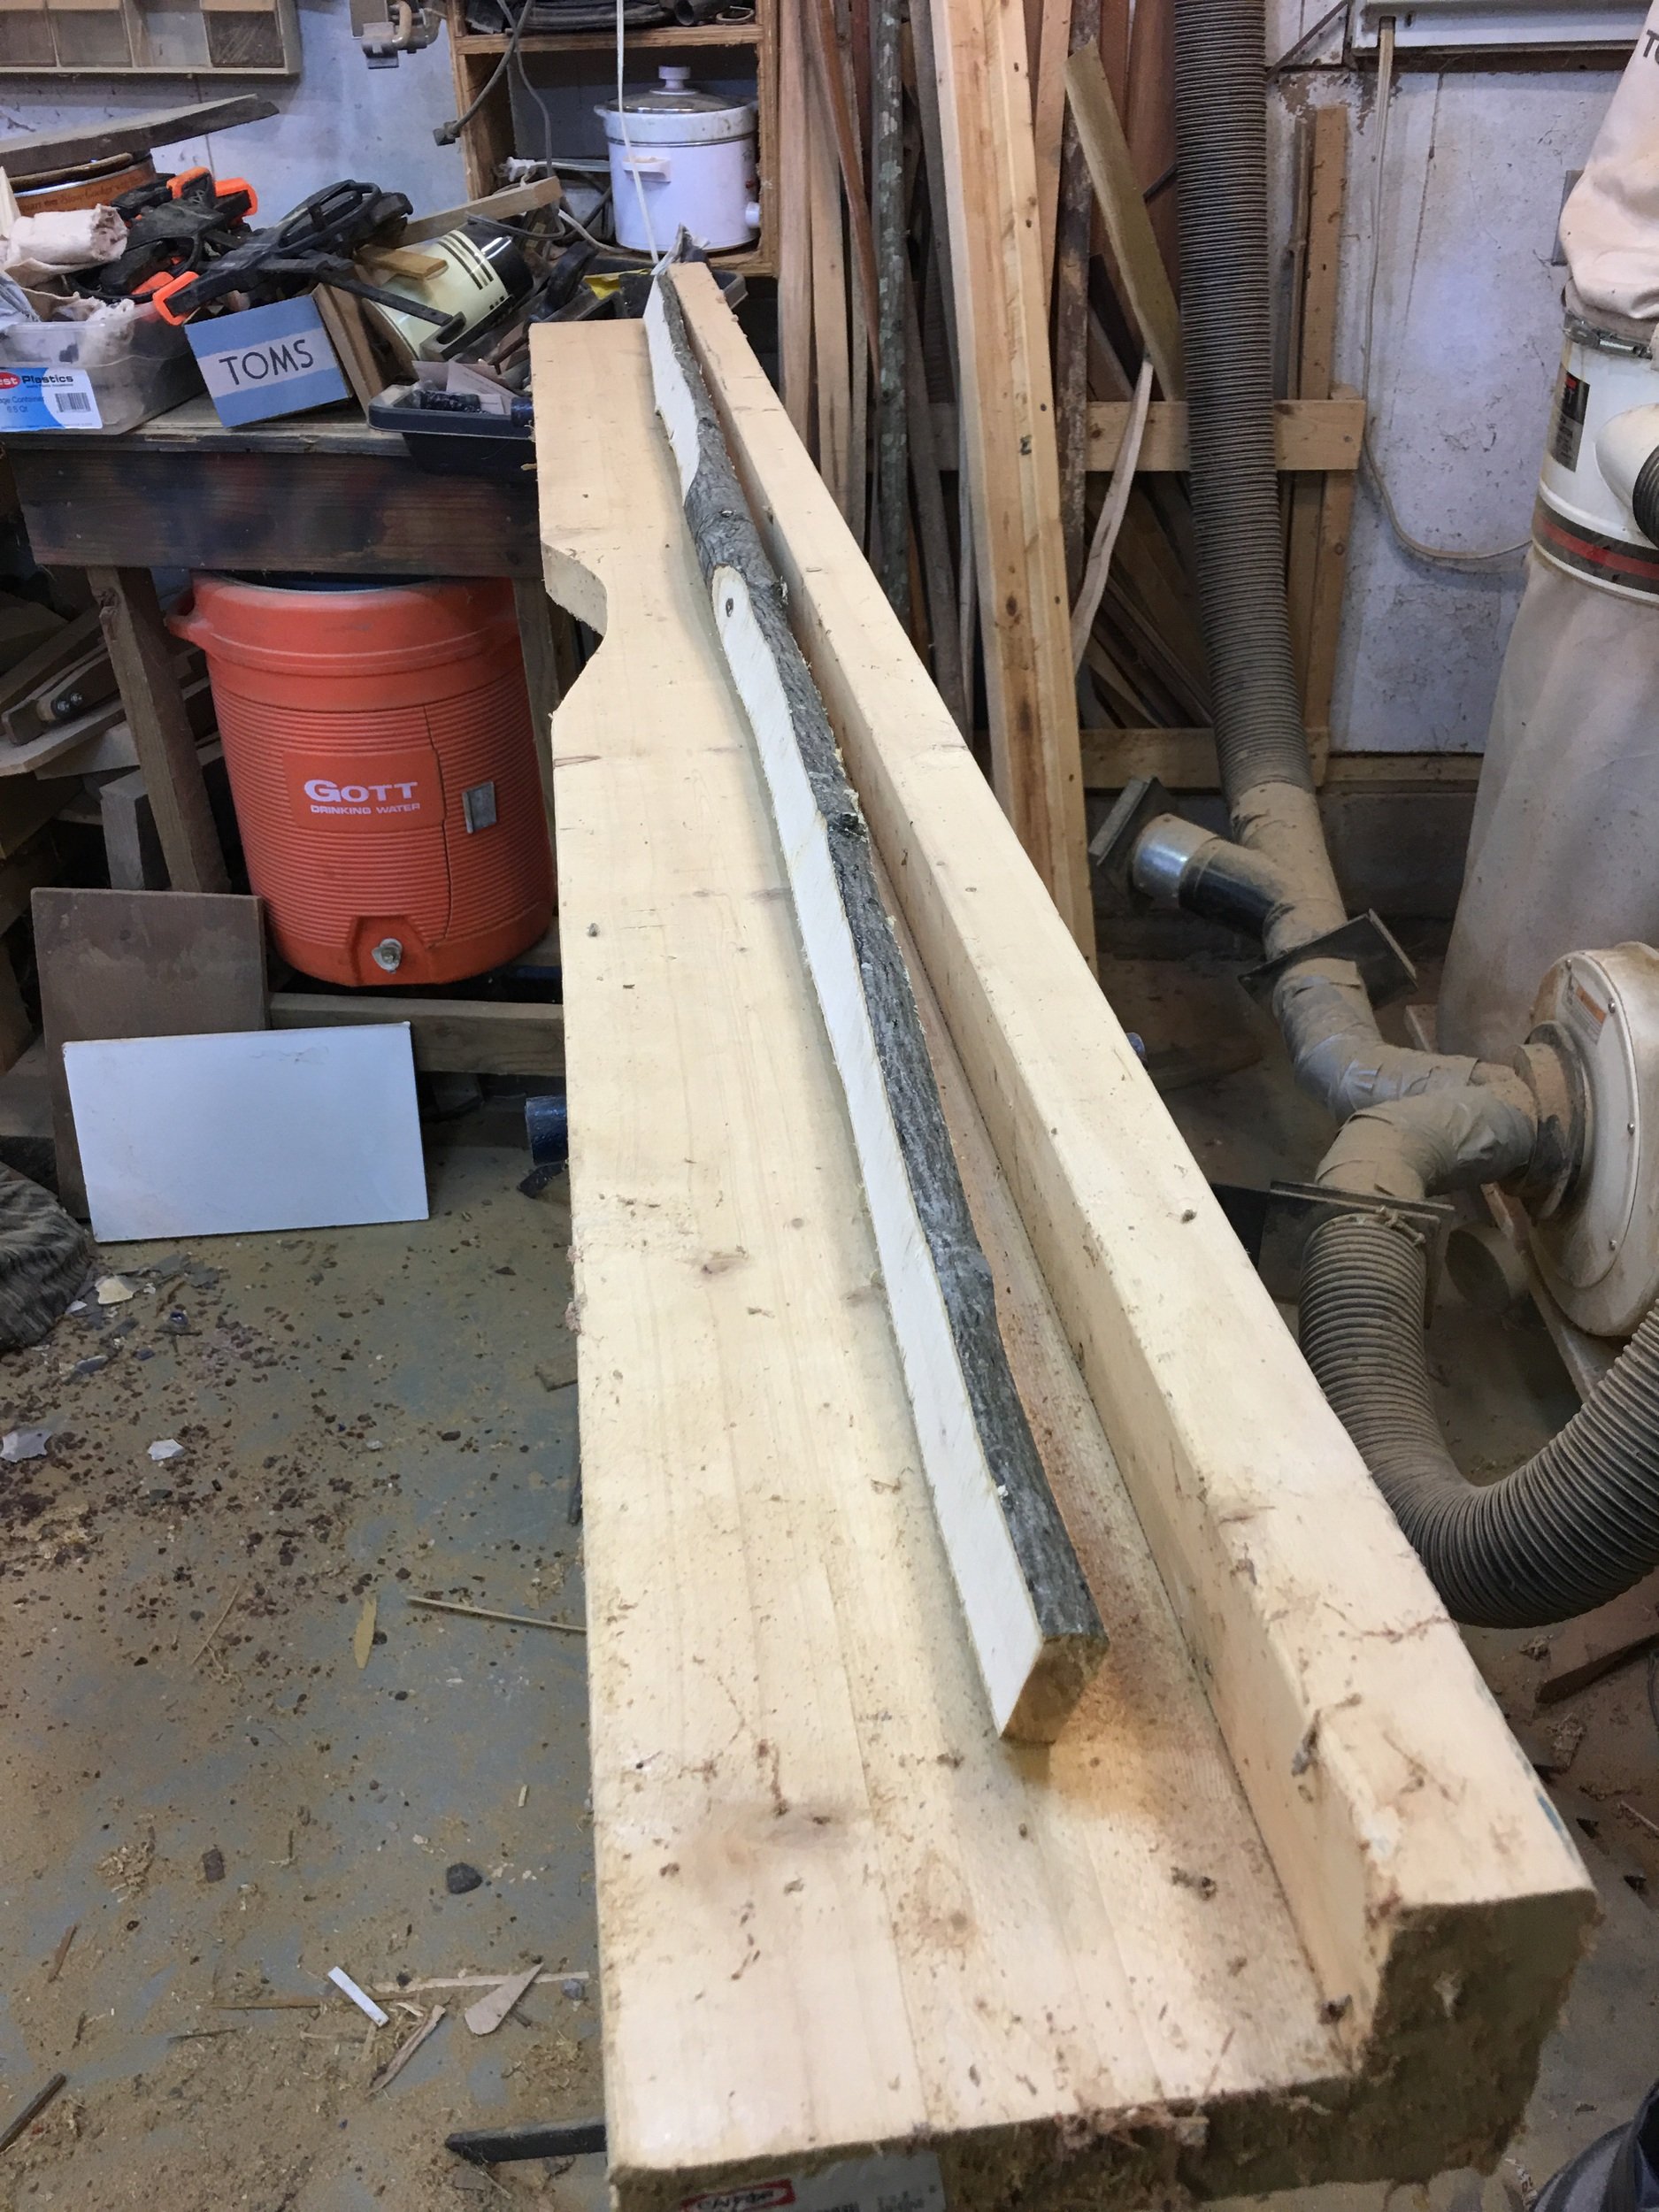
Clamp the bow with the belly facing you to the form. The wood is wet and will bend fairly easily at this point. Make sure you clamp it to both the base and the back of the form. Let the bow dry for about two weeks.
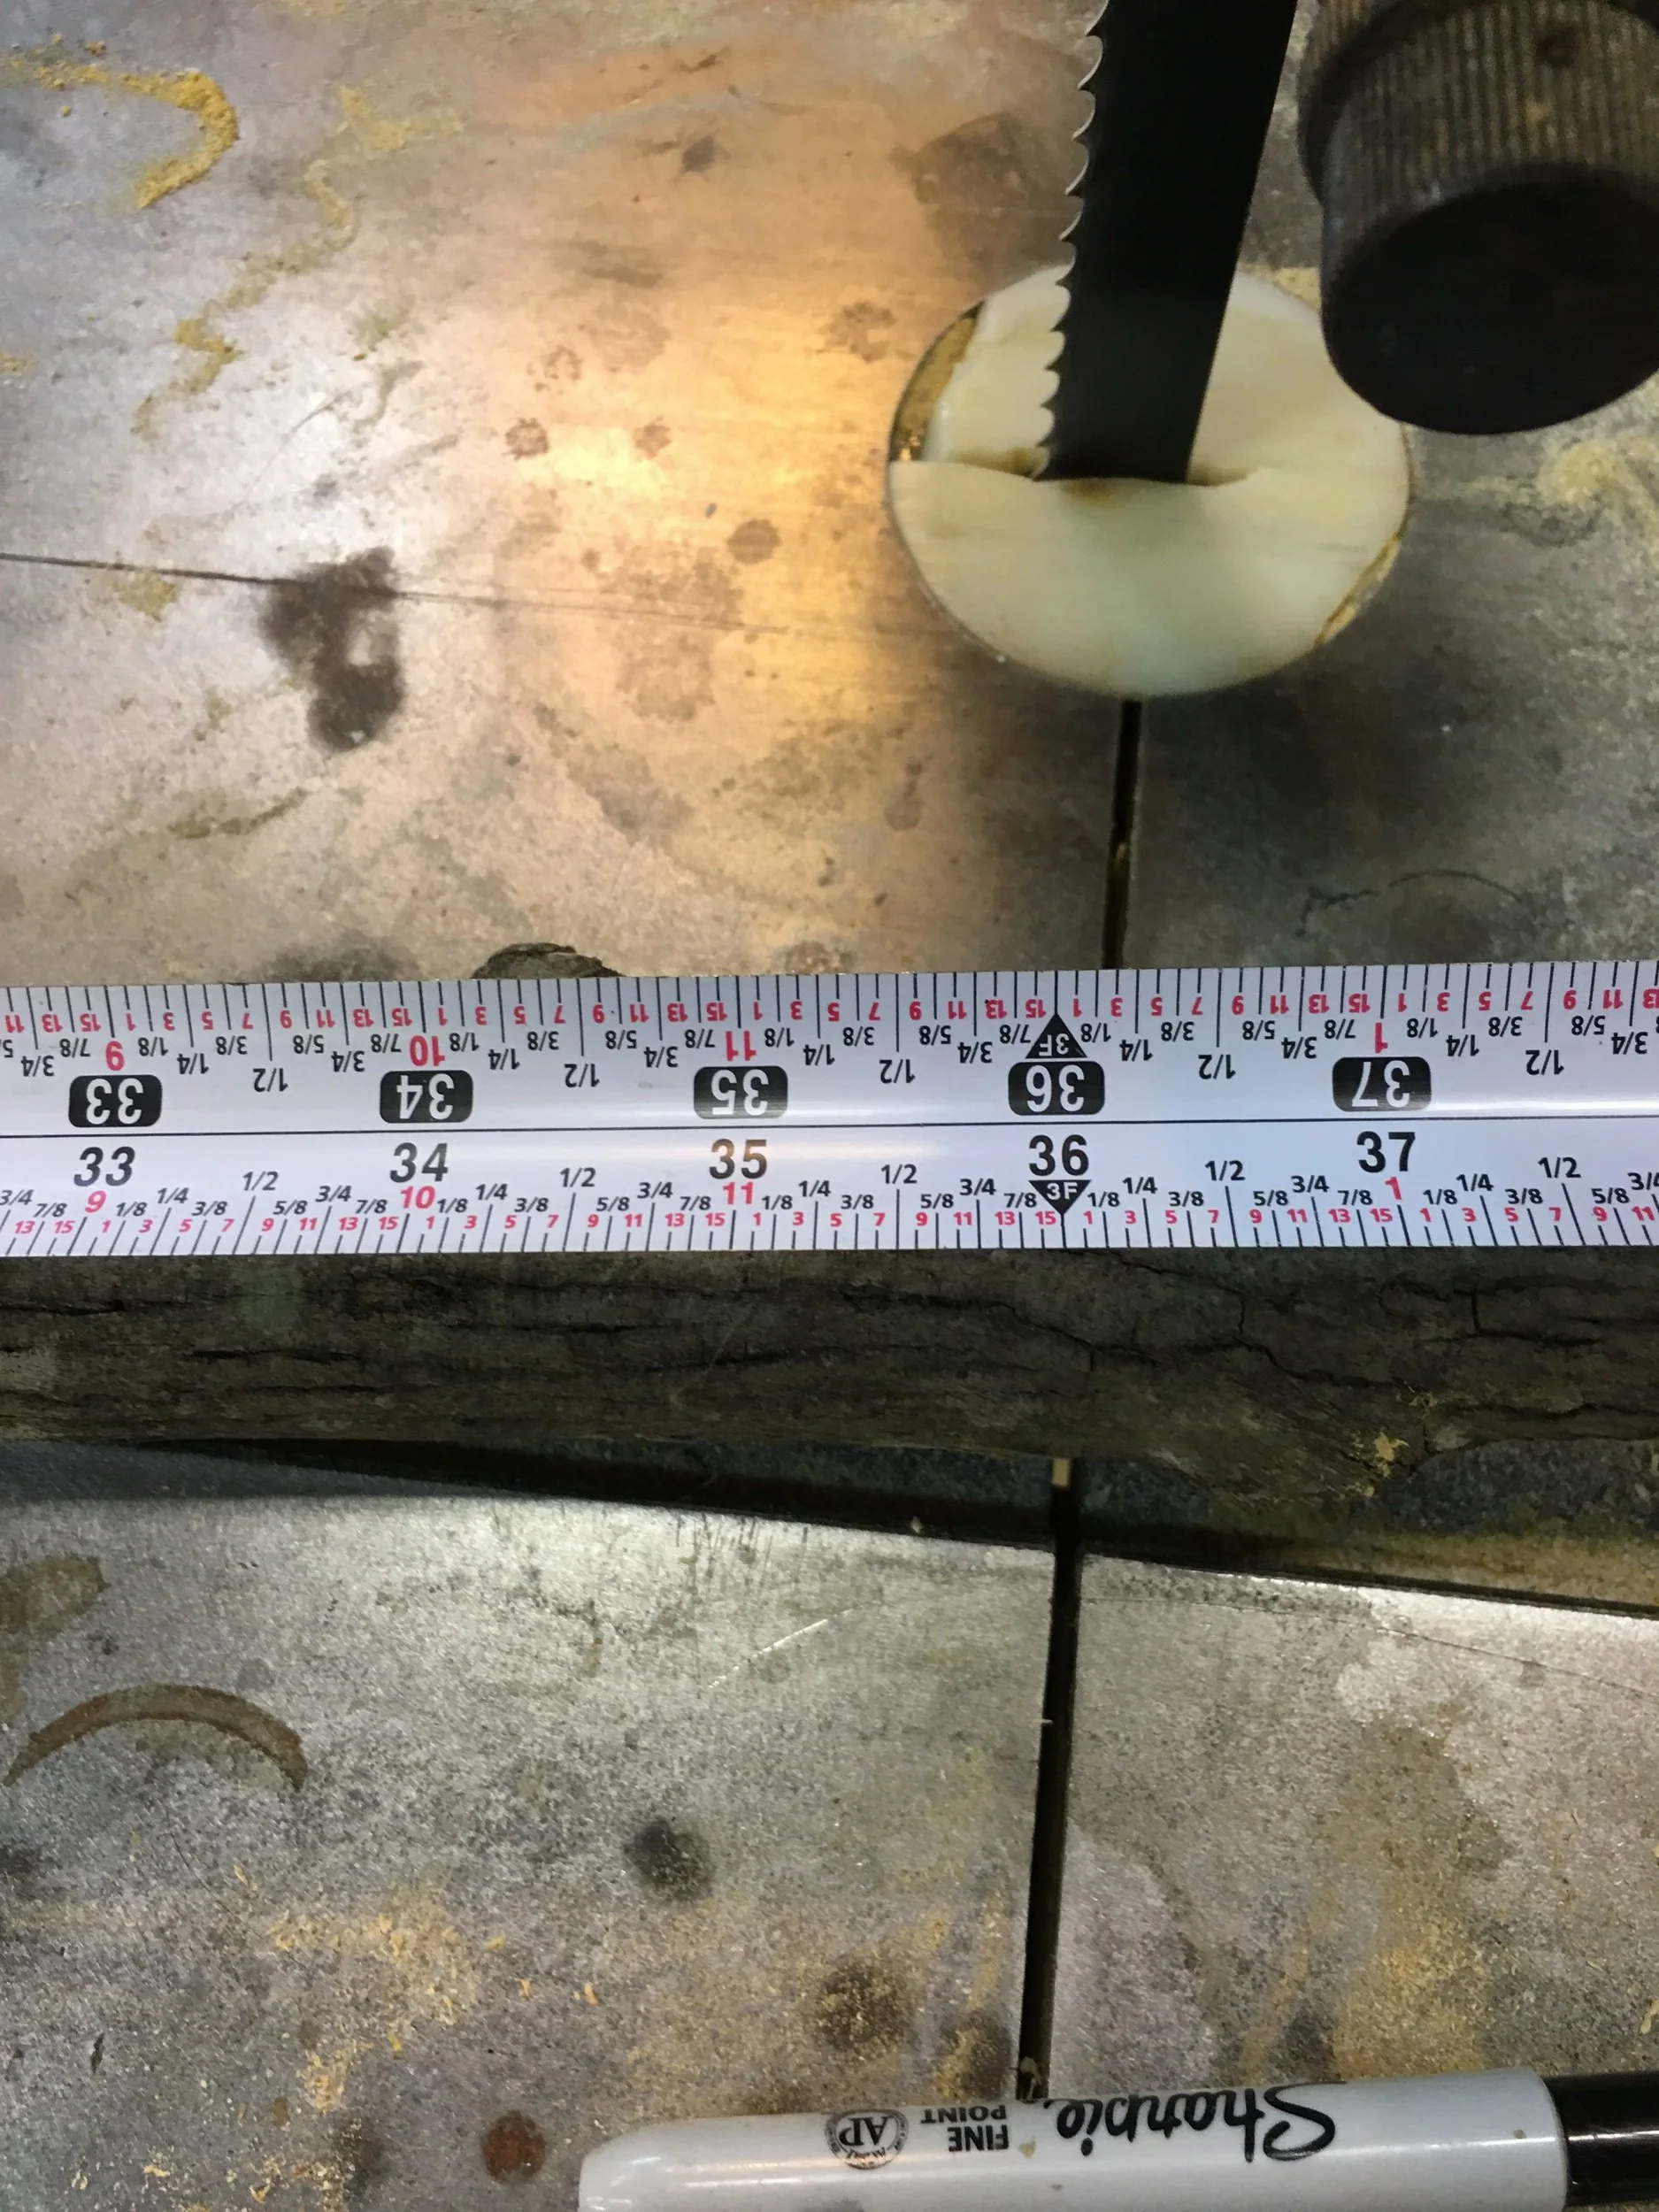
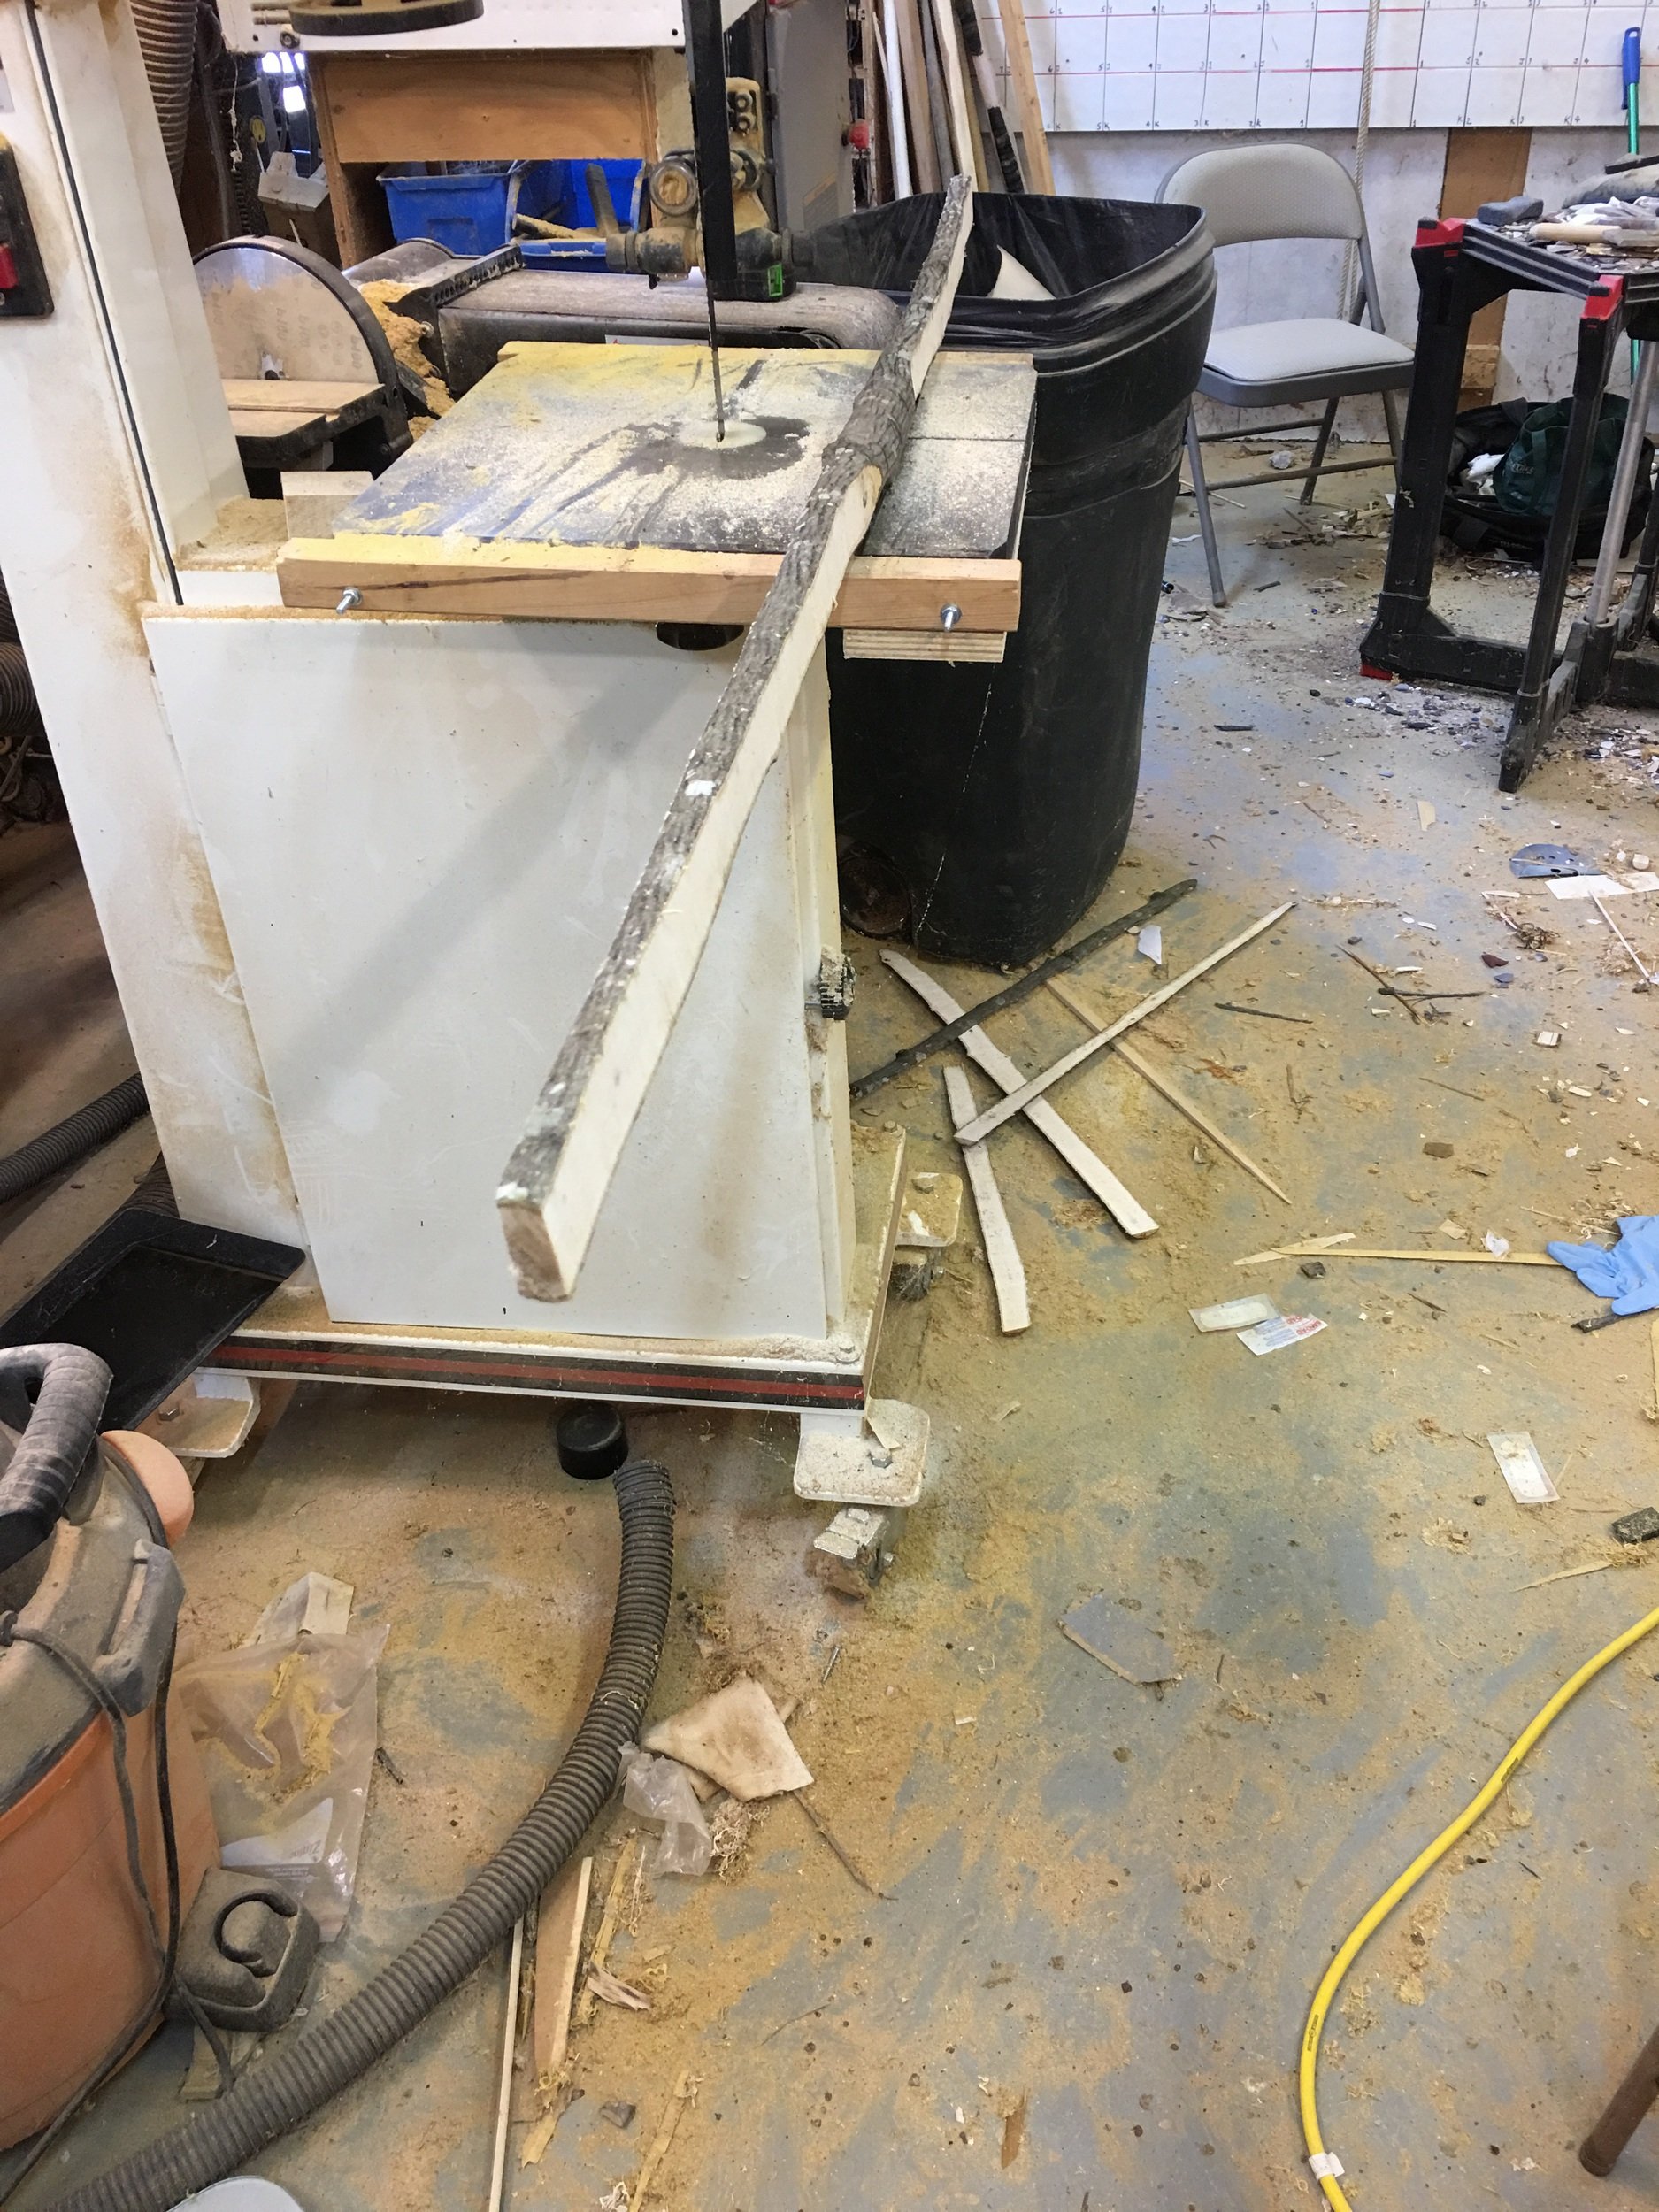
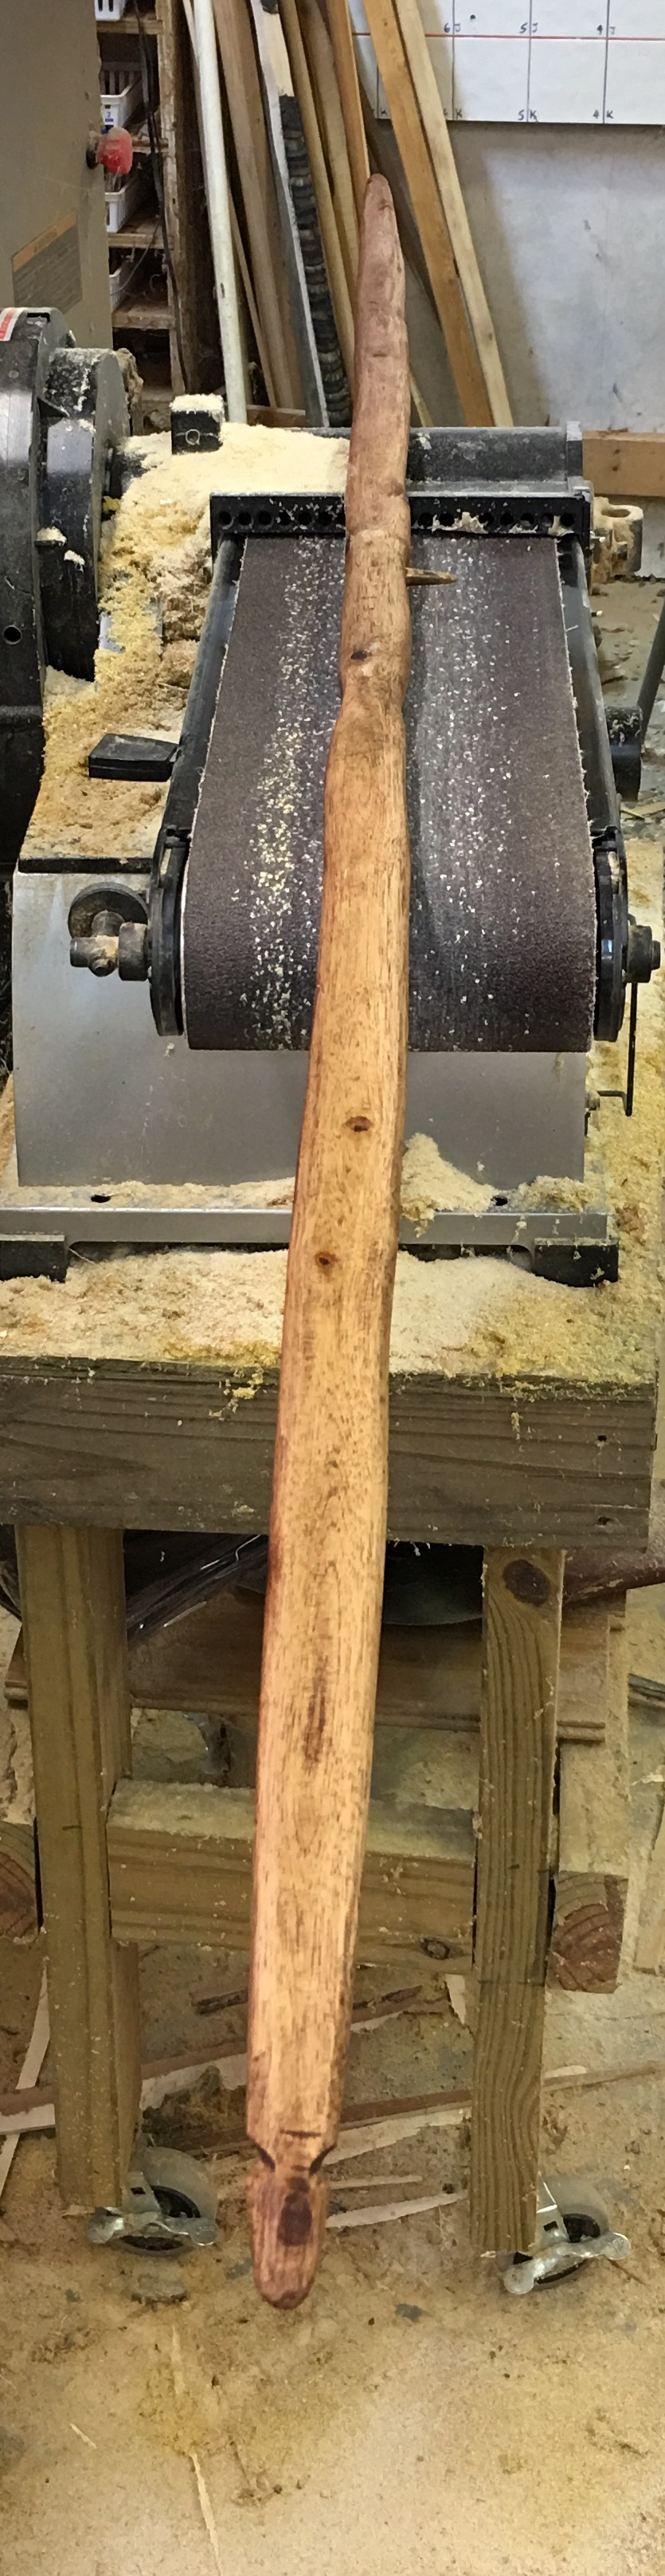
When the bow feels dry, it is time to saw out the profile. I like an American flatbow style. But you can use your own pattern. I have made a pattern as you see here. It is 1 3/4" wide at the fades. It then narrows down to 1 1/2" 11" from the tip. From there, it narrows to 1/2" wide at the tips.
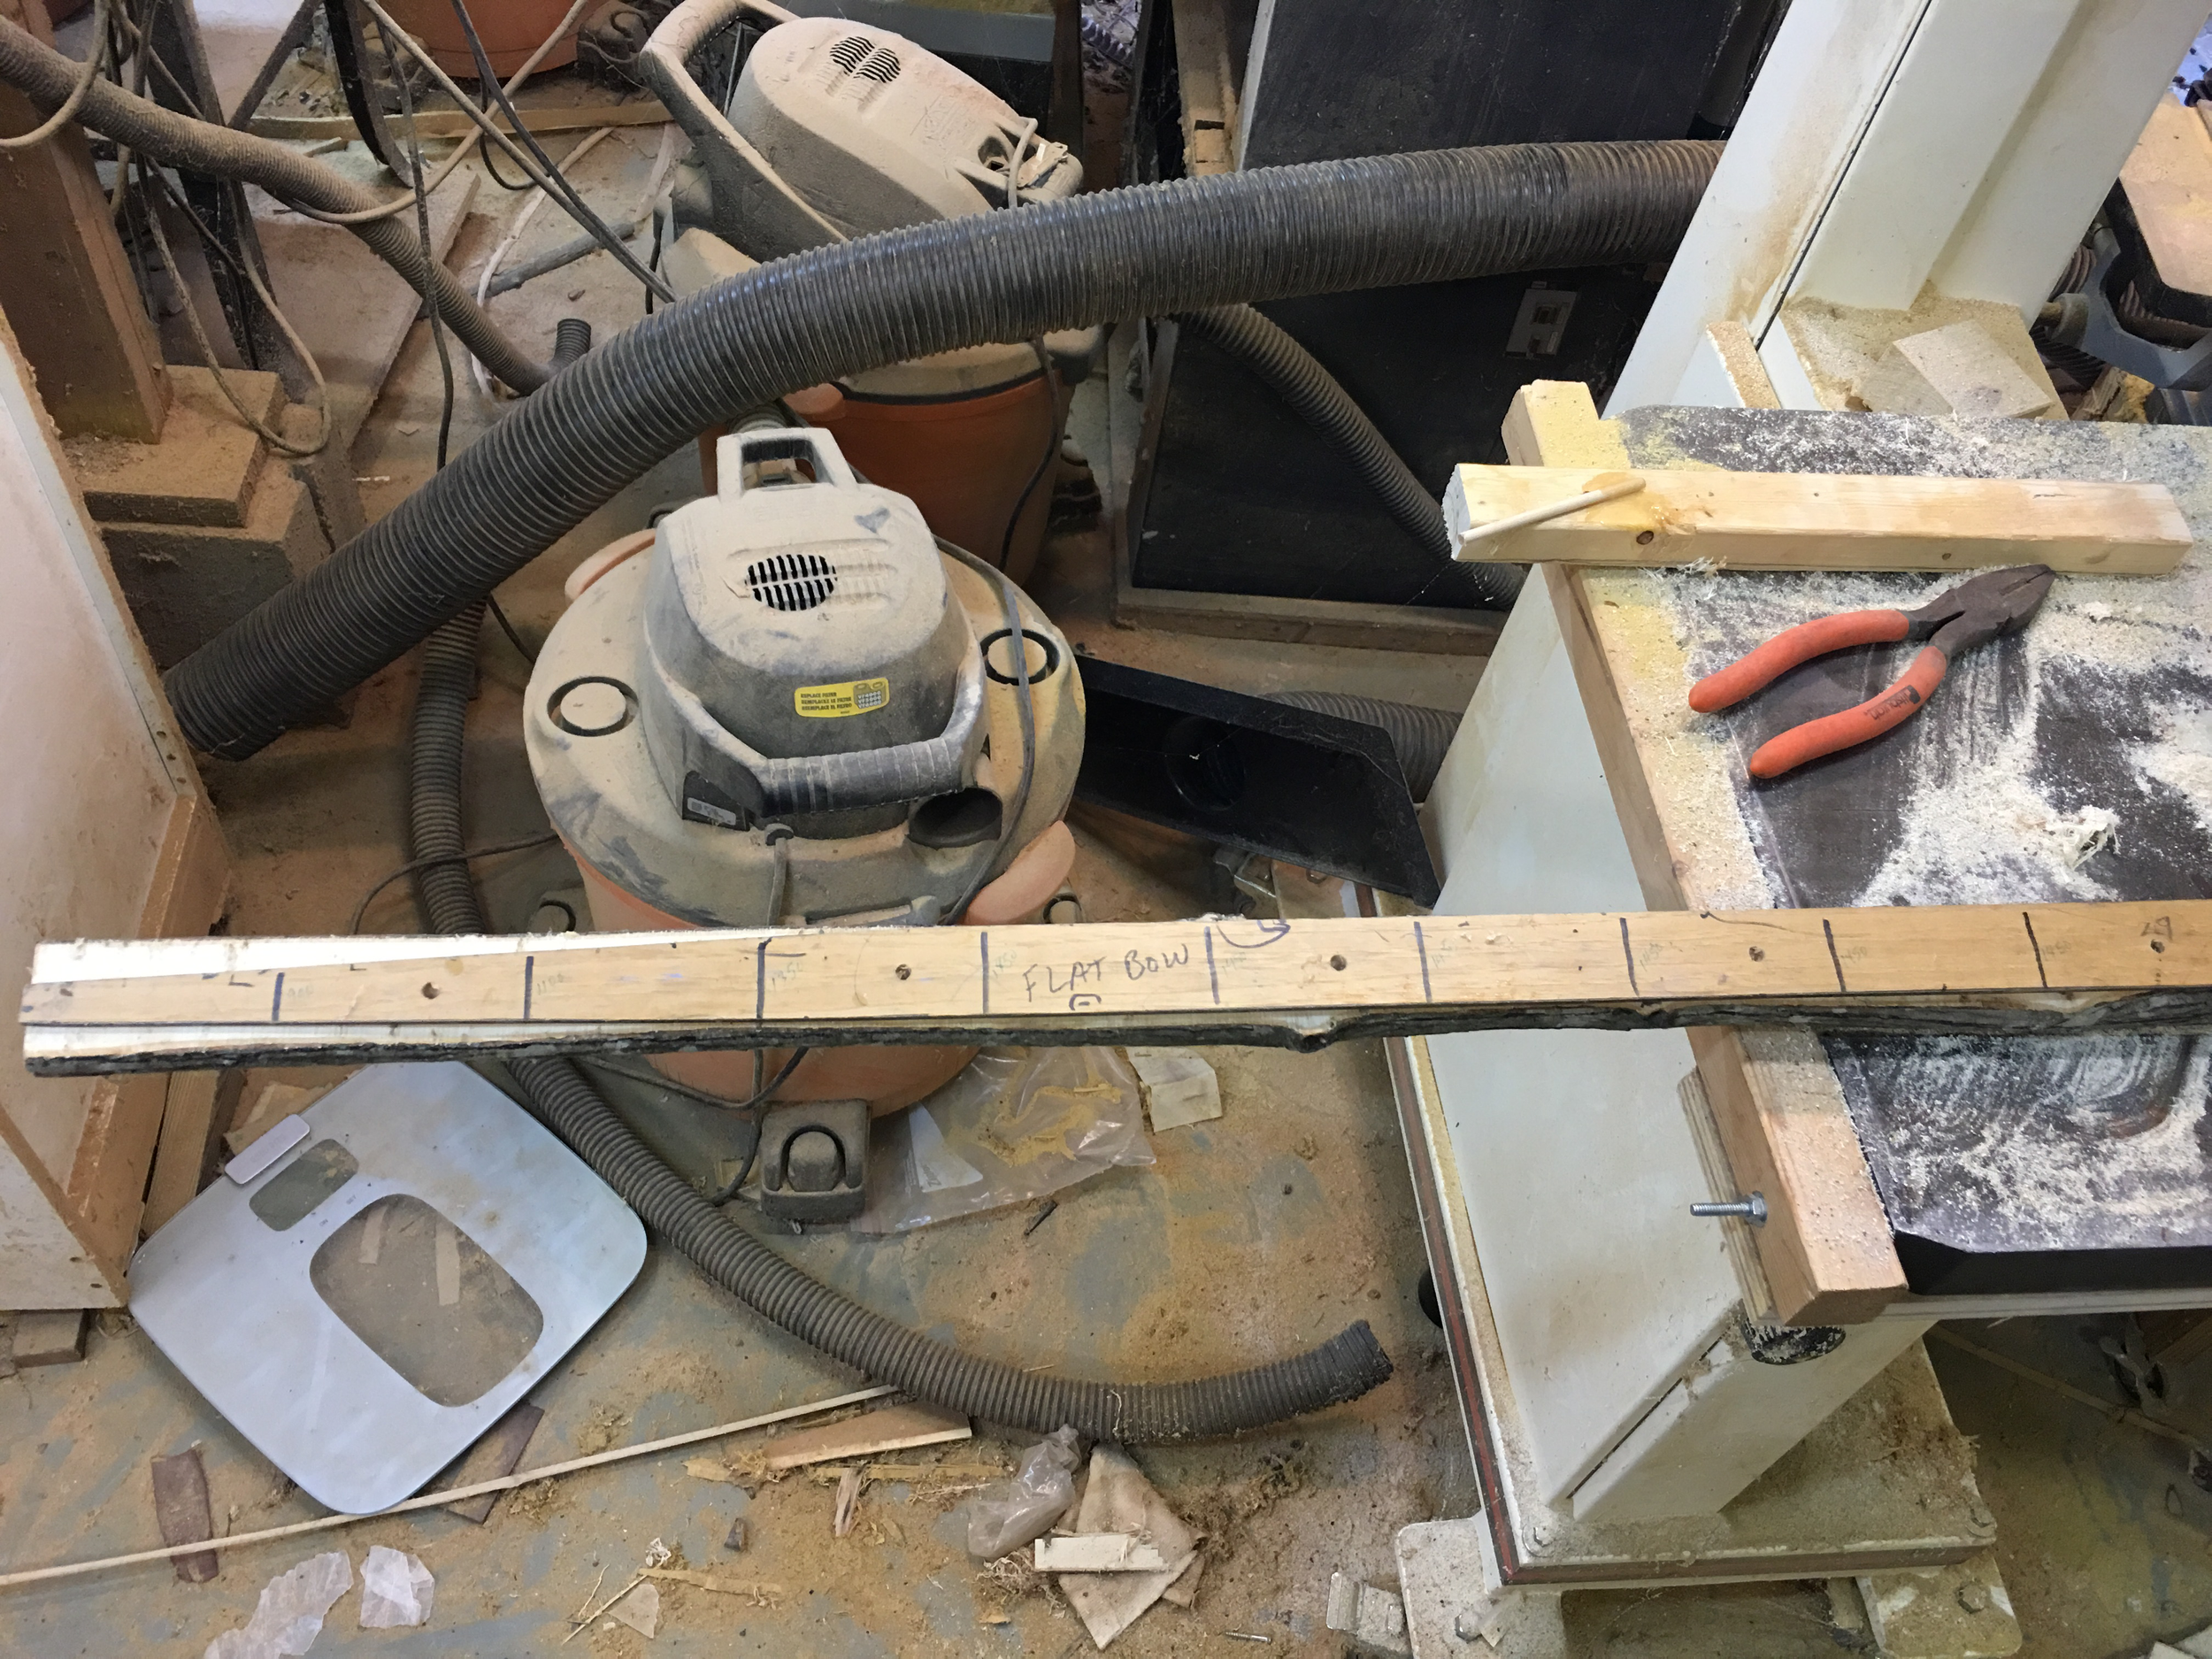
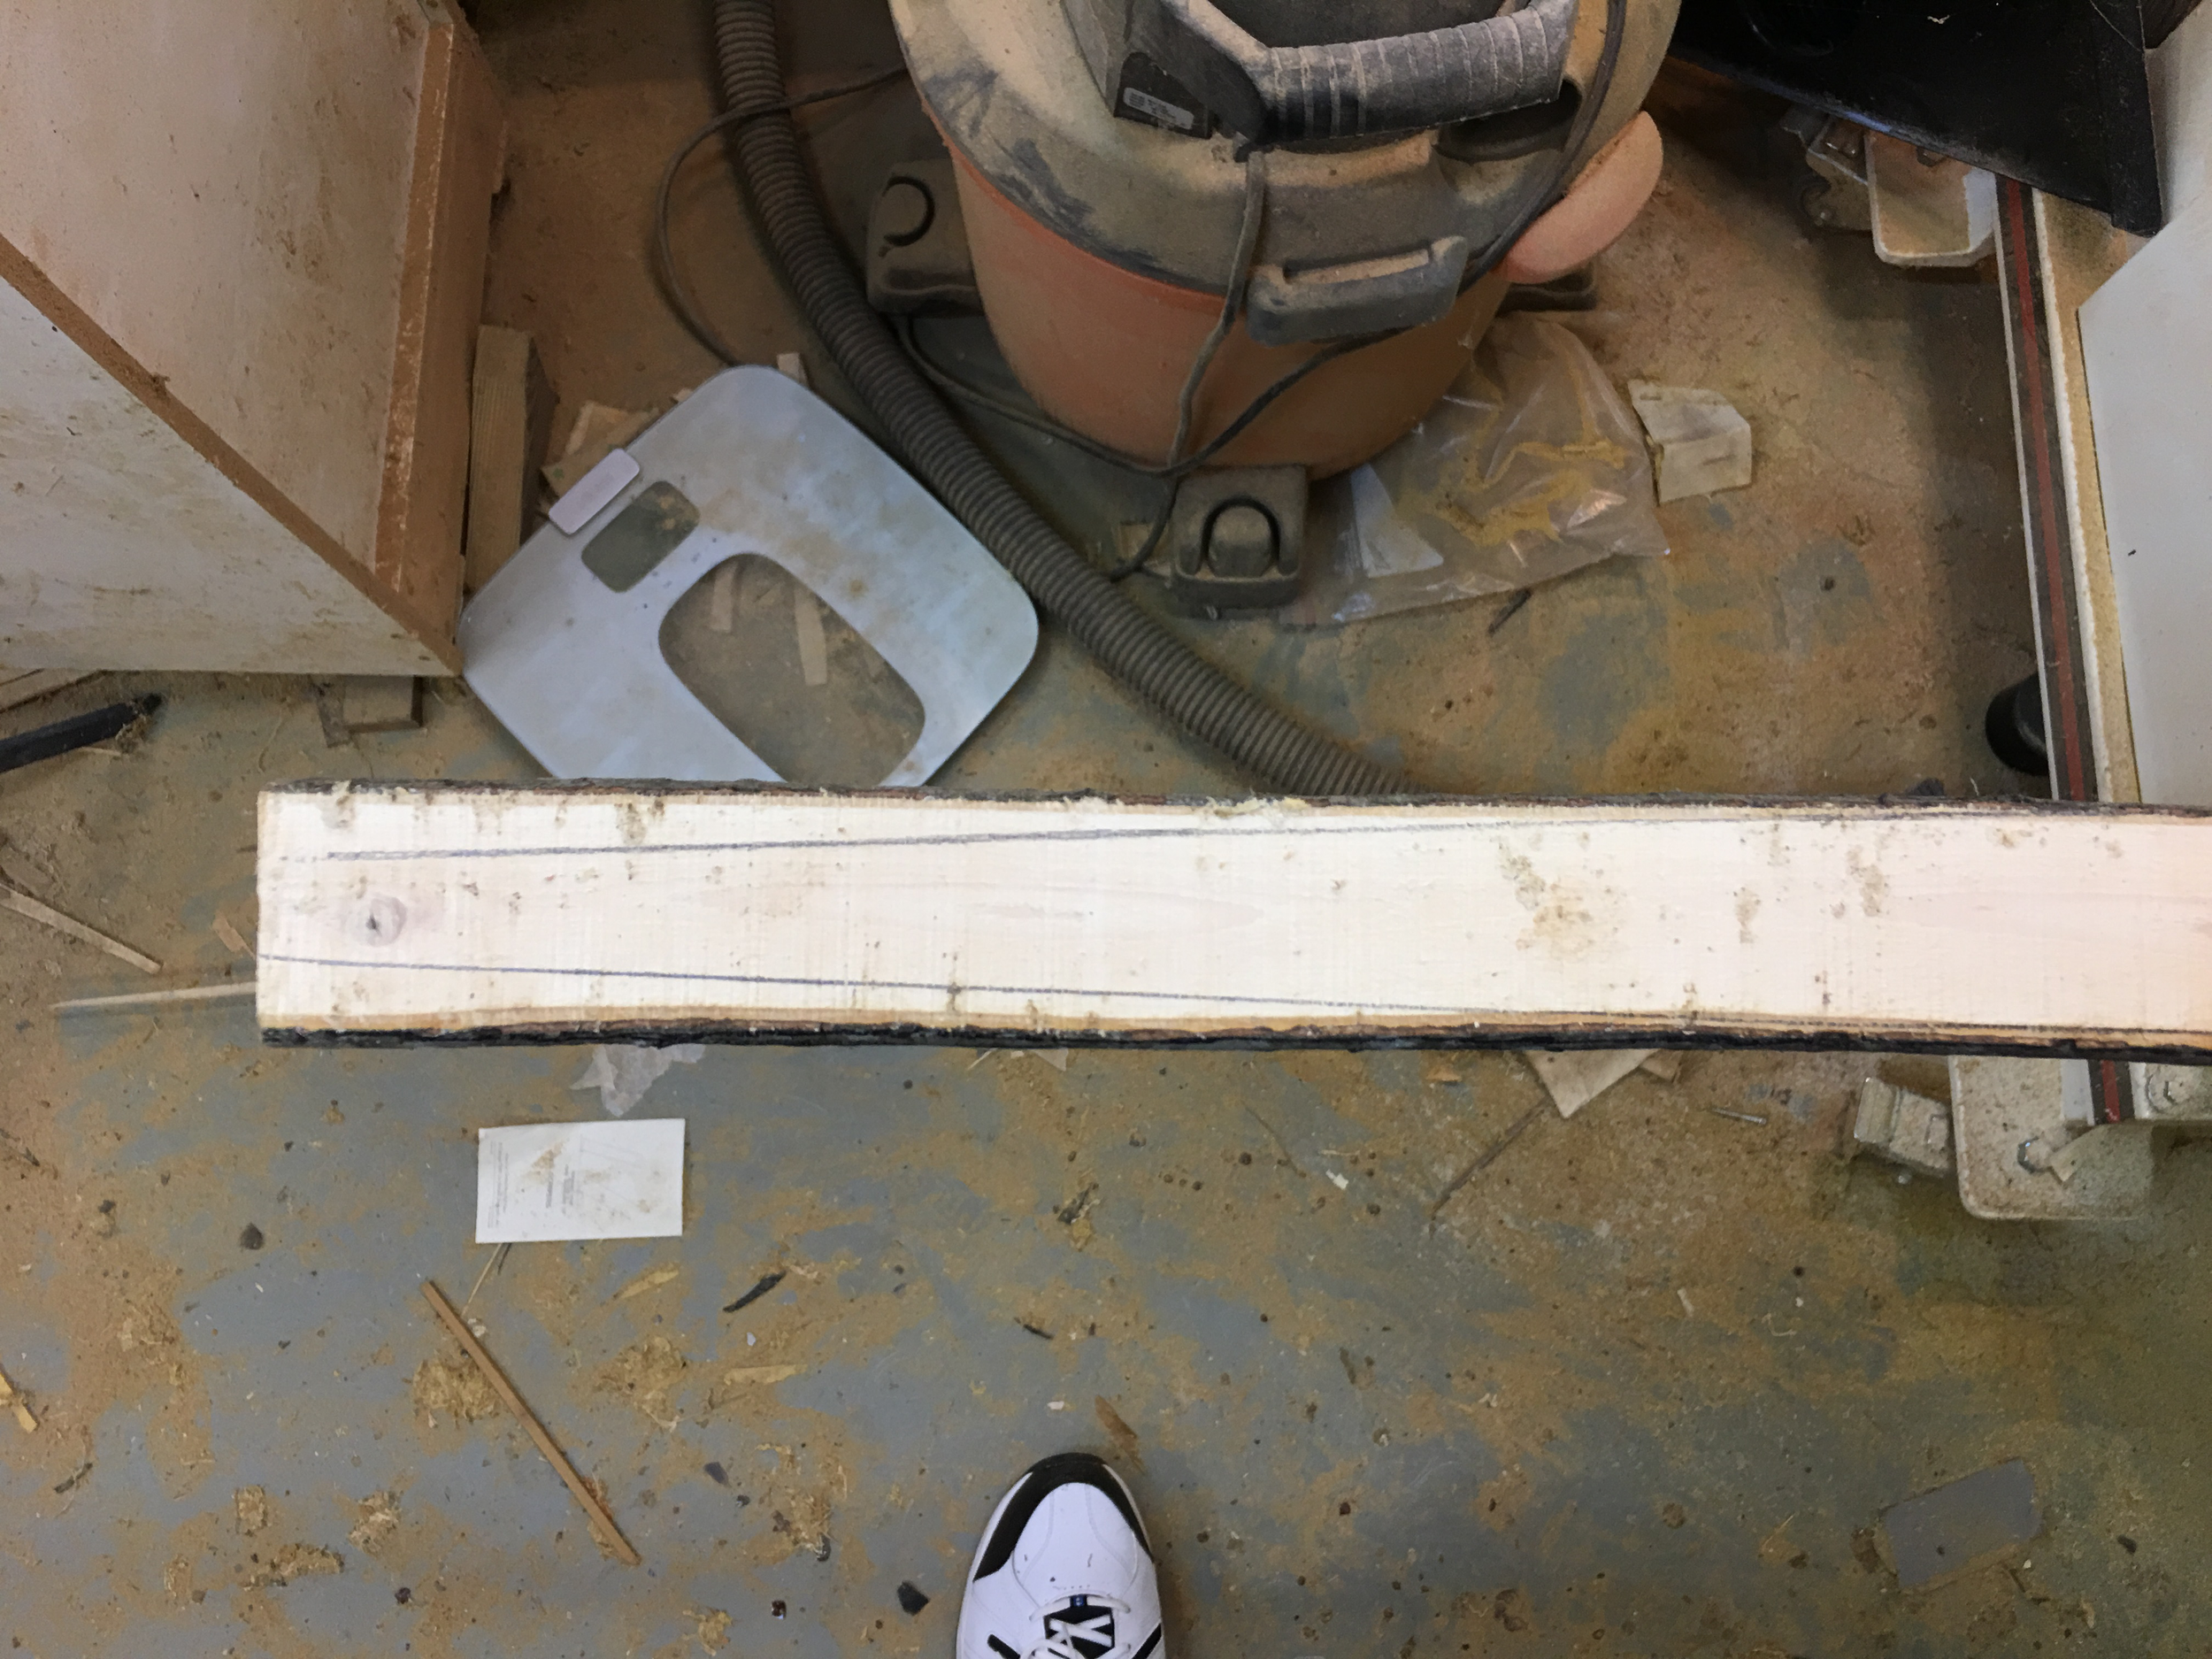
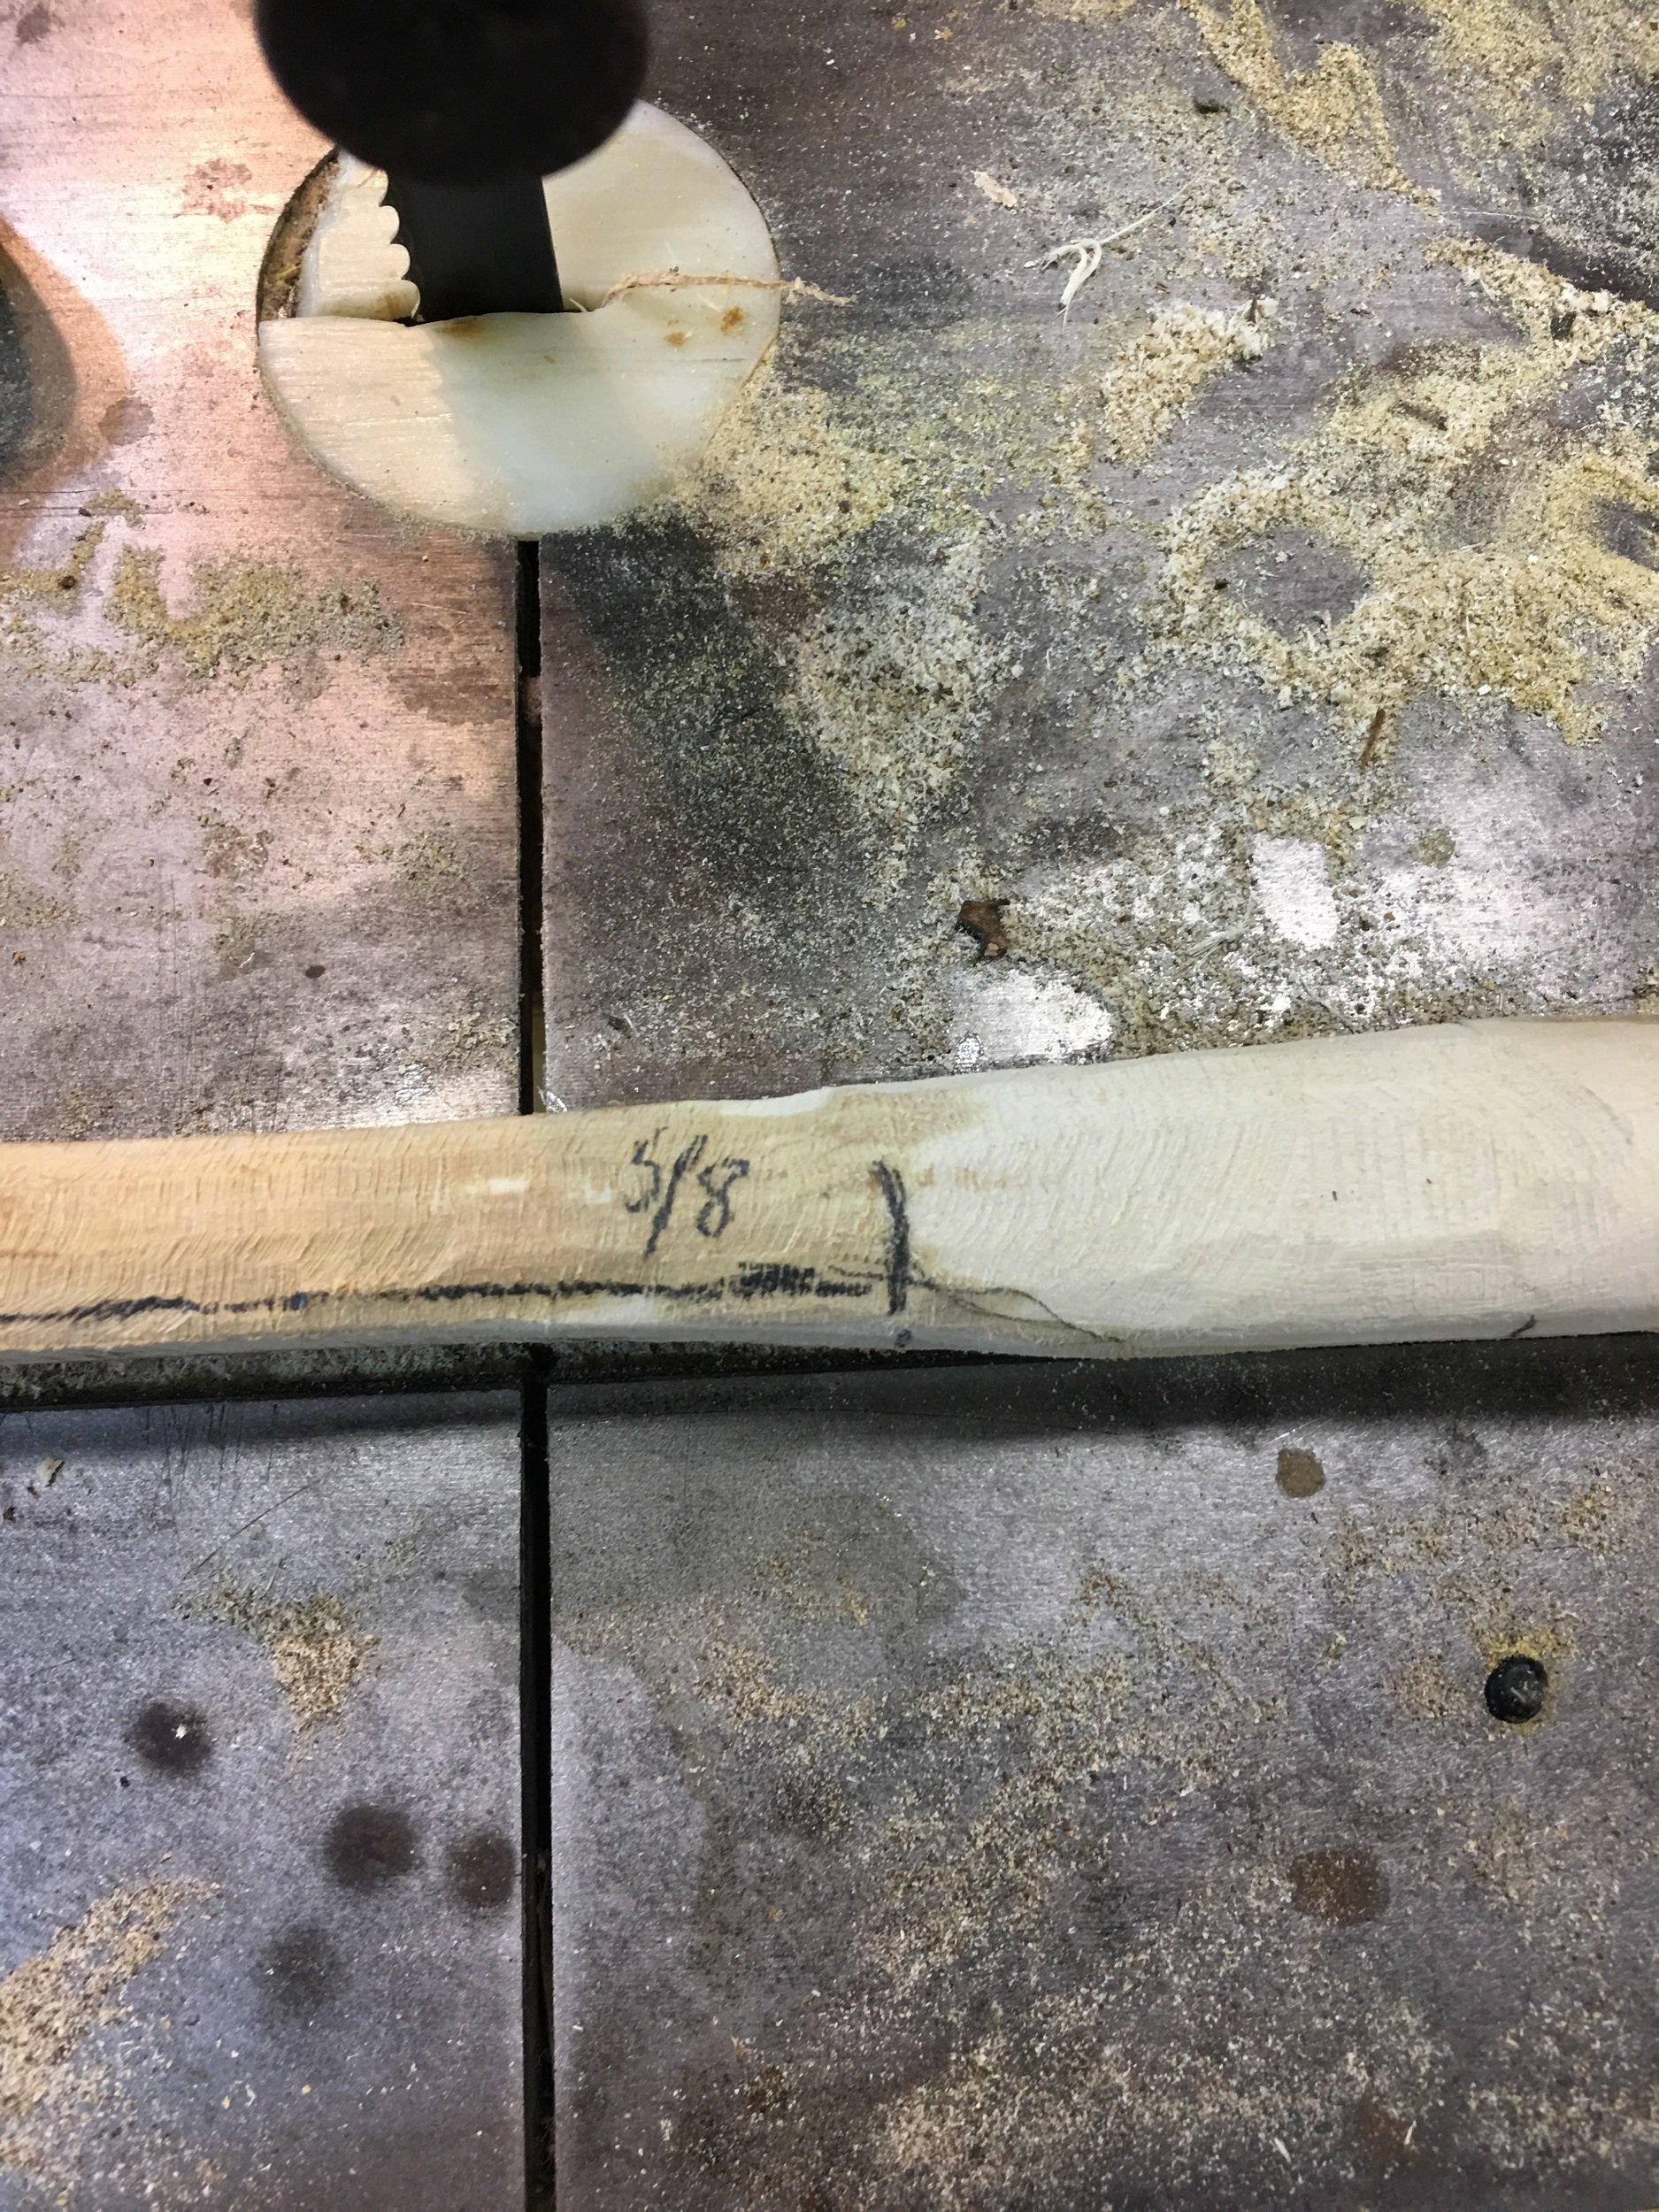
Now narrow the handle area and begin to work on the thickness. The bow should start at 5/8" thick at the fades and should taper down 1/4" to 3/8" thick at the tips.
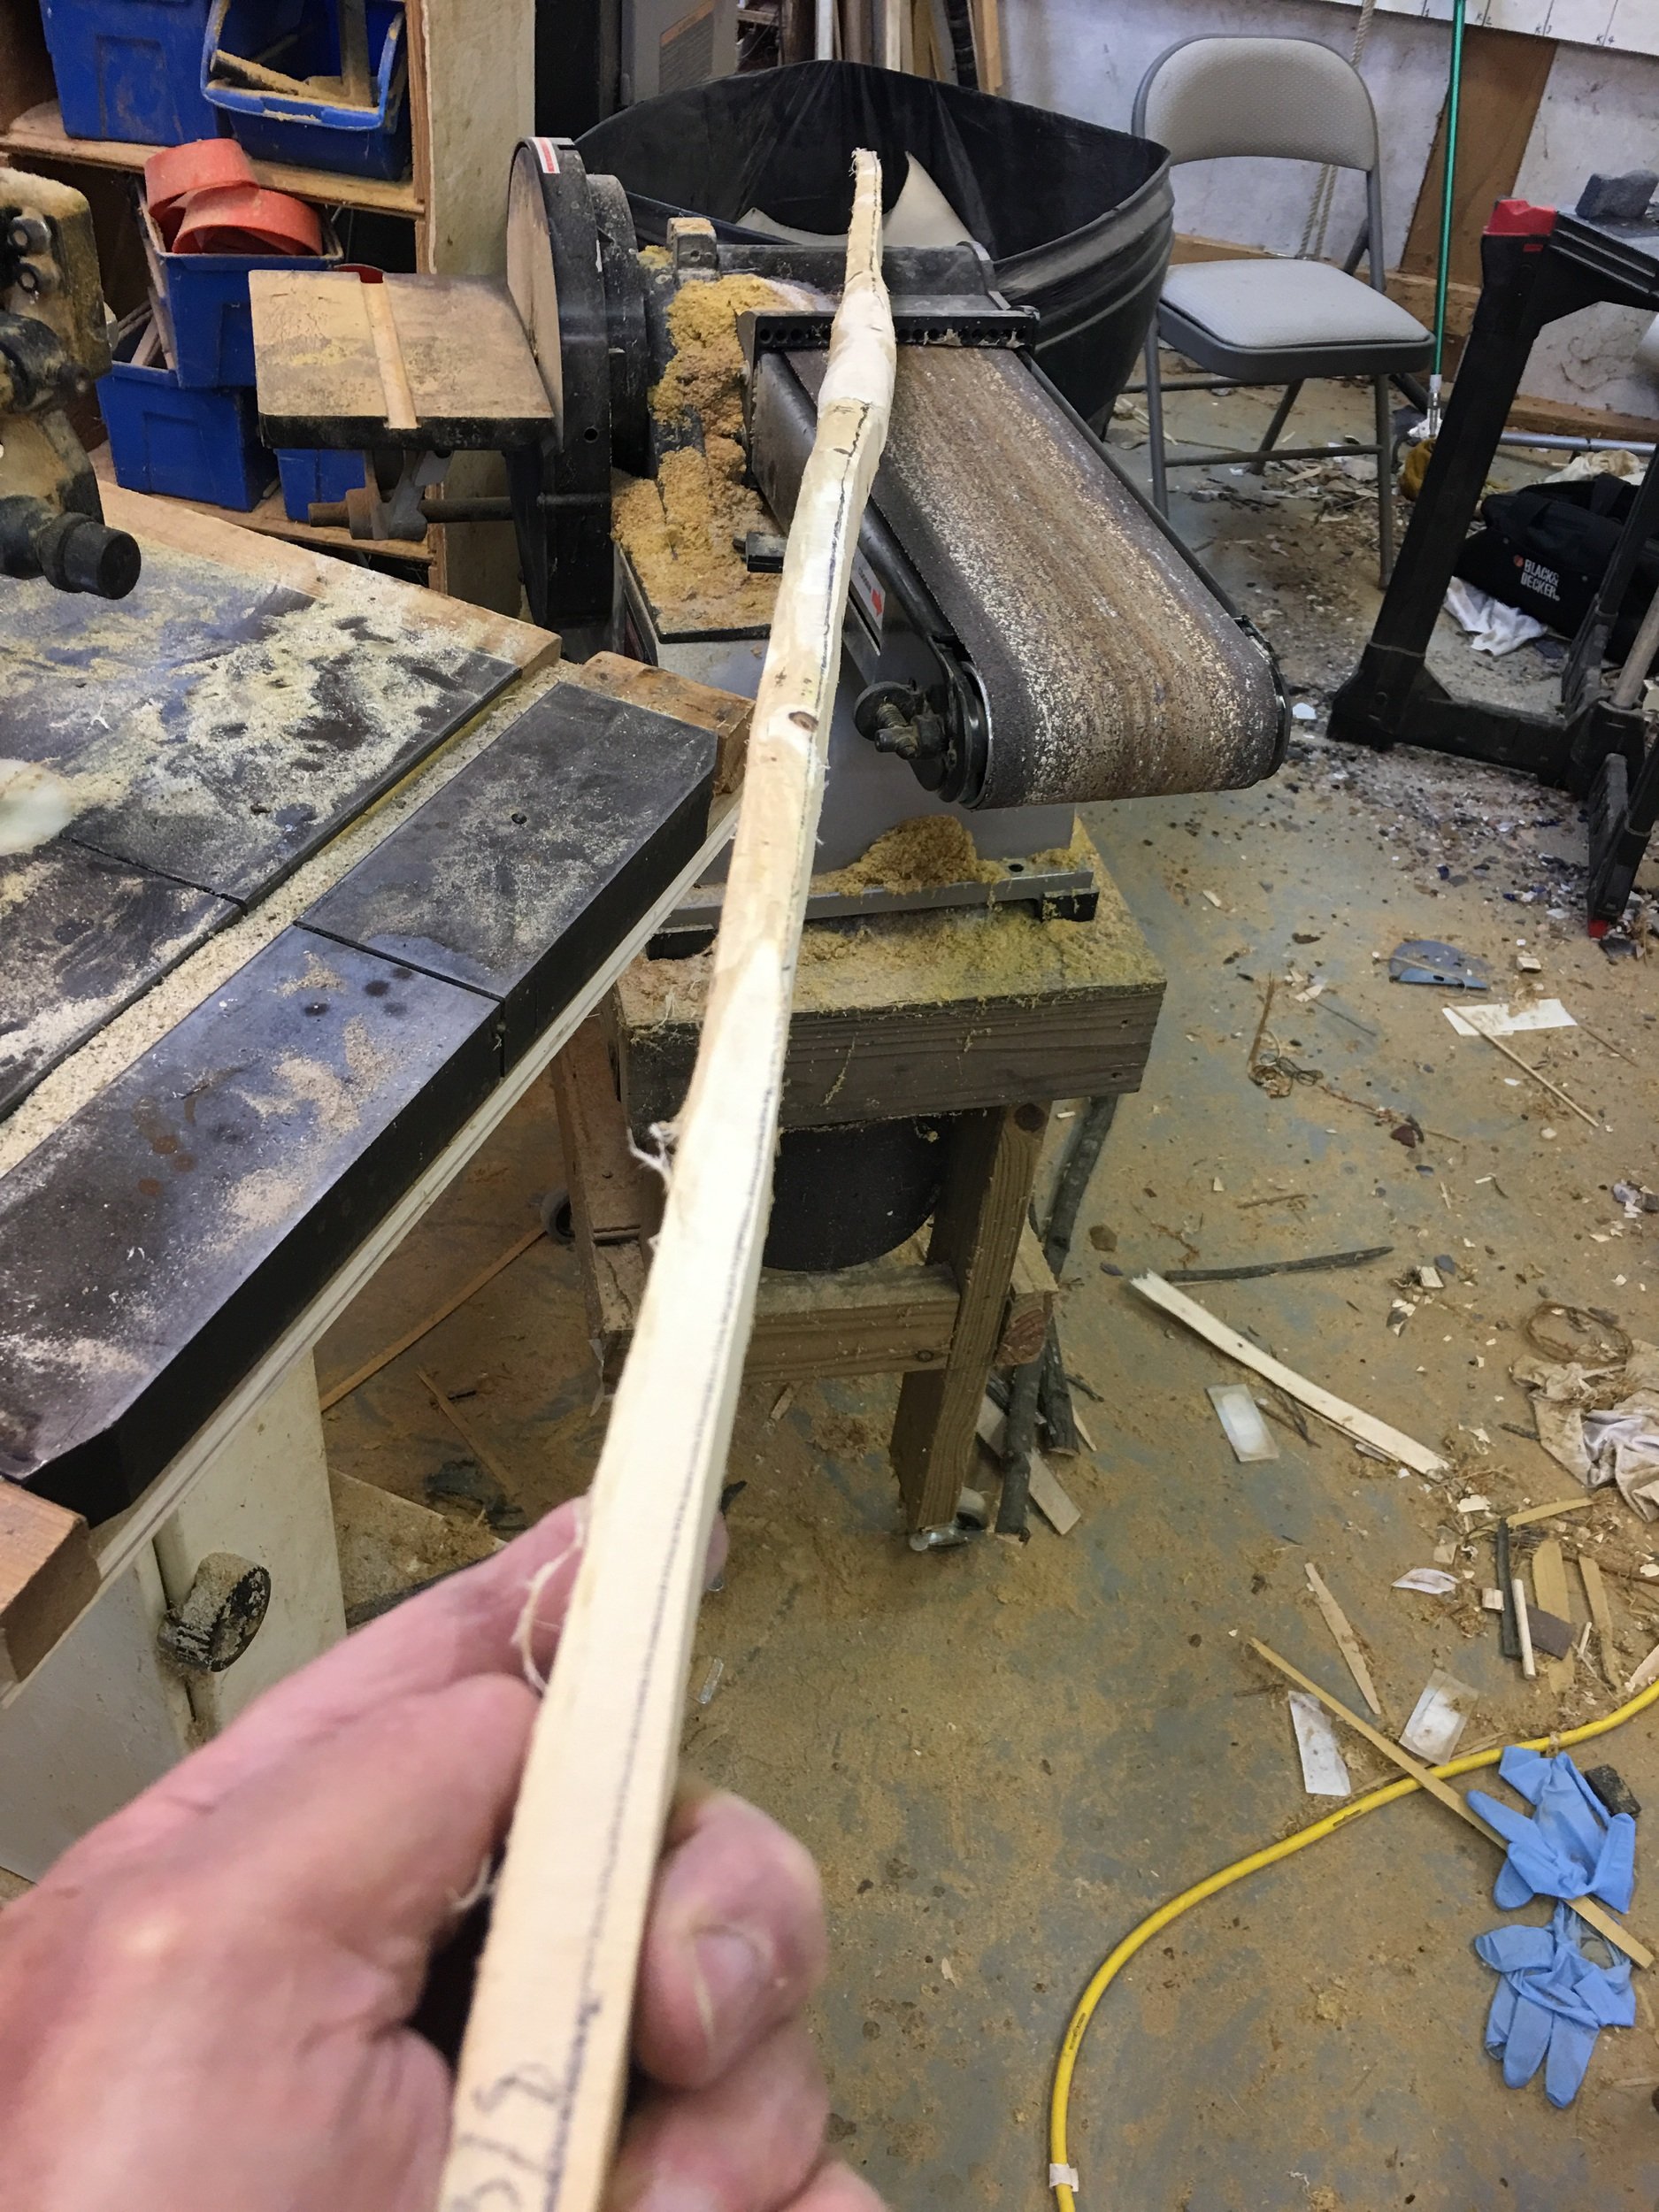
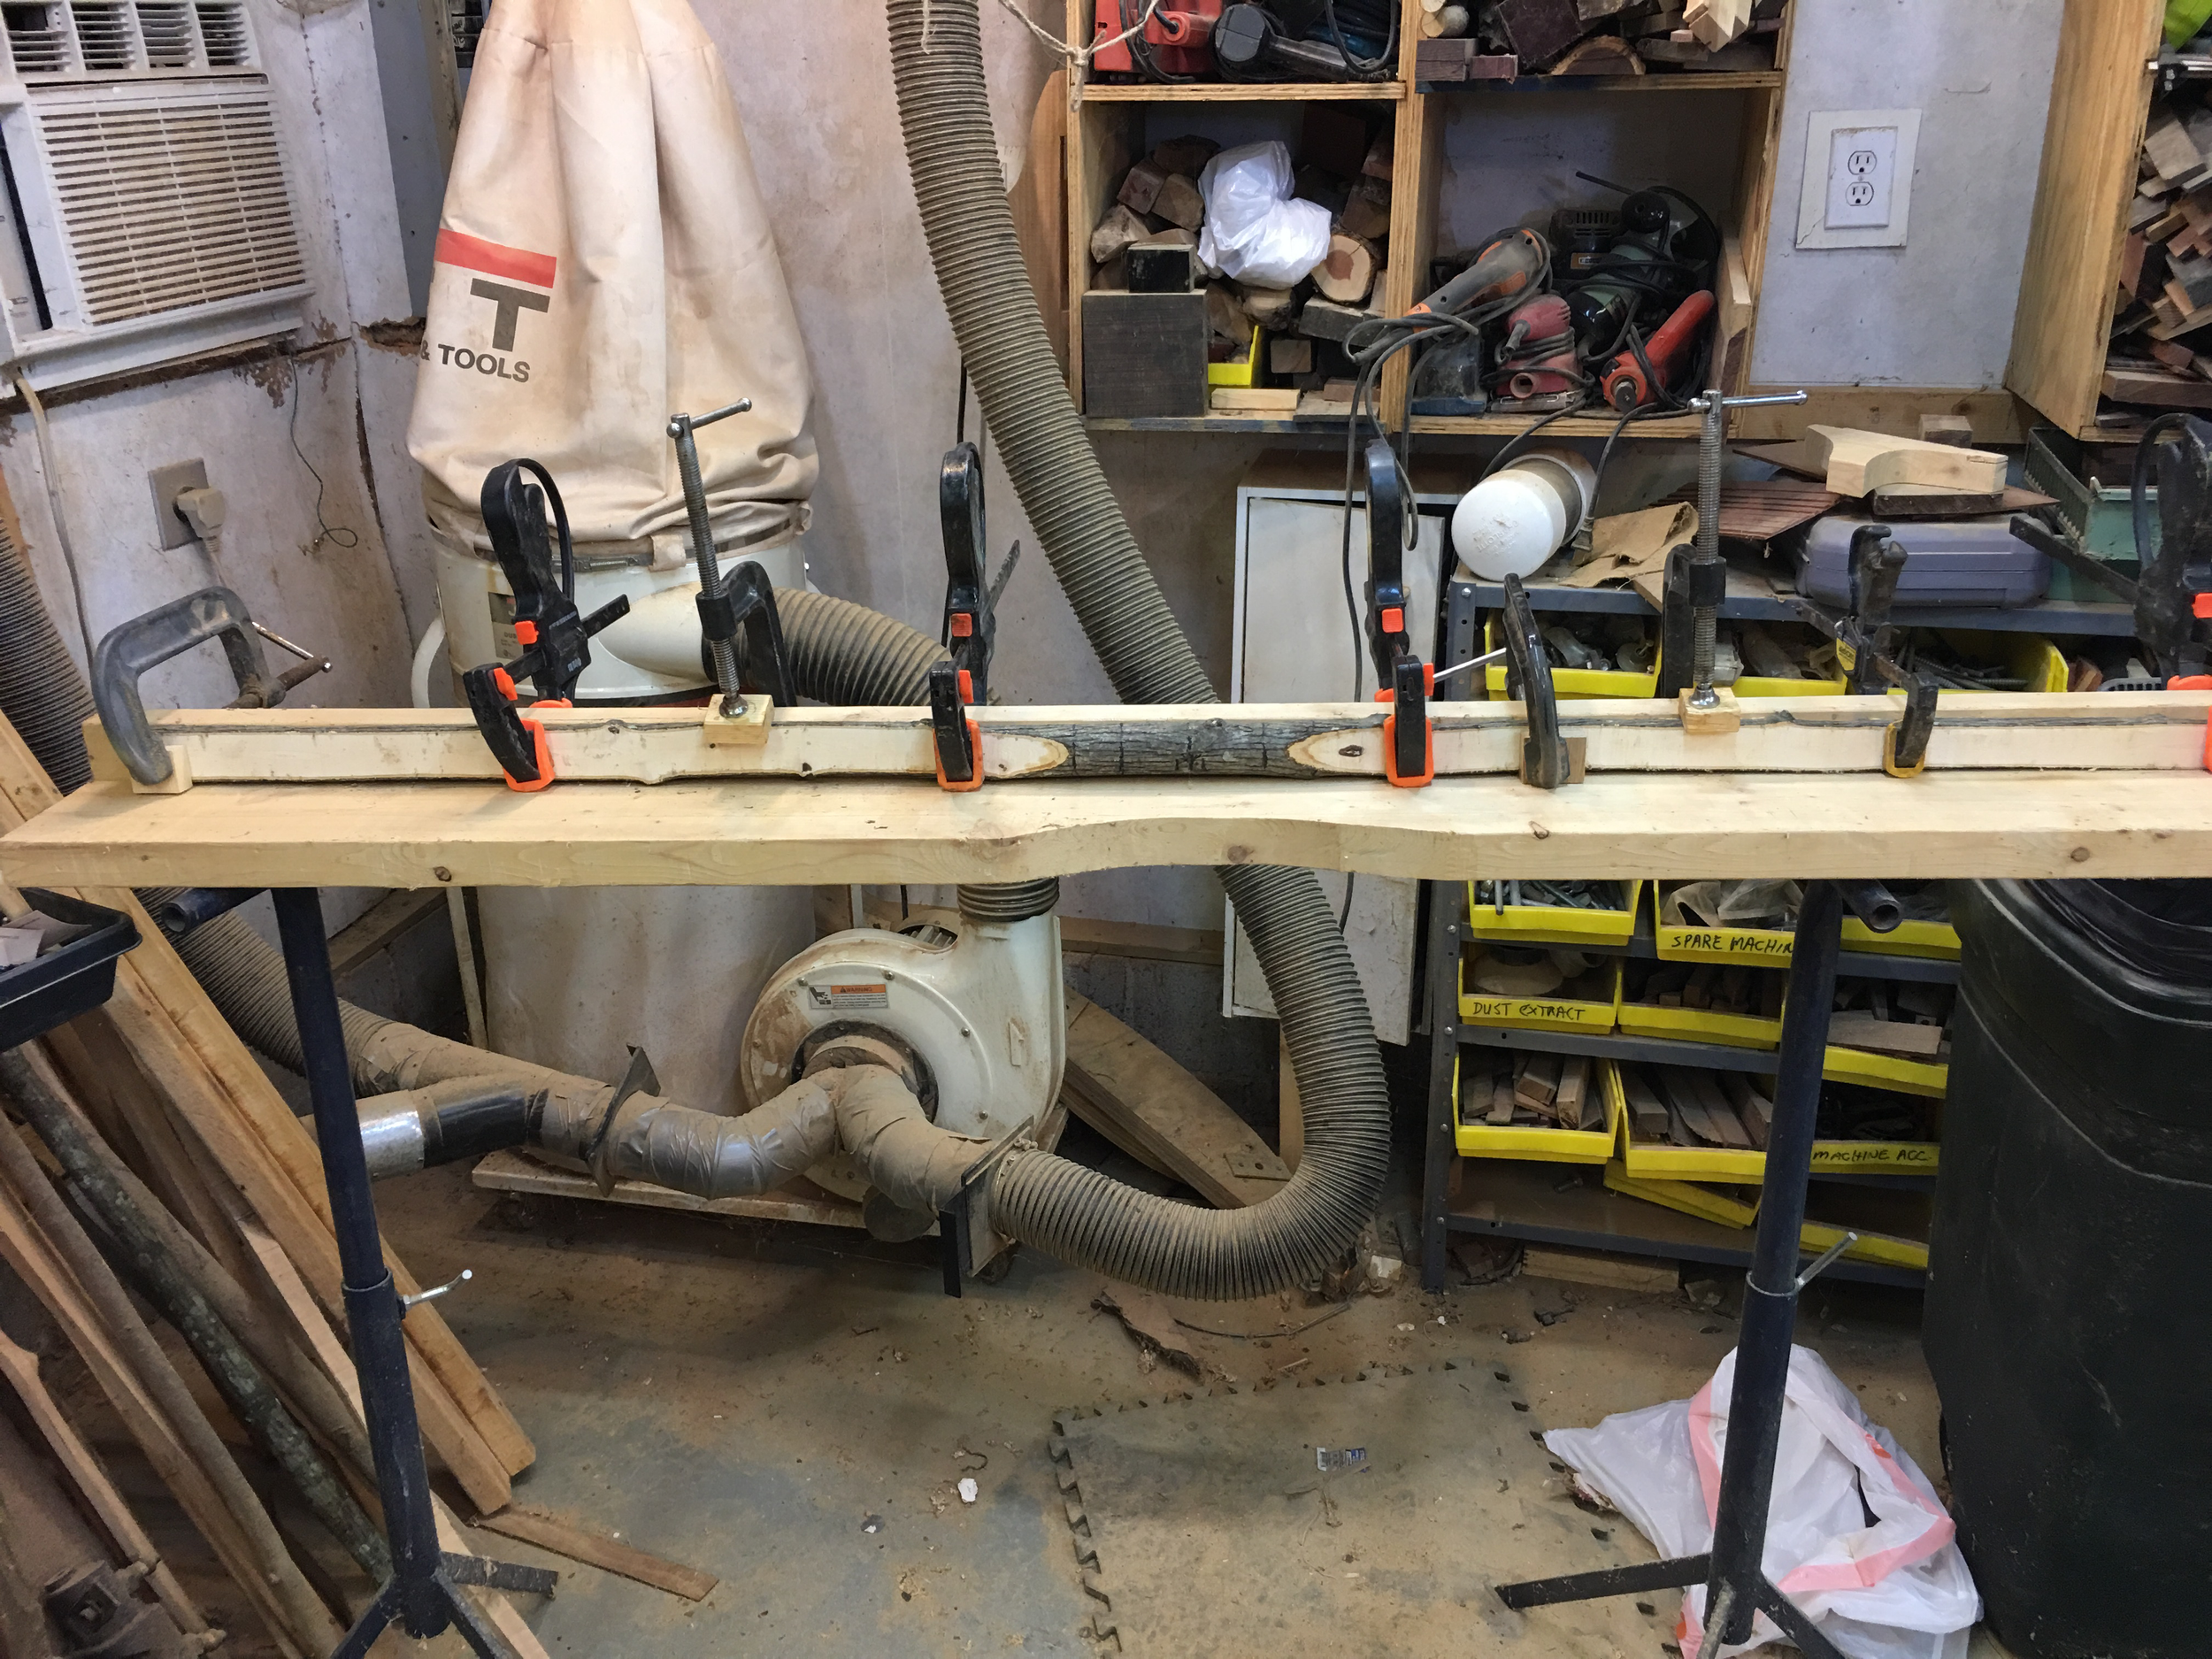
Still a little crooked. Back to the form. This time we will clamp and heat to straighten bow
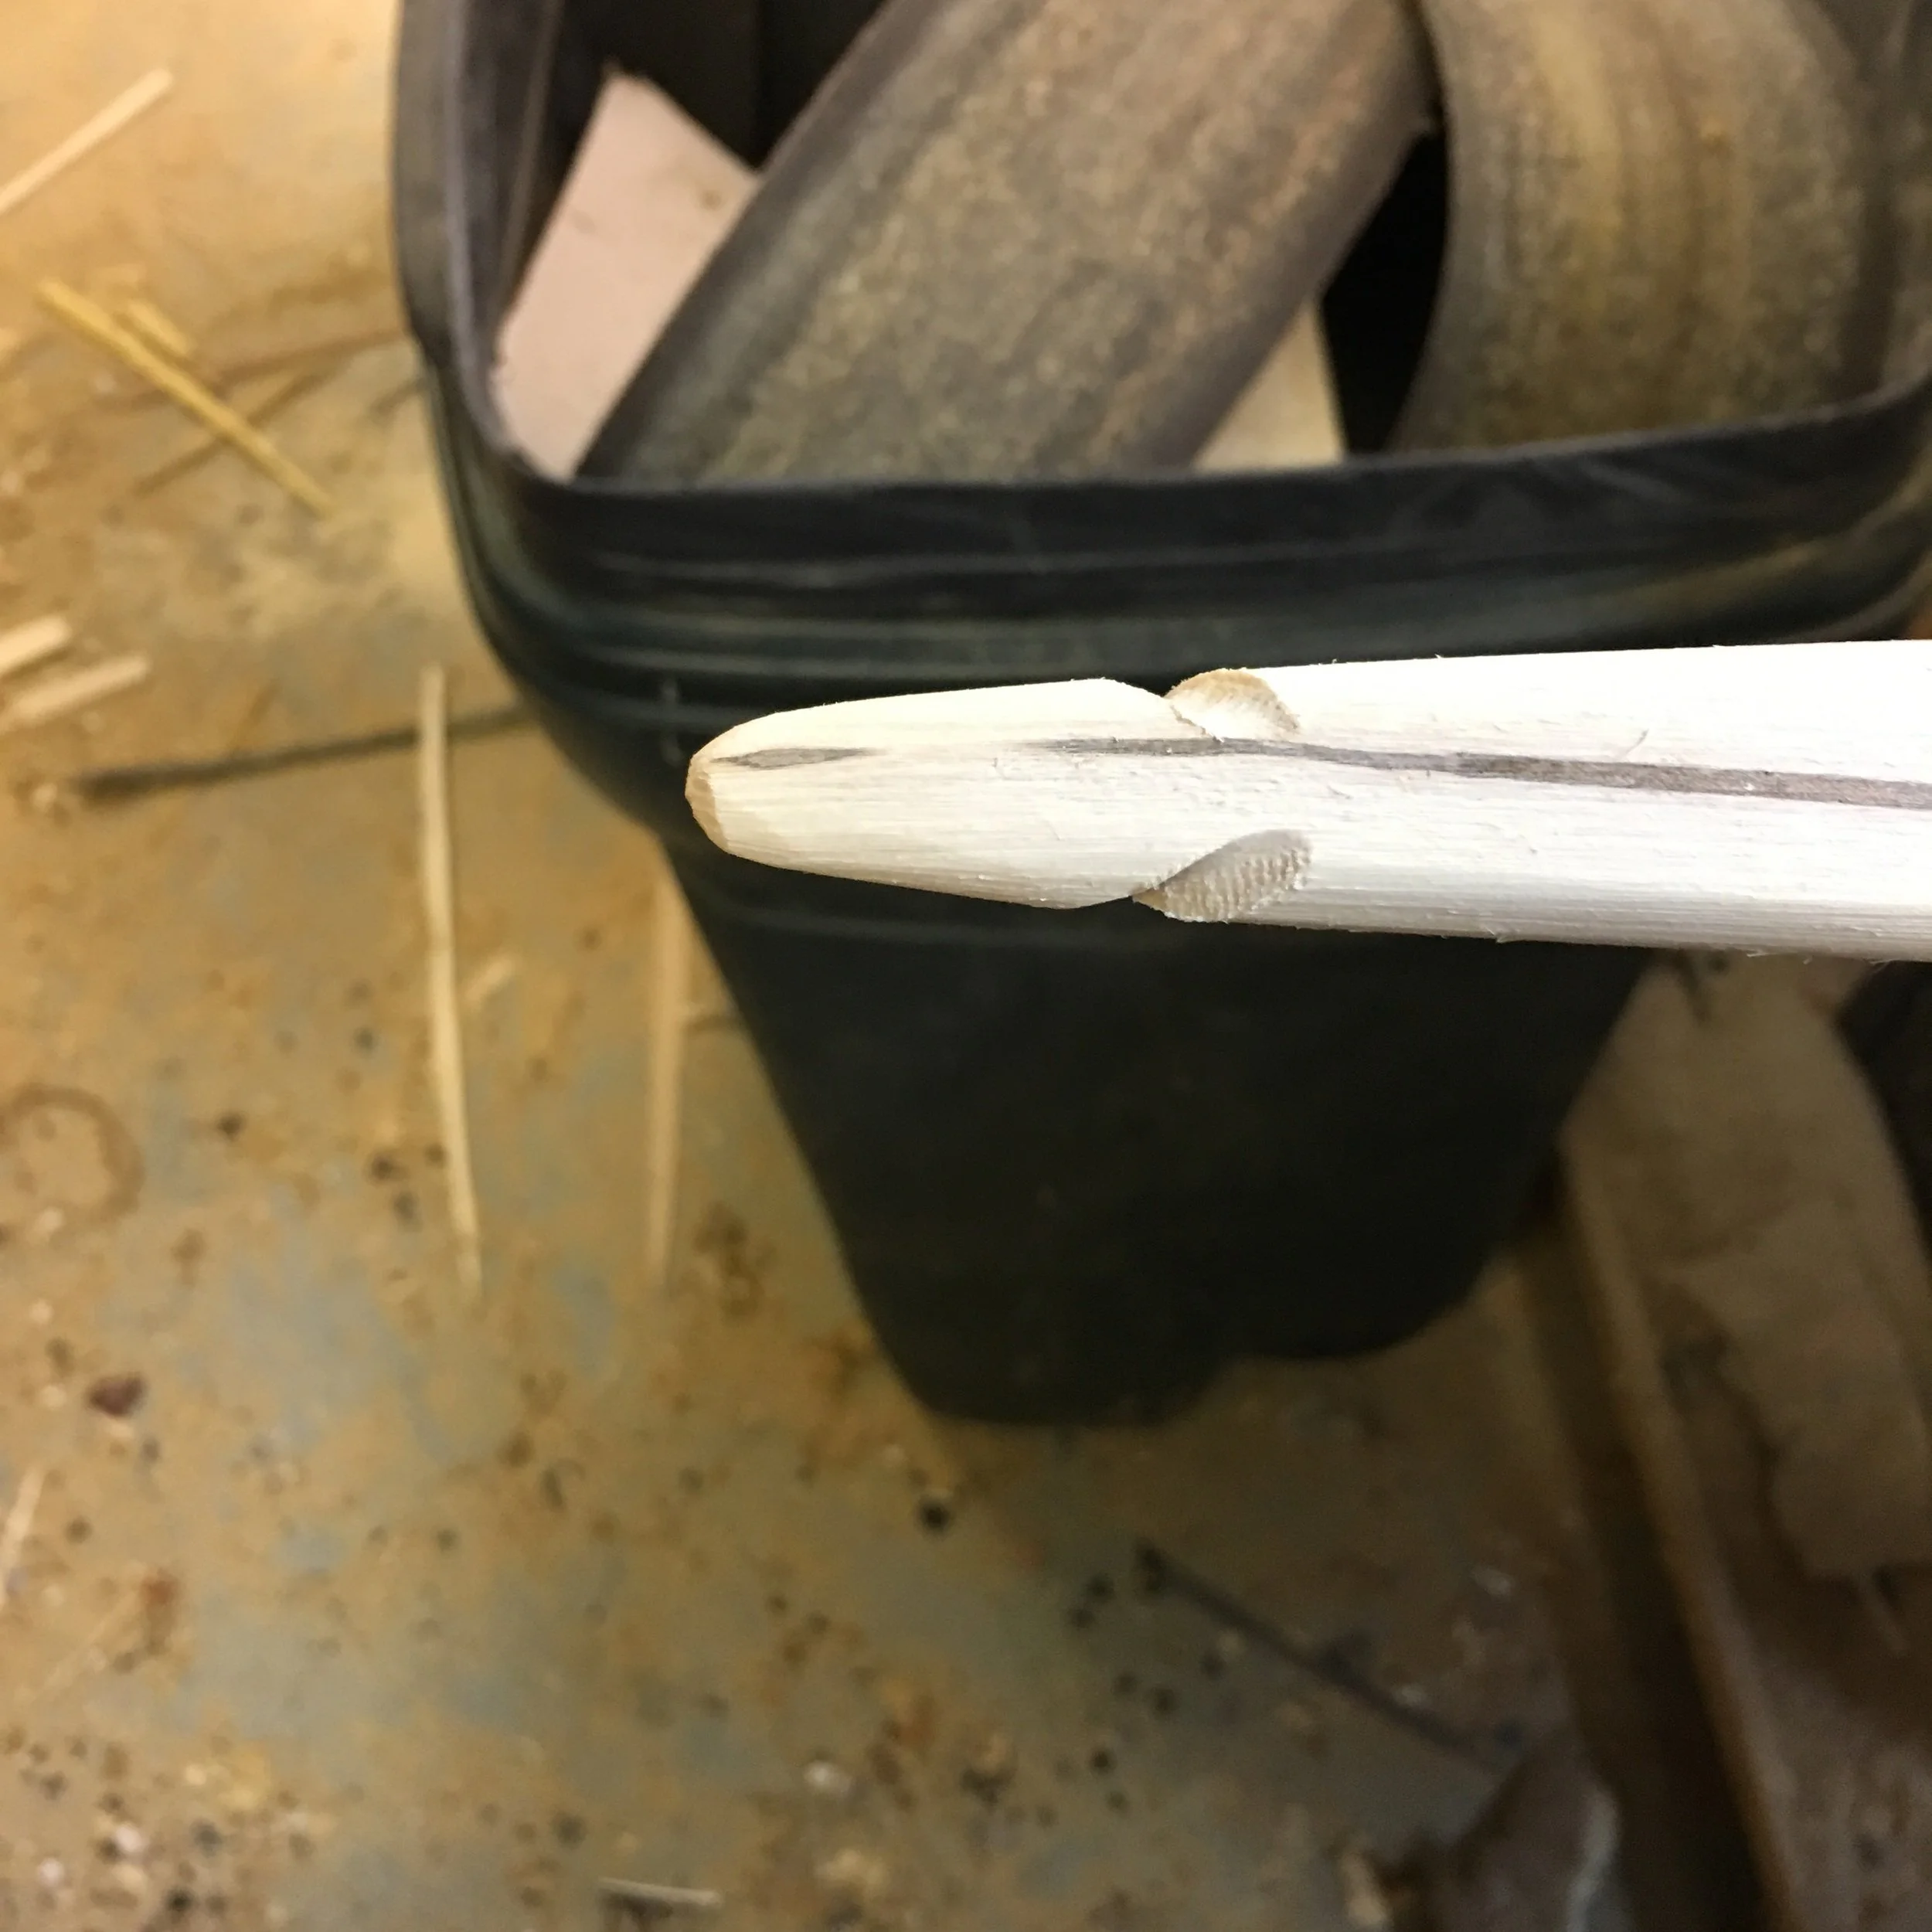
Now, take the bow out of the form an file in some nocks. Note the pith on the belly, showing the center of the sapling. This will NOT weaken the bow at all.
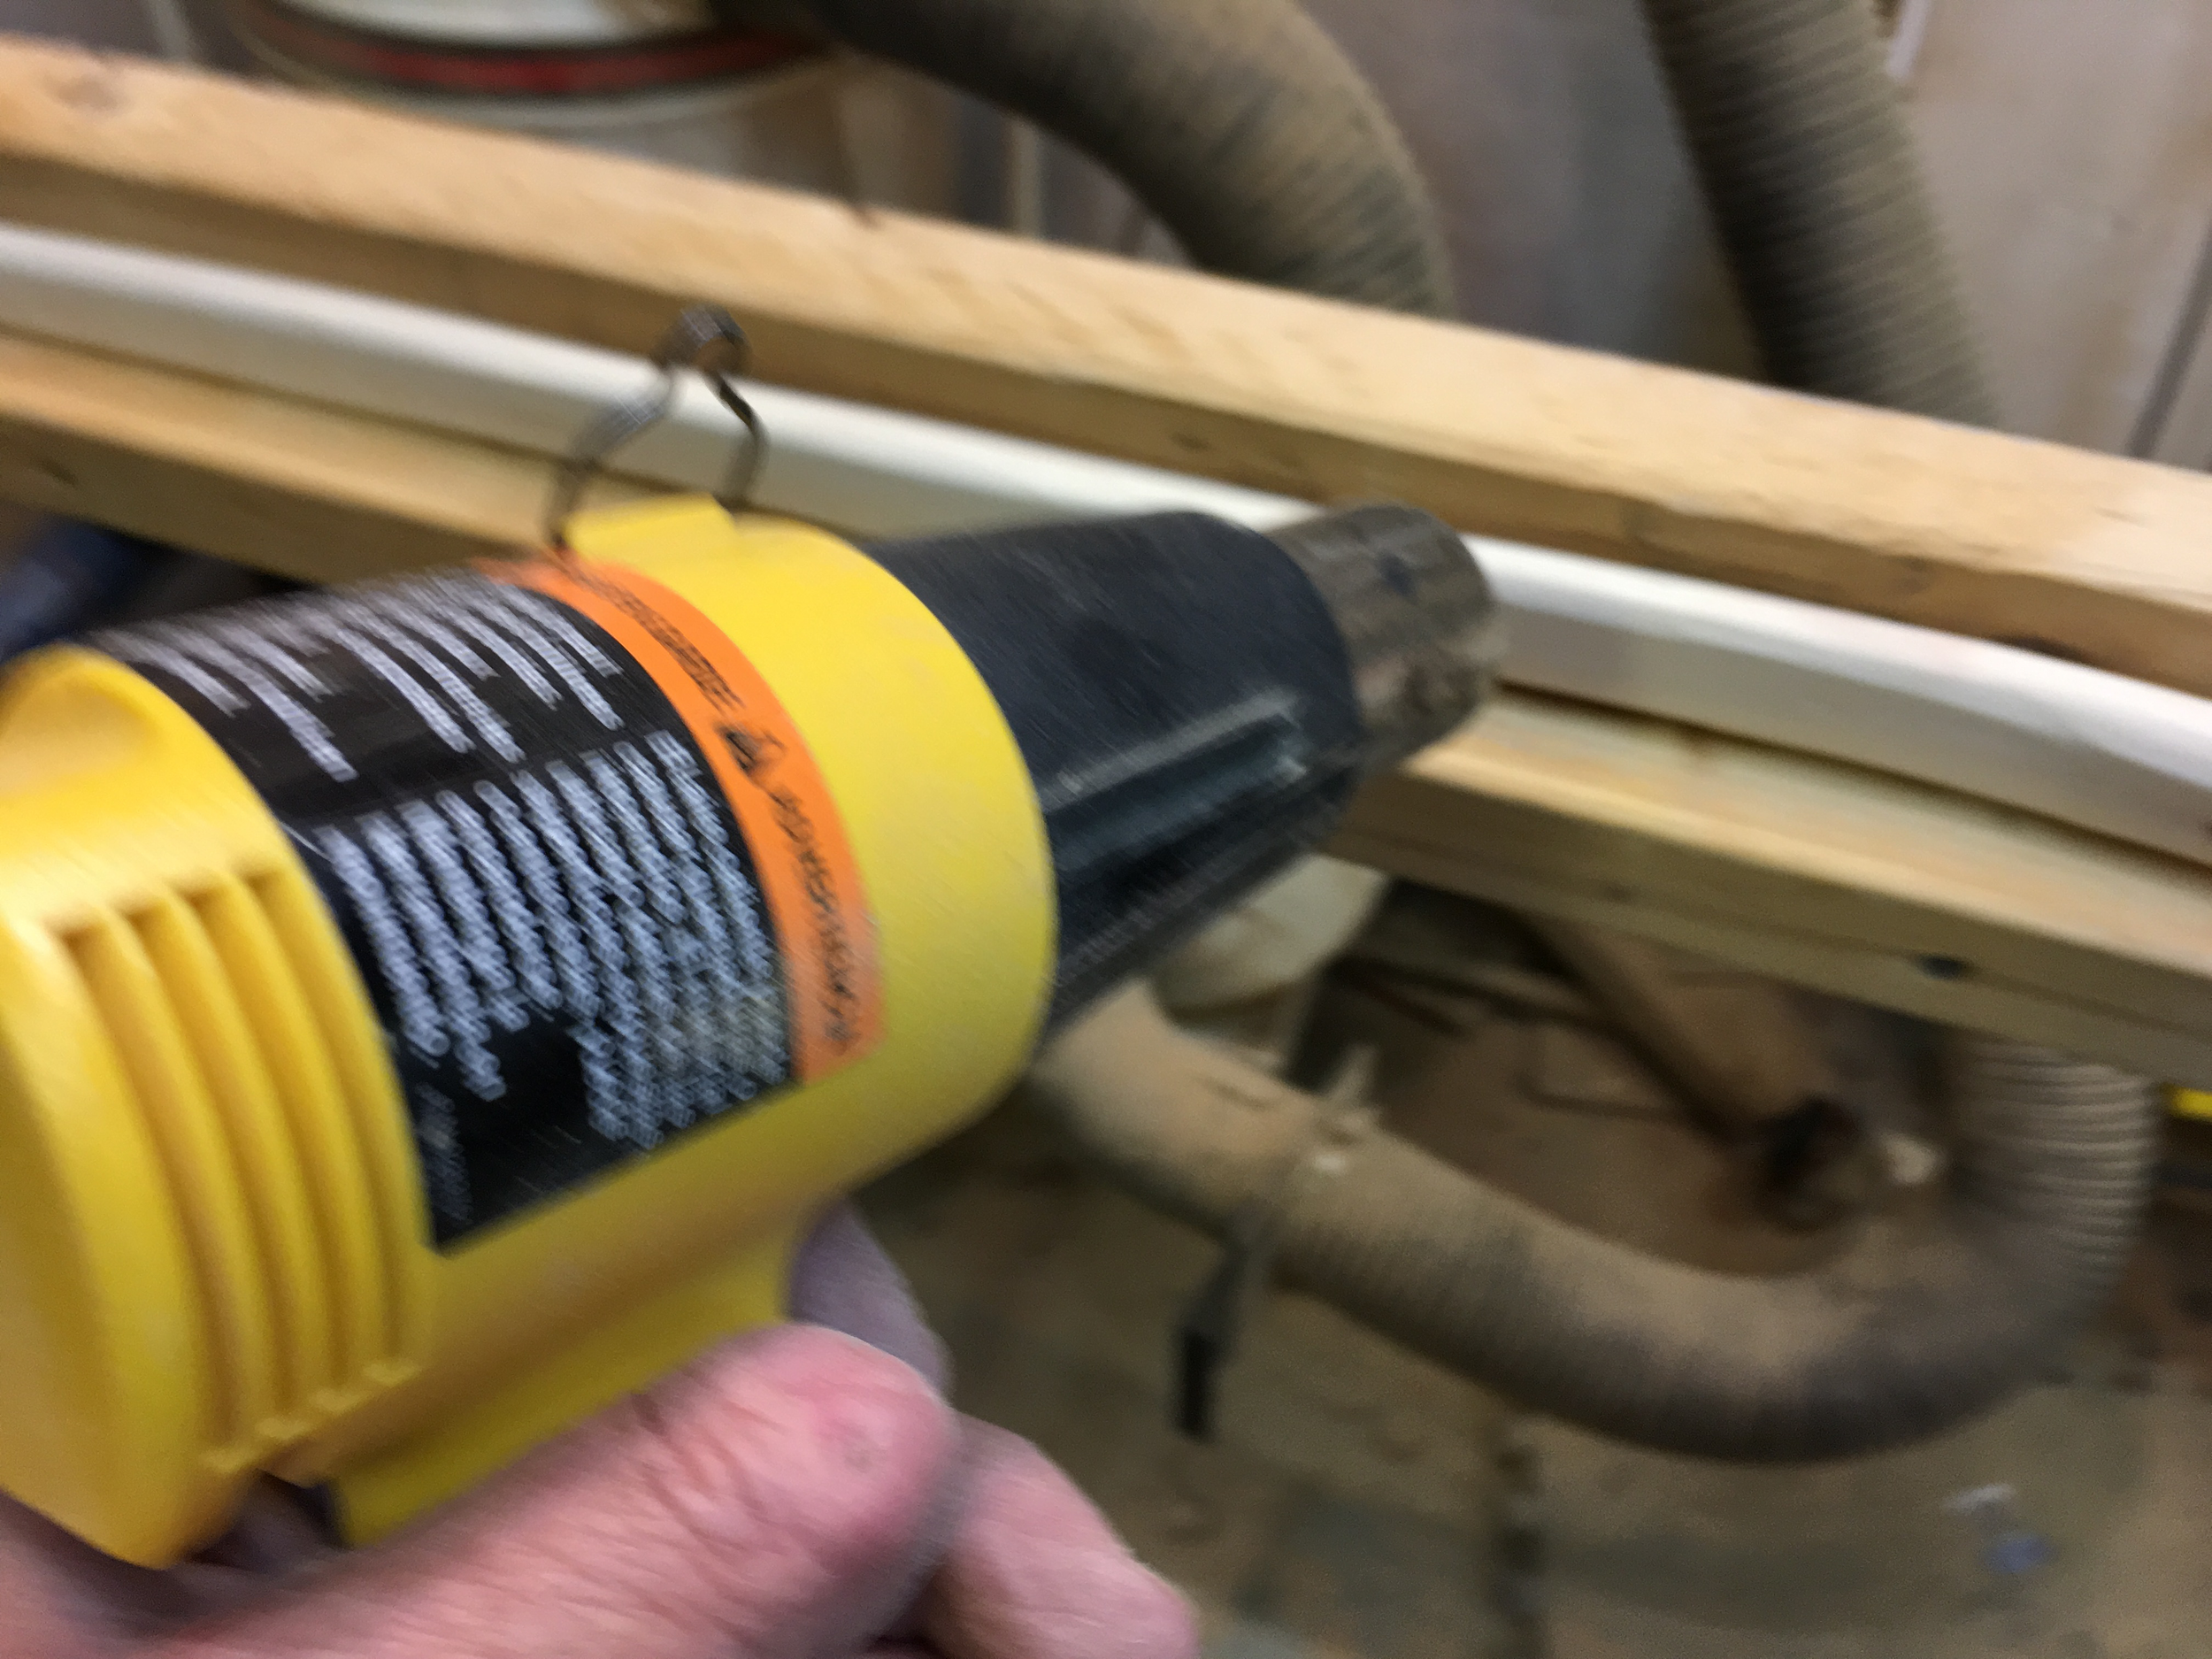
This next step really strengthens the bow and makes it shoot fast. Put it on a form like this and clamp some reset (backward bend) in it. Heat it 30 passes every ten inches, holding the heat gun about 2" above surface. Don't scorch it though. Let it cool at least three hours.
Now some walnut oil stain
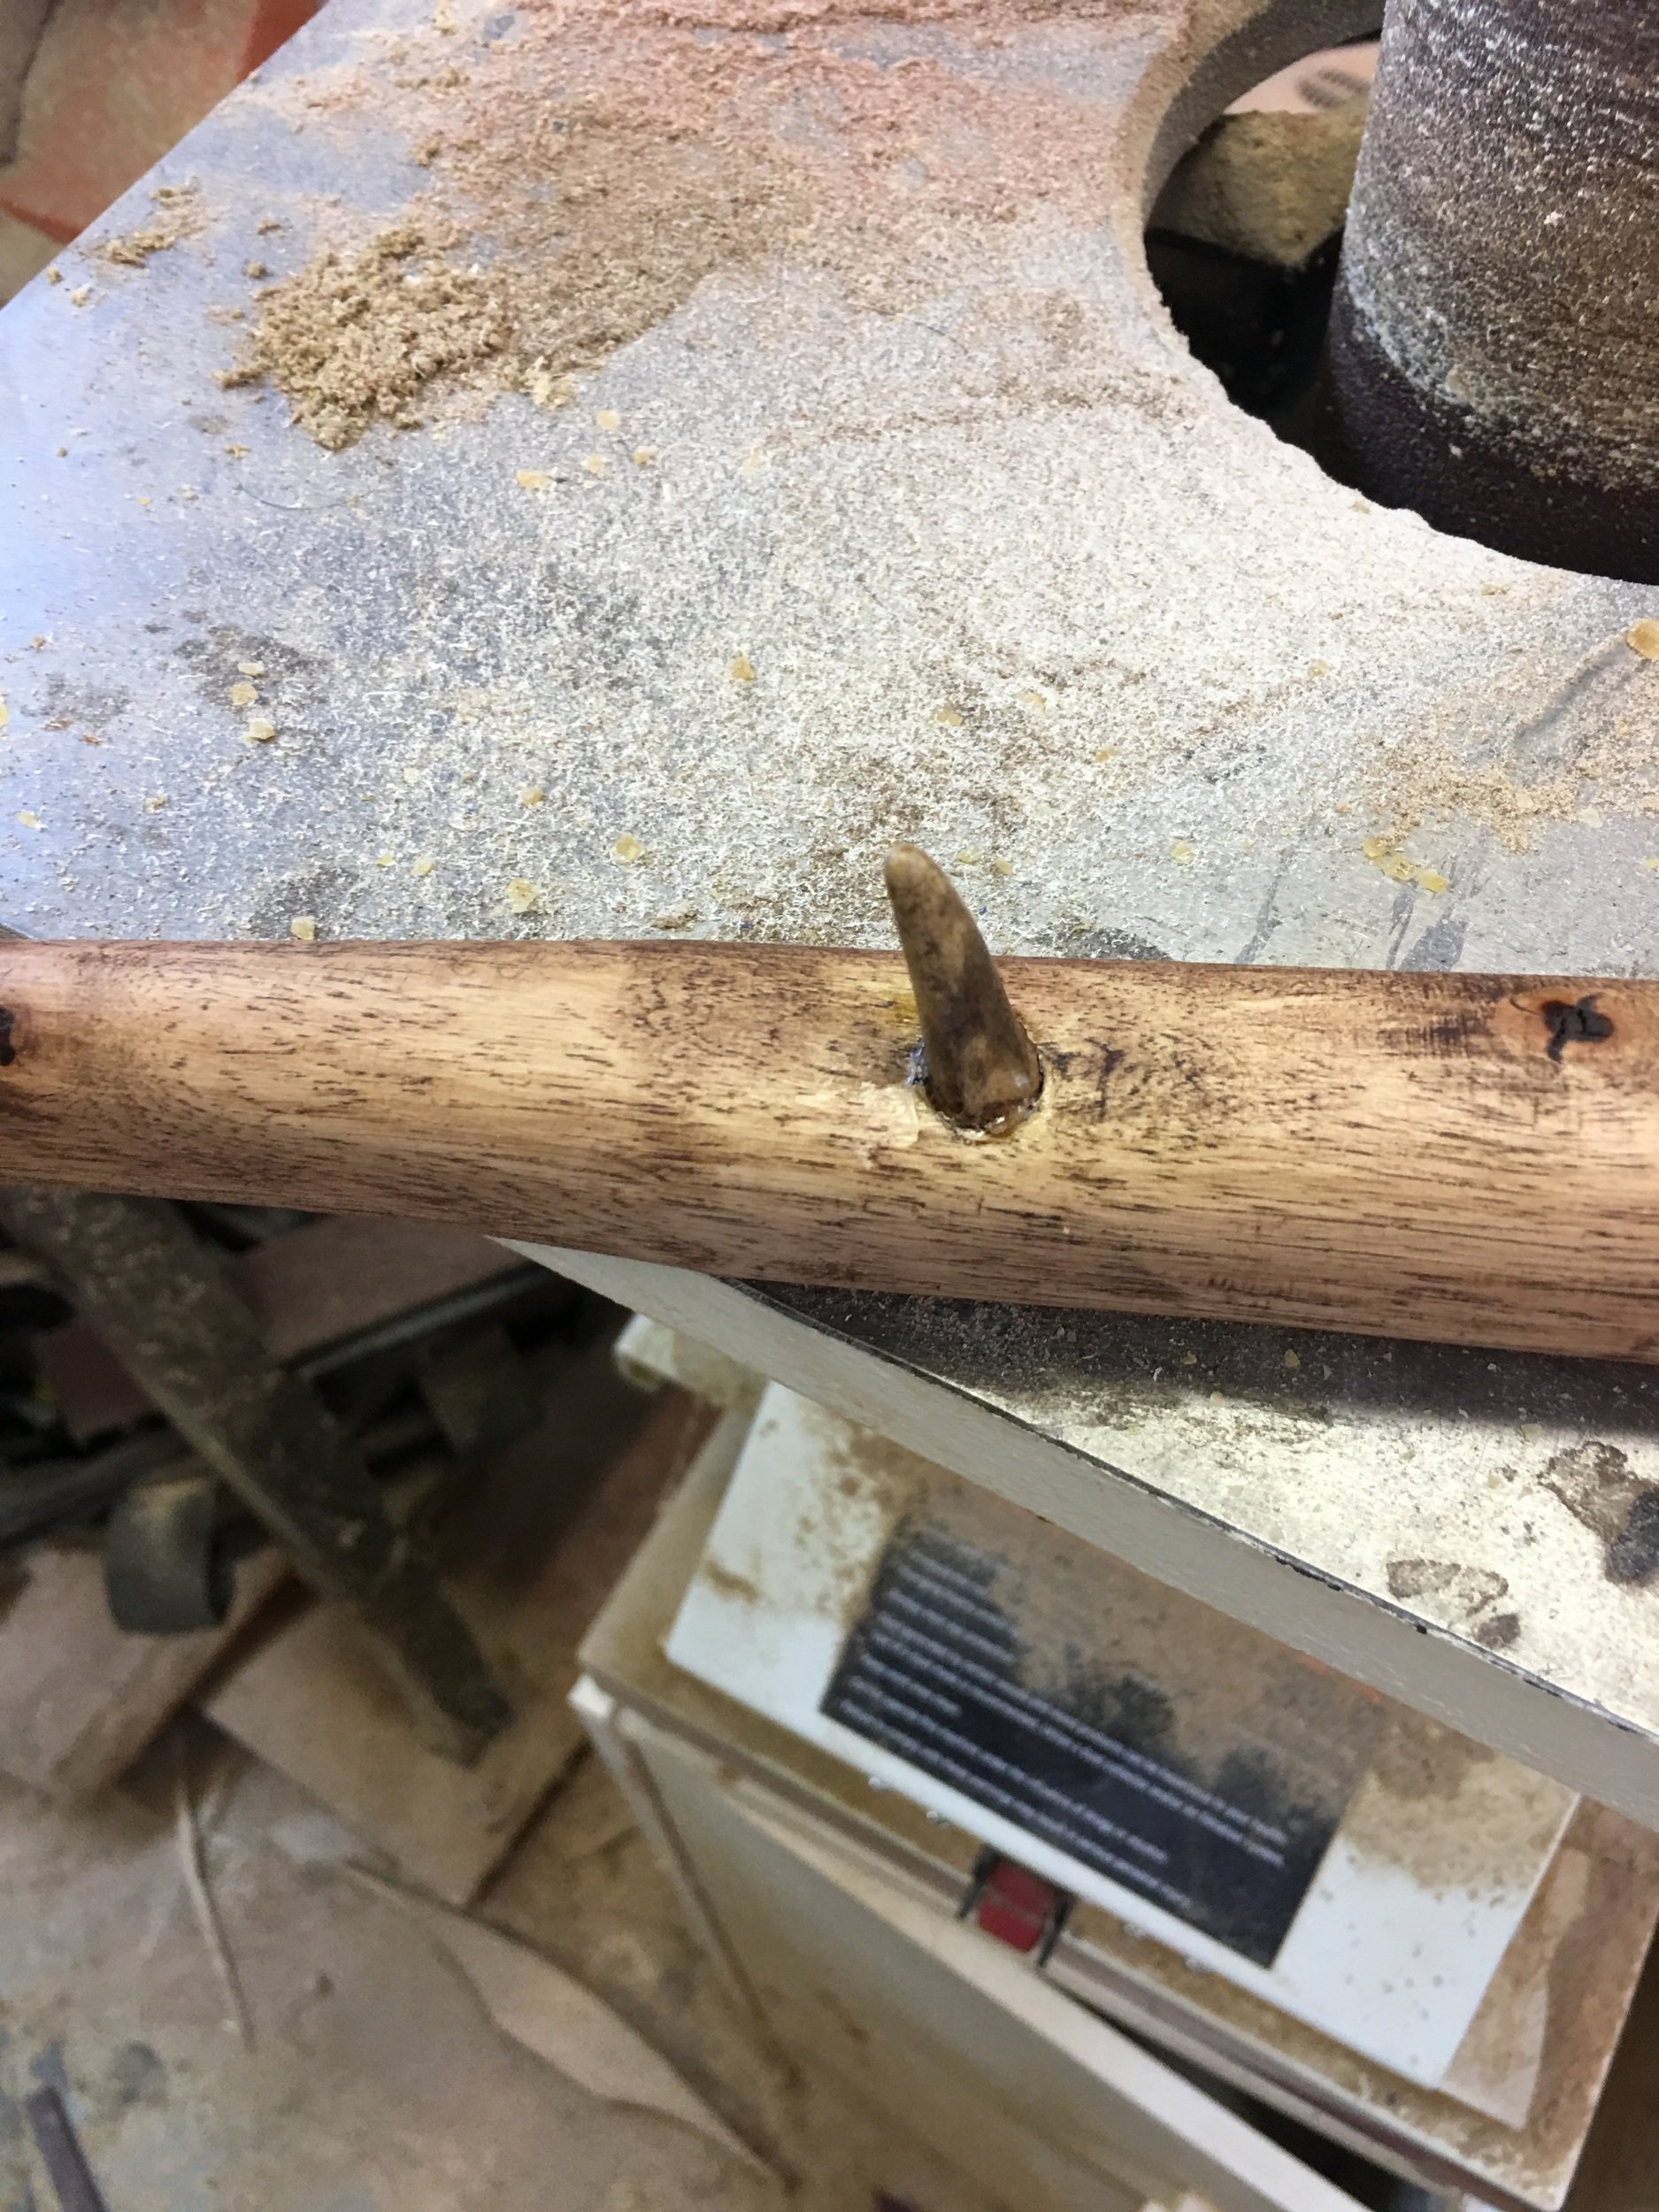
An antler tip arrow rest, counter-sunk and superglued.
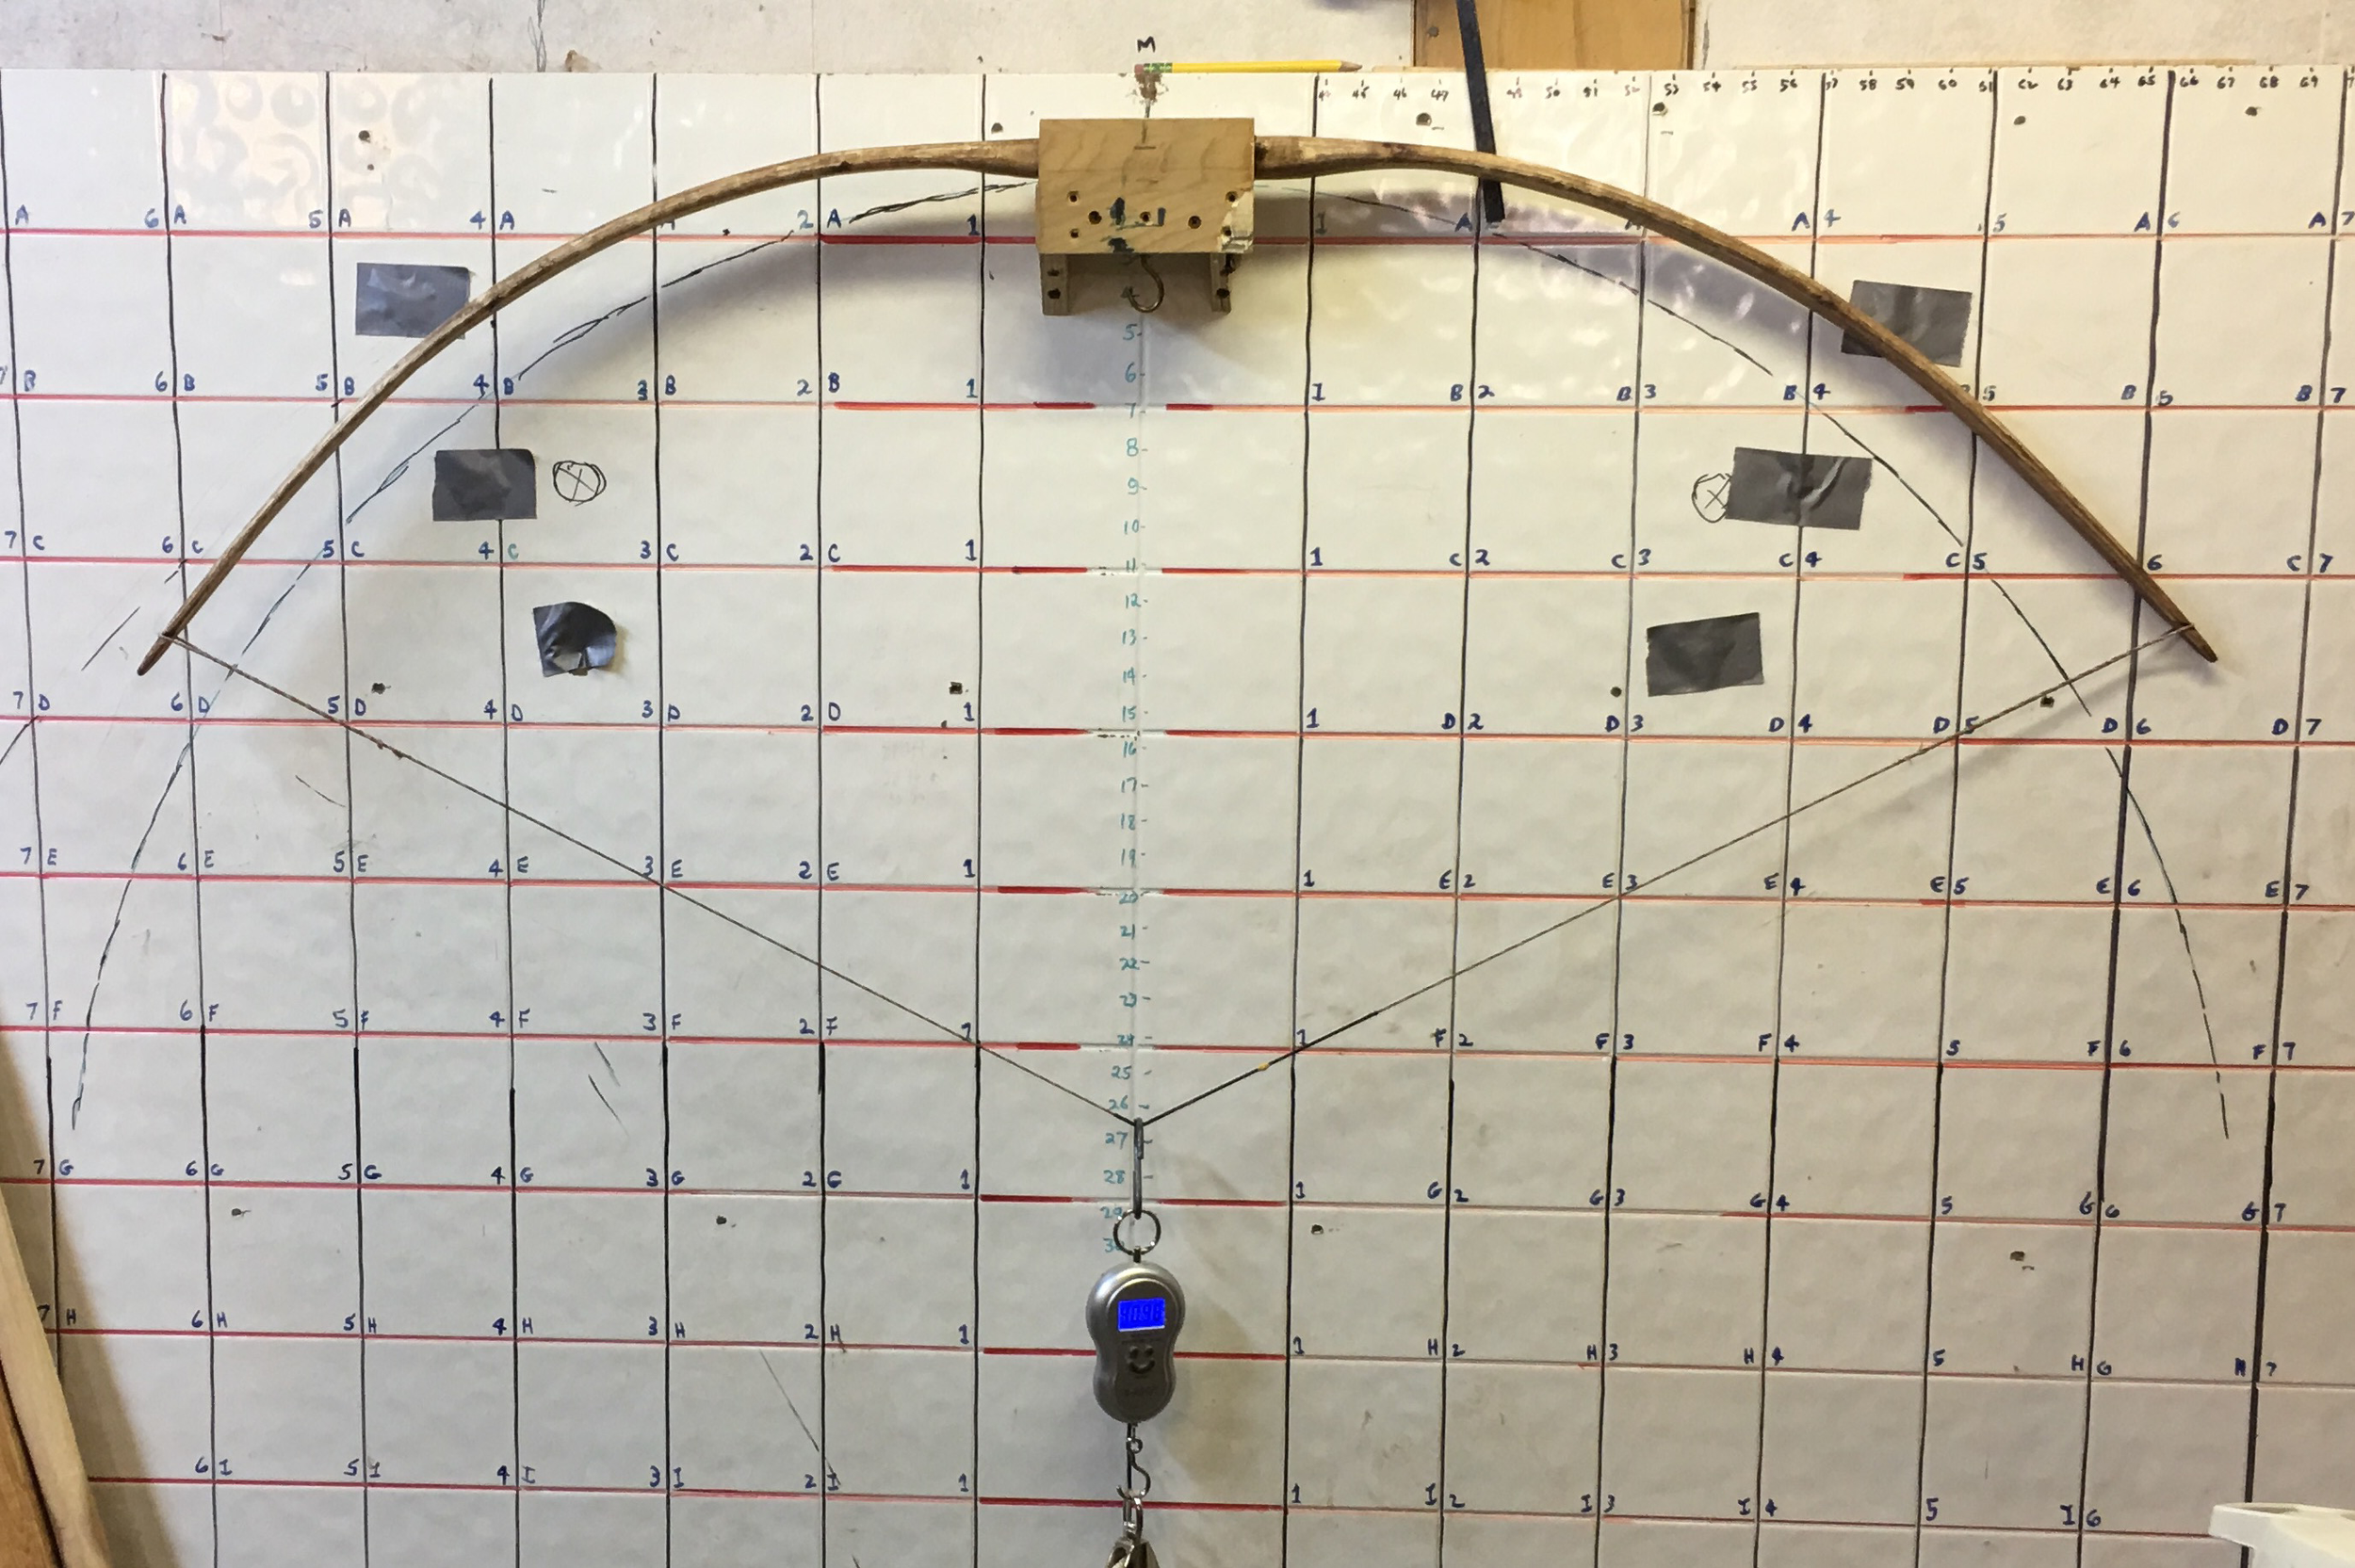
Make a string and brace it. Pre-tiller looks pretty good.
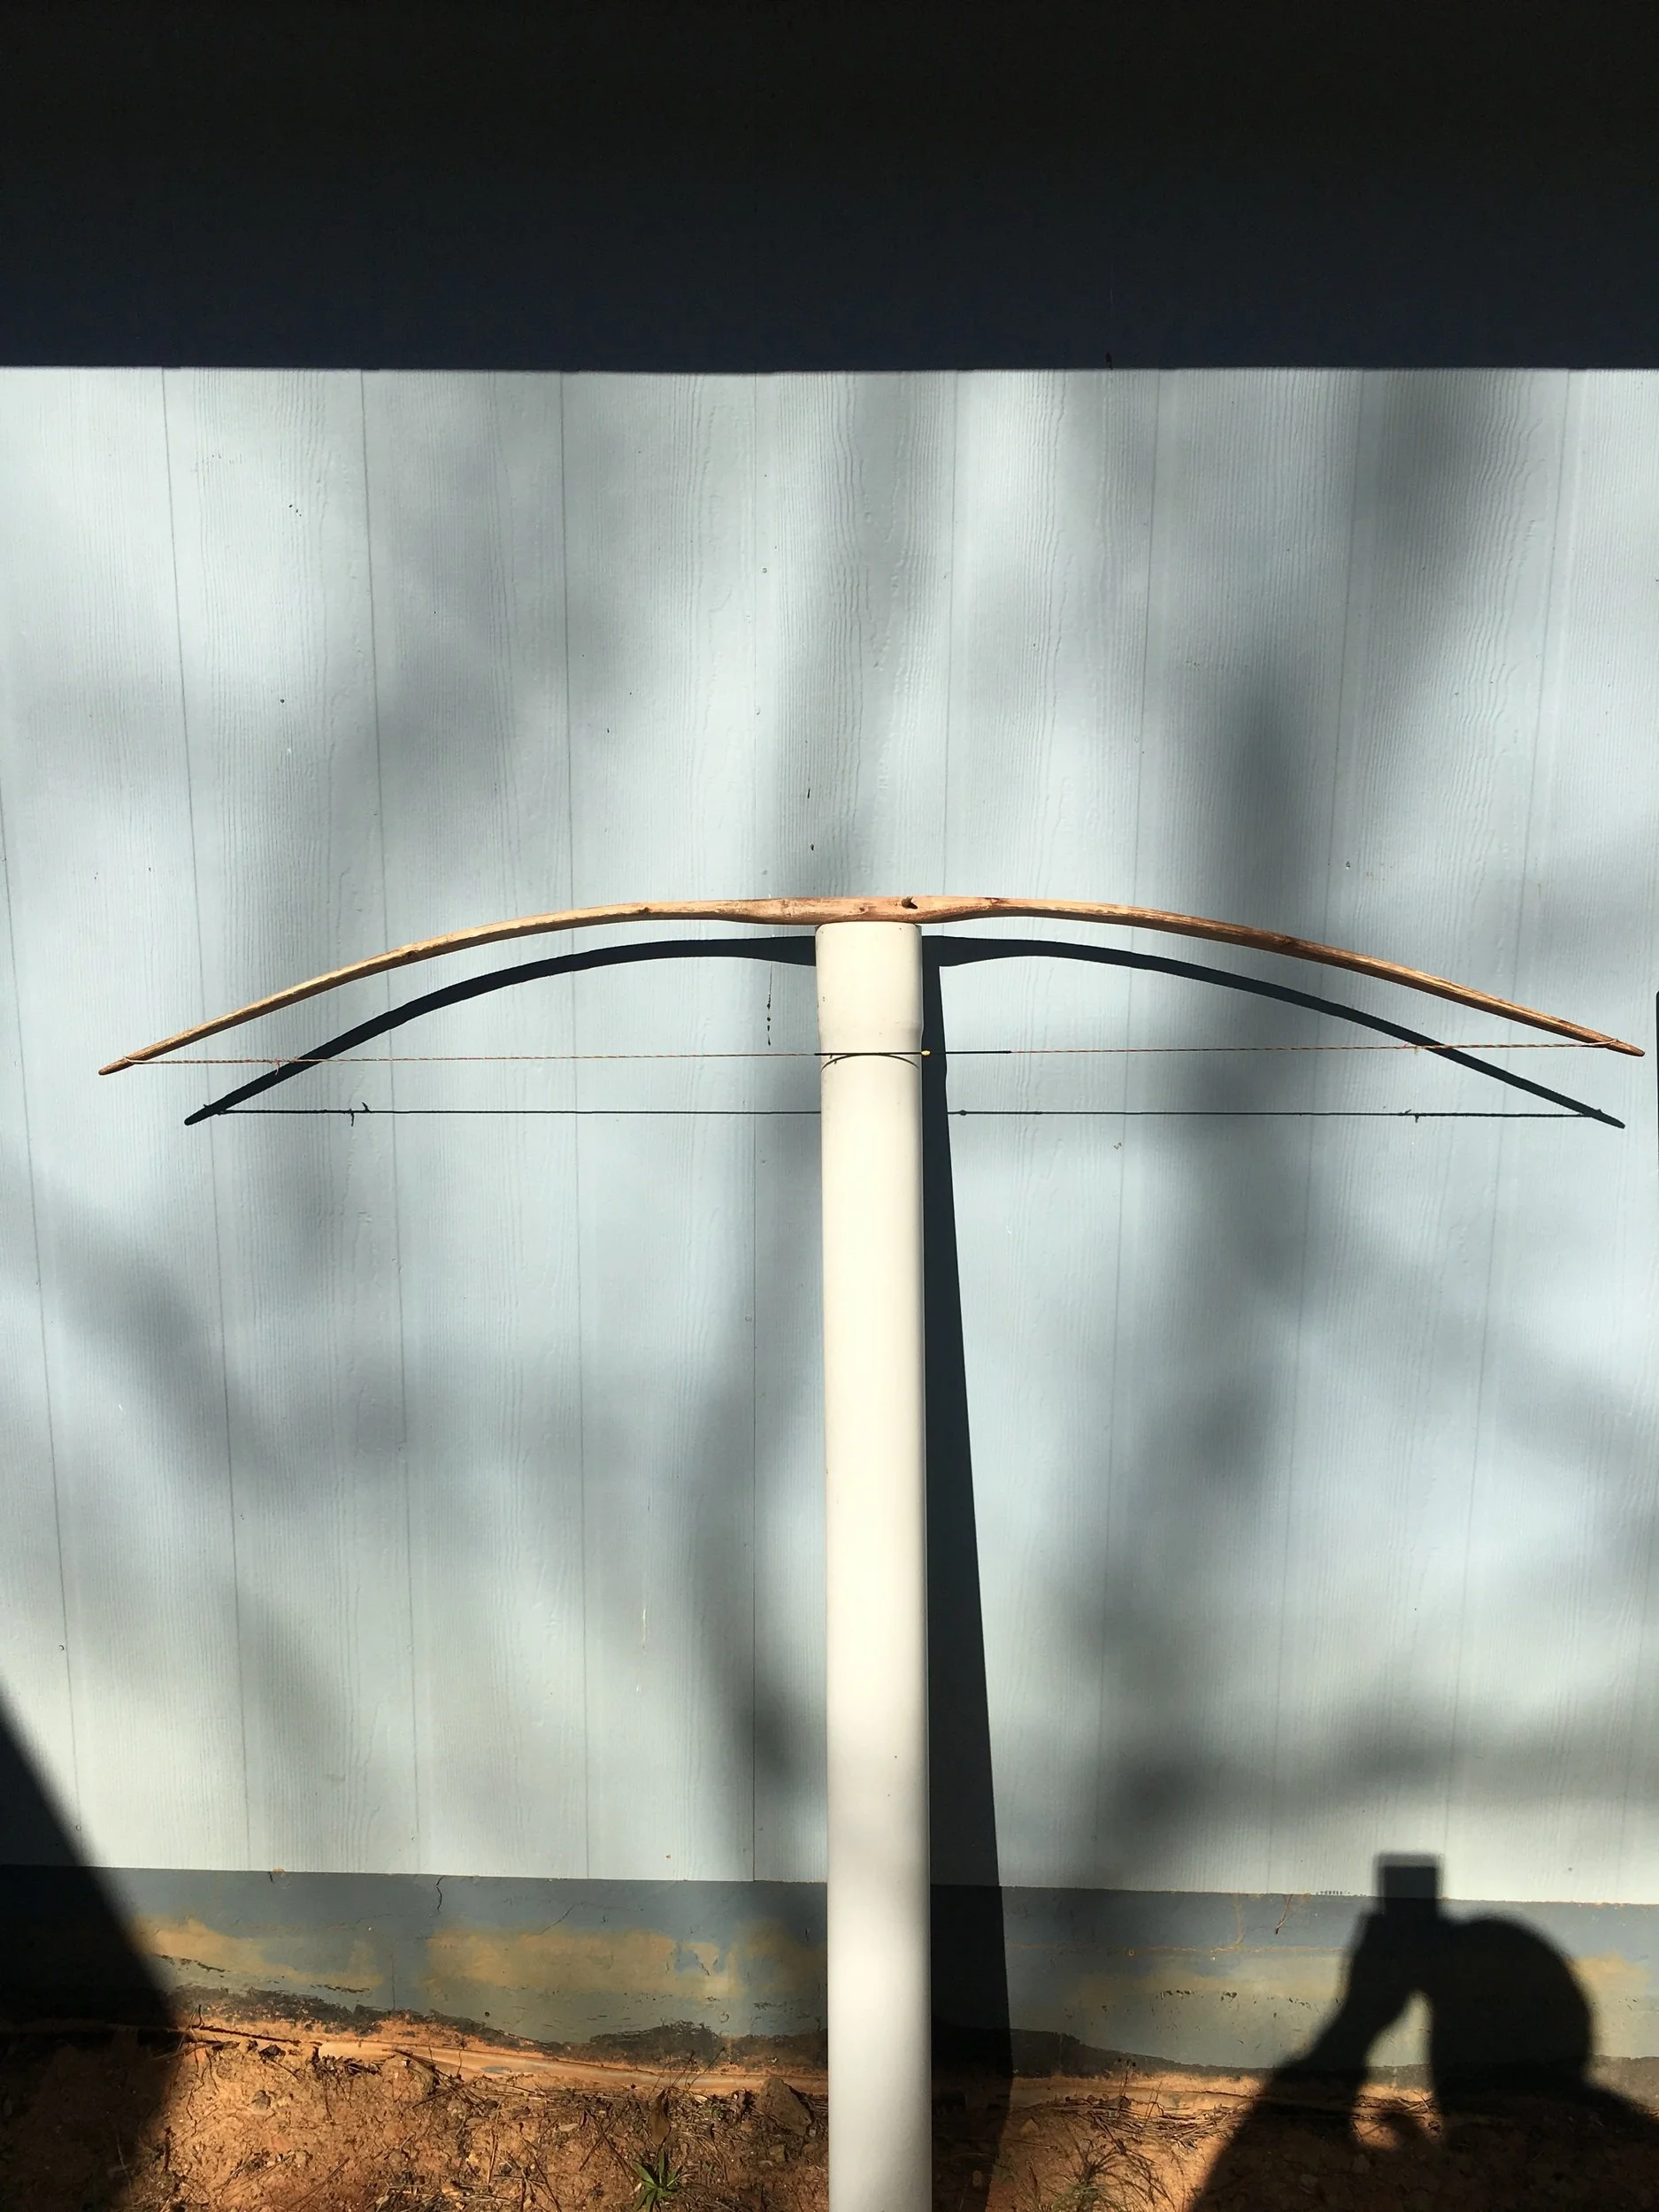
Now, put her on a tiller stick or board and start removing all the stiff spots until it bends nice and even. This bow was about 41 pounds at 28 inches.
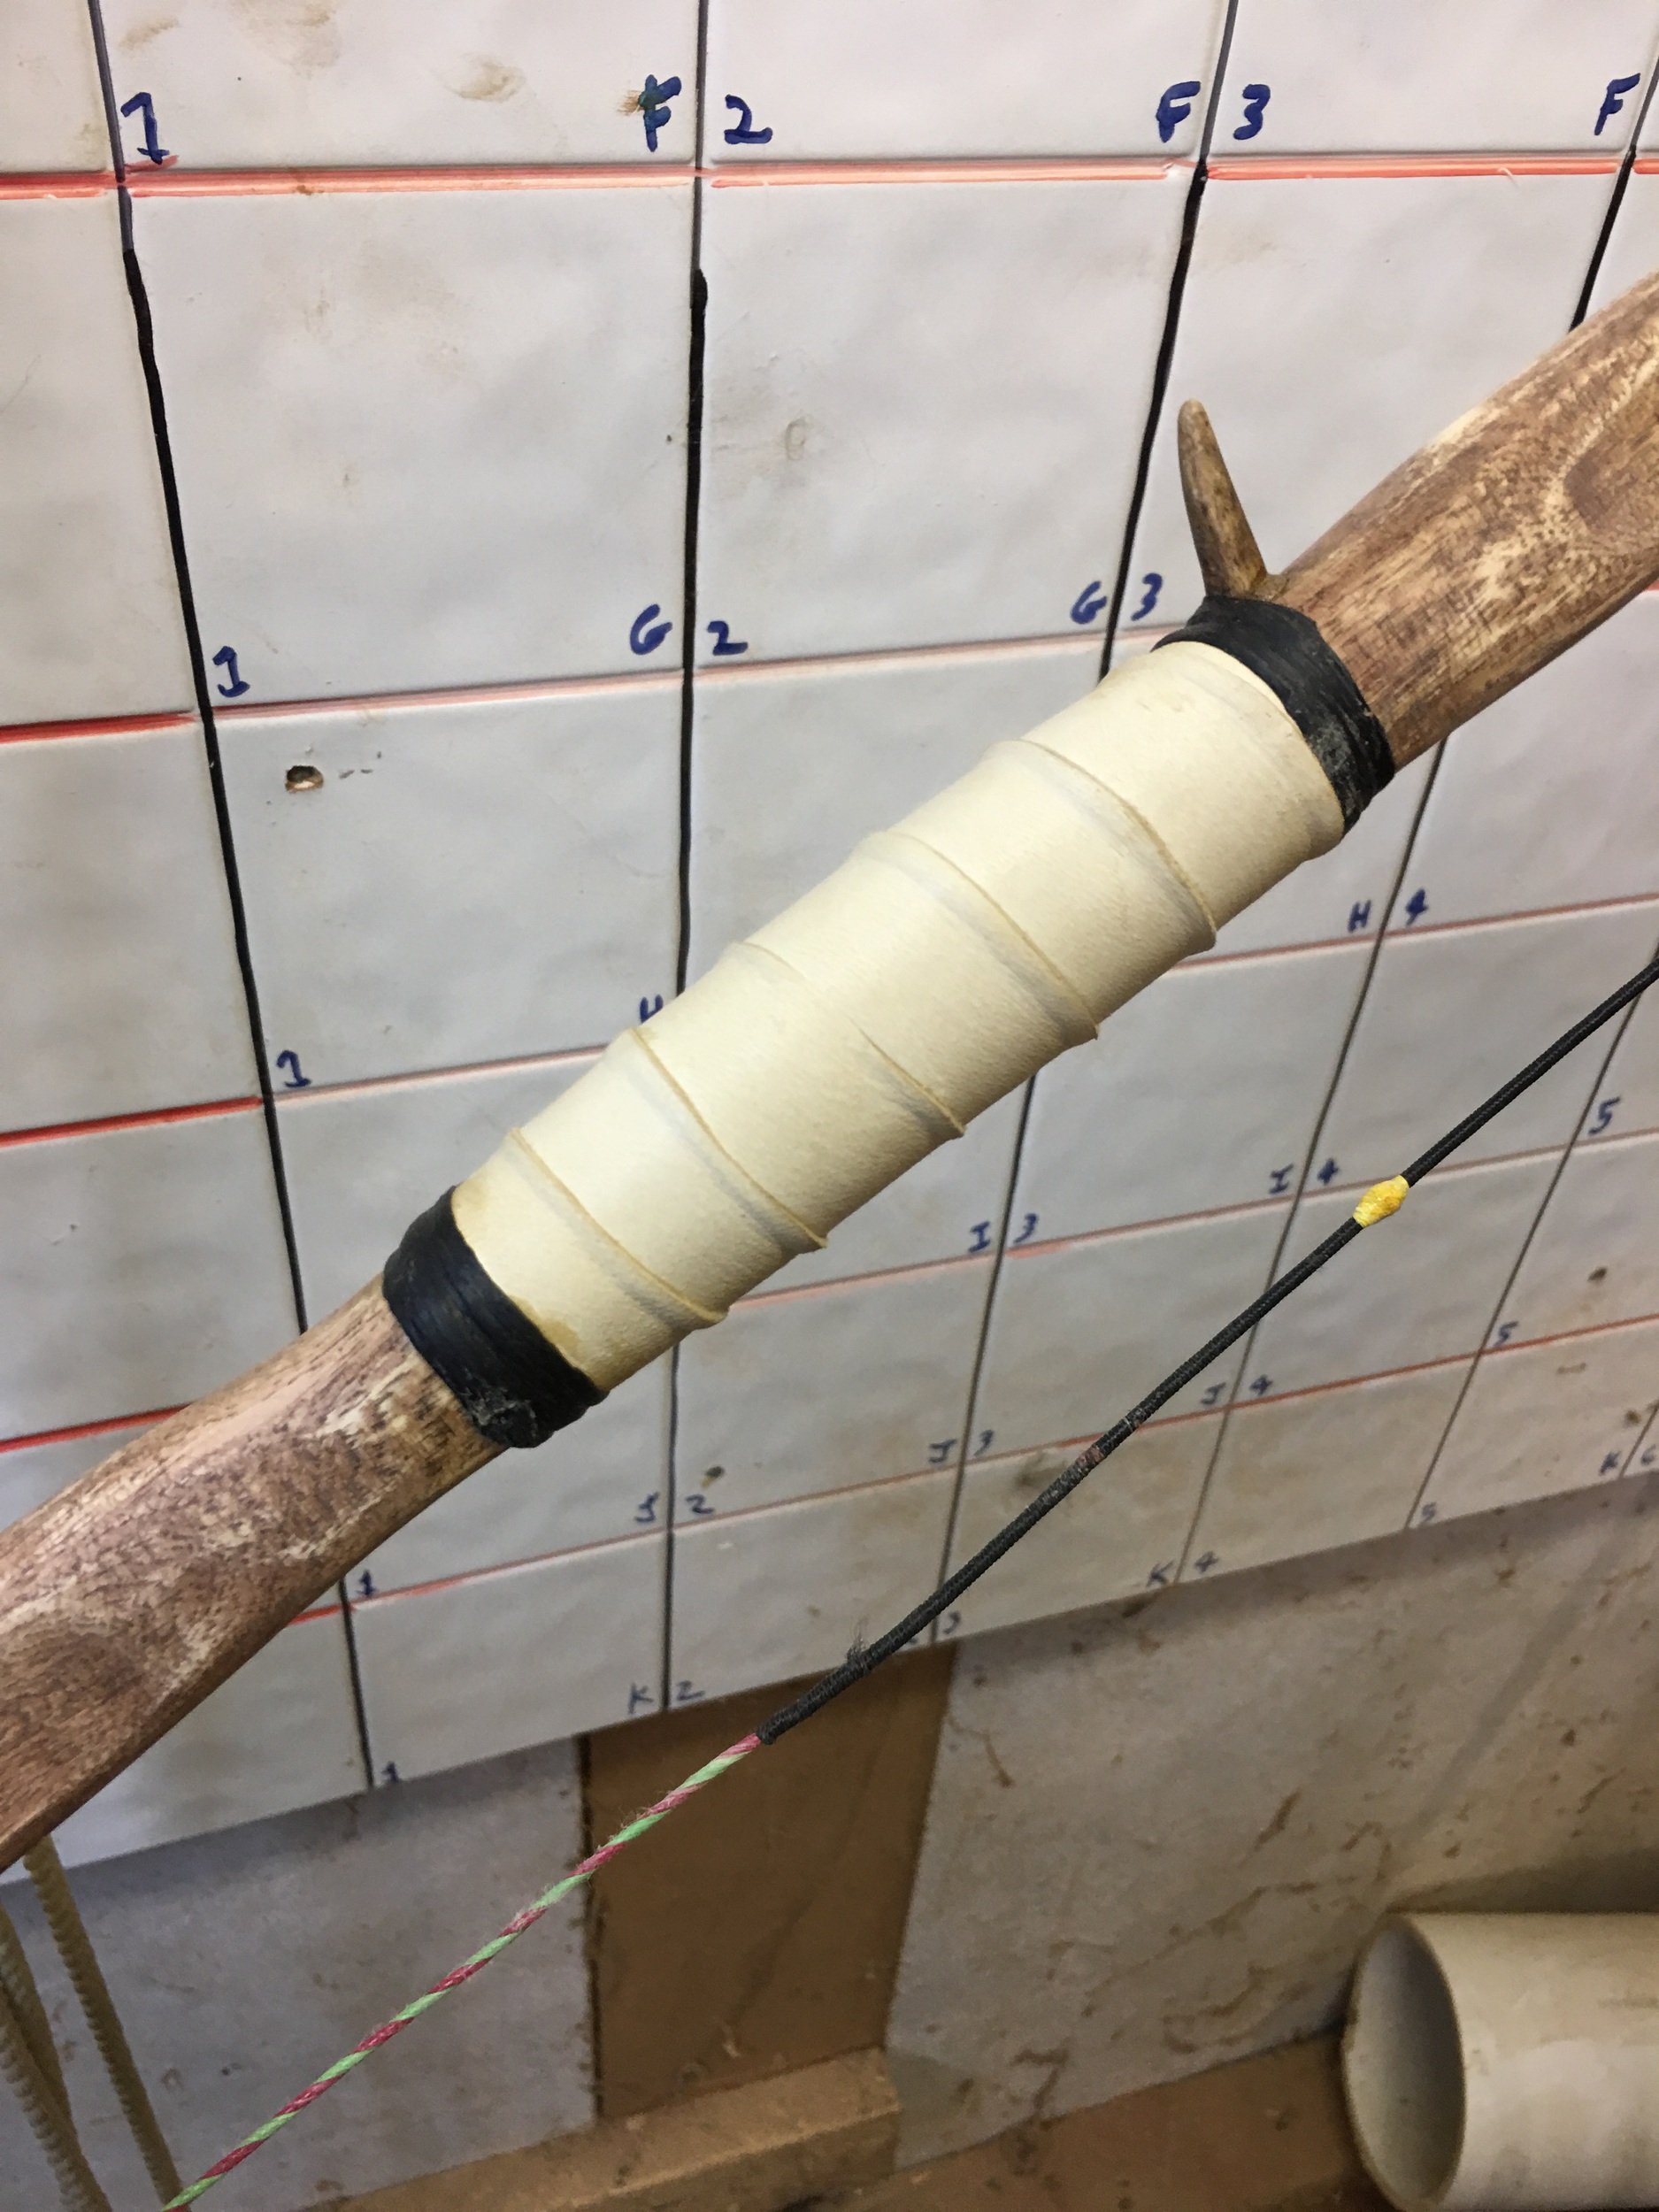
Wrap the handle with some nice leather
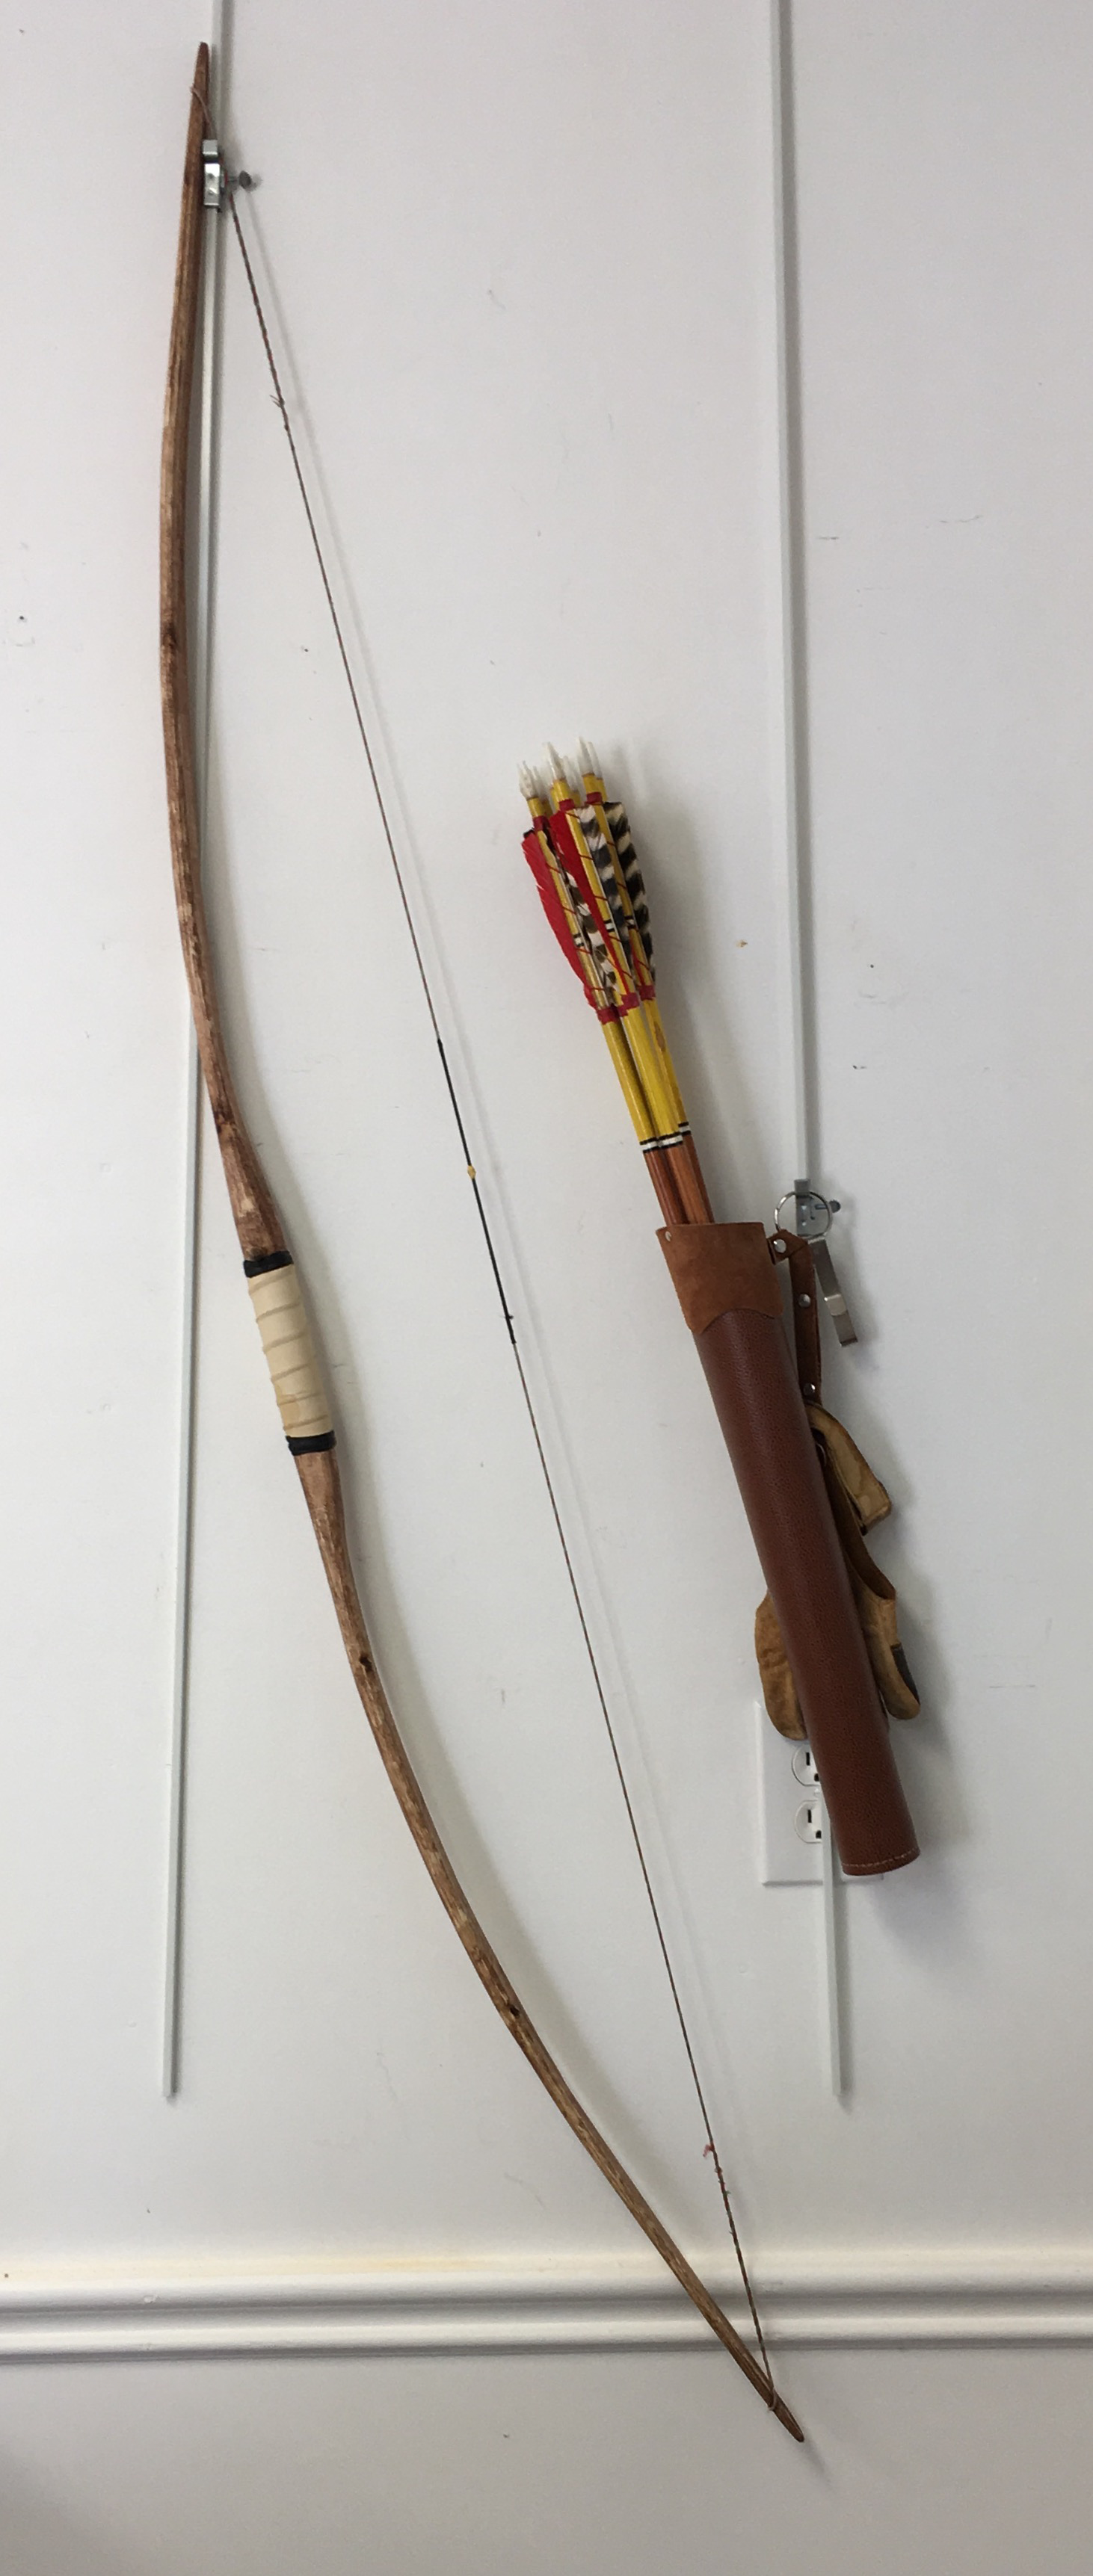
Now you have a nice shooting bow made from backyard woods. You will love these little darlins.
Wood Interior of ‘53 Suburban
Custom made of African Bubinga
![IMG_0593-e1551746170697-765x1024[1].jpg](https://images.squarespace-cdn.com/content/v1/5c5644b5b10f25f13eaf300c/1590499974667-S6C62DQBP45ALKNEOOKK/IMG_0593-e1551746170697-765x1024%5B1%5D.jpg)
![IMG_1284-1024x509[1].jpg](https://images.squarespace-cdn.com/content/v1/5c5644b5b10f25f13eaf300c/1590499989858-18V5U3B1GL0KVDOES8MF/IMG_1284-1024x509%5B1%5D.jpg)
![IMG_1286-1024x765[1].jpg](https://images.squarespace-cdn.com/content/v1/5c5644b5b10f25f13eaf300c/1590500003733-HQ0Y9NGT8MEEDL3RK2F5/IMG_1286-1024x765%5B1%5D.jpg)
![IMG_1289-1024x765[1].jpg](https://images.squarespace-cdn.com/content/v1/5c5644b5b10f25f13eaf300c/1590500015607-BYGB6XTB33VDNBYYFIC0/IMG_1289-1024x765%5B1%5D.jpg)
Kumihimo Platform
This device is used for braiding strands of thread into decorative braid
The woods used are: Cherry, Walnut, Maple, Bubinga and Wenge.
![IMG_5473-503x1024[1].jpg](https://images.squarespace-cdn.com/content/v1/5c5644b5b10f25f13eaf300c/1590499806151-HGKBQD2QTDPVTJH63JA3/IMG_5473-503x1024%5B1%5D.jpg)
![IMG_5474-754x1024[1].jpg](https://images.squarespace-cdn.com/content/v1/5c5644b5b10f25f13eaf300c/1590499820414-P3SSWQEAS5WQO7P41A1N/IMG_5474-754x1024%5B1%5D.jpg)
![IMG_5475-e1551745587707-768x1024[1].jpeg](https://images.squarespace-cdn.com/content/v1/5c5644b5b10f25f13eaf300c/1590499834117-GK06D2R2GYC74S05THZV/IMG_5475-e1551745587707-768x1024%5B1%5D.jpeg)
Primitive Frame with Deerskin Painting
Display Rack for Needlepoint
I built this rack for a national display of American flags done in needlepoint done by ladies of the American Needlepoint Guild.
Reed Box
I built this reed box for my saxophone instructor. It is made from curly maple, bocote and purple heart with a green velvet lining. It is very slender and slides open.
![Reed-Box-1[1].jpg](https://images.squarespace-cdn.com/content/v1/5c5644b5b10f25f13eaf300c/1590499444877-W1BJU5RT99REOV8028HT/Reed-Box-1%5B1%5D.jpg)
![Reed-Box-3[1].jpg](https://images.squarespace-cdn.com/content/v1/5c5644b5b10f25f13eaf300c/1590499473199-SP4EBZLFBQE2D9QLTLL1/Reed-Box-3%5B1%5D.jpg)
![Reed-Box-2[1].jpg](https://images.squarespace-cdn.com/content/v1/5c5644b5b10f25f13eaf300c/1590499459939-OBQNT7O53IOS1QWSYXYM/Reed-Box-2%5B1%5D.jpg)
![Reed-Box-4[1].jpg](https://images.squarespace-cdn.com/content/v1/5c5644b5b10f25f13eaf300c/1590499489755-708GX0Q02RJ4L4NFJRZO/Reed-Box-4%5B1%5D.jpg)
Wolf Arrow Box
I made this arrow box for a friend of mine. It is composed of cedar and painted with acrylic paint. I modelled it after a west coast North American native arrow box that I saw a picture of. I started with a cedar post from Home Depot, hollowed it out with chisels, put a simple pin hinge on one end and a simple latch on the front end.
Duck Calls
![Duck-Call-2-e1324434144194[1].jpg](https://images.squarespace-cdn.com/content/v1/5c5644b5b10f25f13eaf300c/1590498784520-TW0THOXRLVDI52BLSEG6/Duck-Call-2-e1324434144194%5B1%5D.jpg)
![Duck-Call-3[1].jpg](https://images.squarespace-cdn.com/content/v1/5c5644b5b10f25f13eaf300c/1590498801046-0R69H4IZNQ7E4POO5SWQ/Duck-Call-3%5B1%5D.jpg)
![Duck-Call[1].jpg](https://images.squarespace-cdn.com/content/v1/5c5644b5b10f25f13eaf300c/1590498814448-78ALLS25HCULNLMQWZDL/Duck-Call%5B1%5D.jpg)
Sea Turtle
This is a sea turtle cutting board that I made for a lady whose decorative theme for her St. Thomas condo was, of course, sea turtles. She wanted it made of decorative woods. This is what I came up with. It took many different cuts and pieces and about 12 different species of woods, but I finally finished it after about a year.
![Turtle[1].jpg](https://images.squarespace-cdn.com/content/v1/5c5644b5b10f25f13eaf300c/1590497813828-RH6XS2WXNSN8FOYI3I8A/Turtle%5B1%5D.jpg)
![Turtle-Bottom[1].jpg](https://images.squarespace-cdn.com/content/v1/5c5644b5b10f25f13eaf300c/1590497833177-RCJYN13PW814207SW4A1/Turtle-Bottom%5B1%5D.jpg)
![Turtle-Level[1].jpg](https://images.squarespace-cdn.com/content/v1/5c5644b5b10f25f13eaf300c/1590497848526-ZRGOAFAARDC4OSBBY8CY/Turtle-Level%5B1%5D.jpg)
![Turtle-Side[1].jpg](https://images.squarespace-cdn.com/content/v1/5c5644b5b10f25f13eaf300c/1590497866170-39H5KG53YYQP01CU6Z9E/Turtle-Side%5B1%5D.jpg)
Traditional Archery Club Trophy
This is an example of my "weird" woodworking. I was commissioned by the North Georgia Traditional Archery club to make some trophies for their year-end shoot in August of 2011. This is what I came up with. I used a rounded slab from a sparkleberry tree for the base, drilled two holes in in it and placed some hickory branches in the holes for a frame. I lashed them together with artificial sinew, then soaked some goat rawhide in water and stretched it over the frame. When it dried, it was taut and smooth. I then painted the symbol and lettered the award with the appropriate category--in this case the longbow champion. I made ten of these trophies, including four for the youth entrants. Everyone seemed pleased with the trophies.